
CryoFuture Clinic Administrator Guide
1. Creating a New Patient Profile
- Access to the CryoFuture system
- Logged in as a Clinic Admin
- Patient's general information, emergency contact details, and specimen information
Overview
Creating a new patient profile in CryoFuture involves a multi-step process to capture all necessary information for proper patient management and record-keeping.
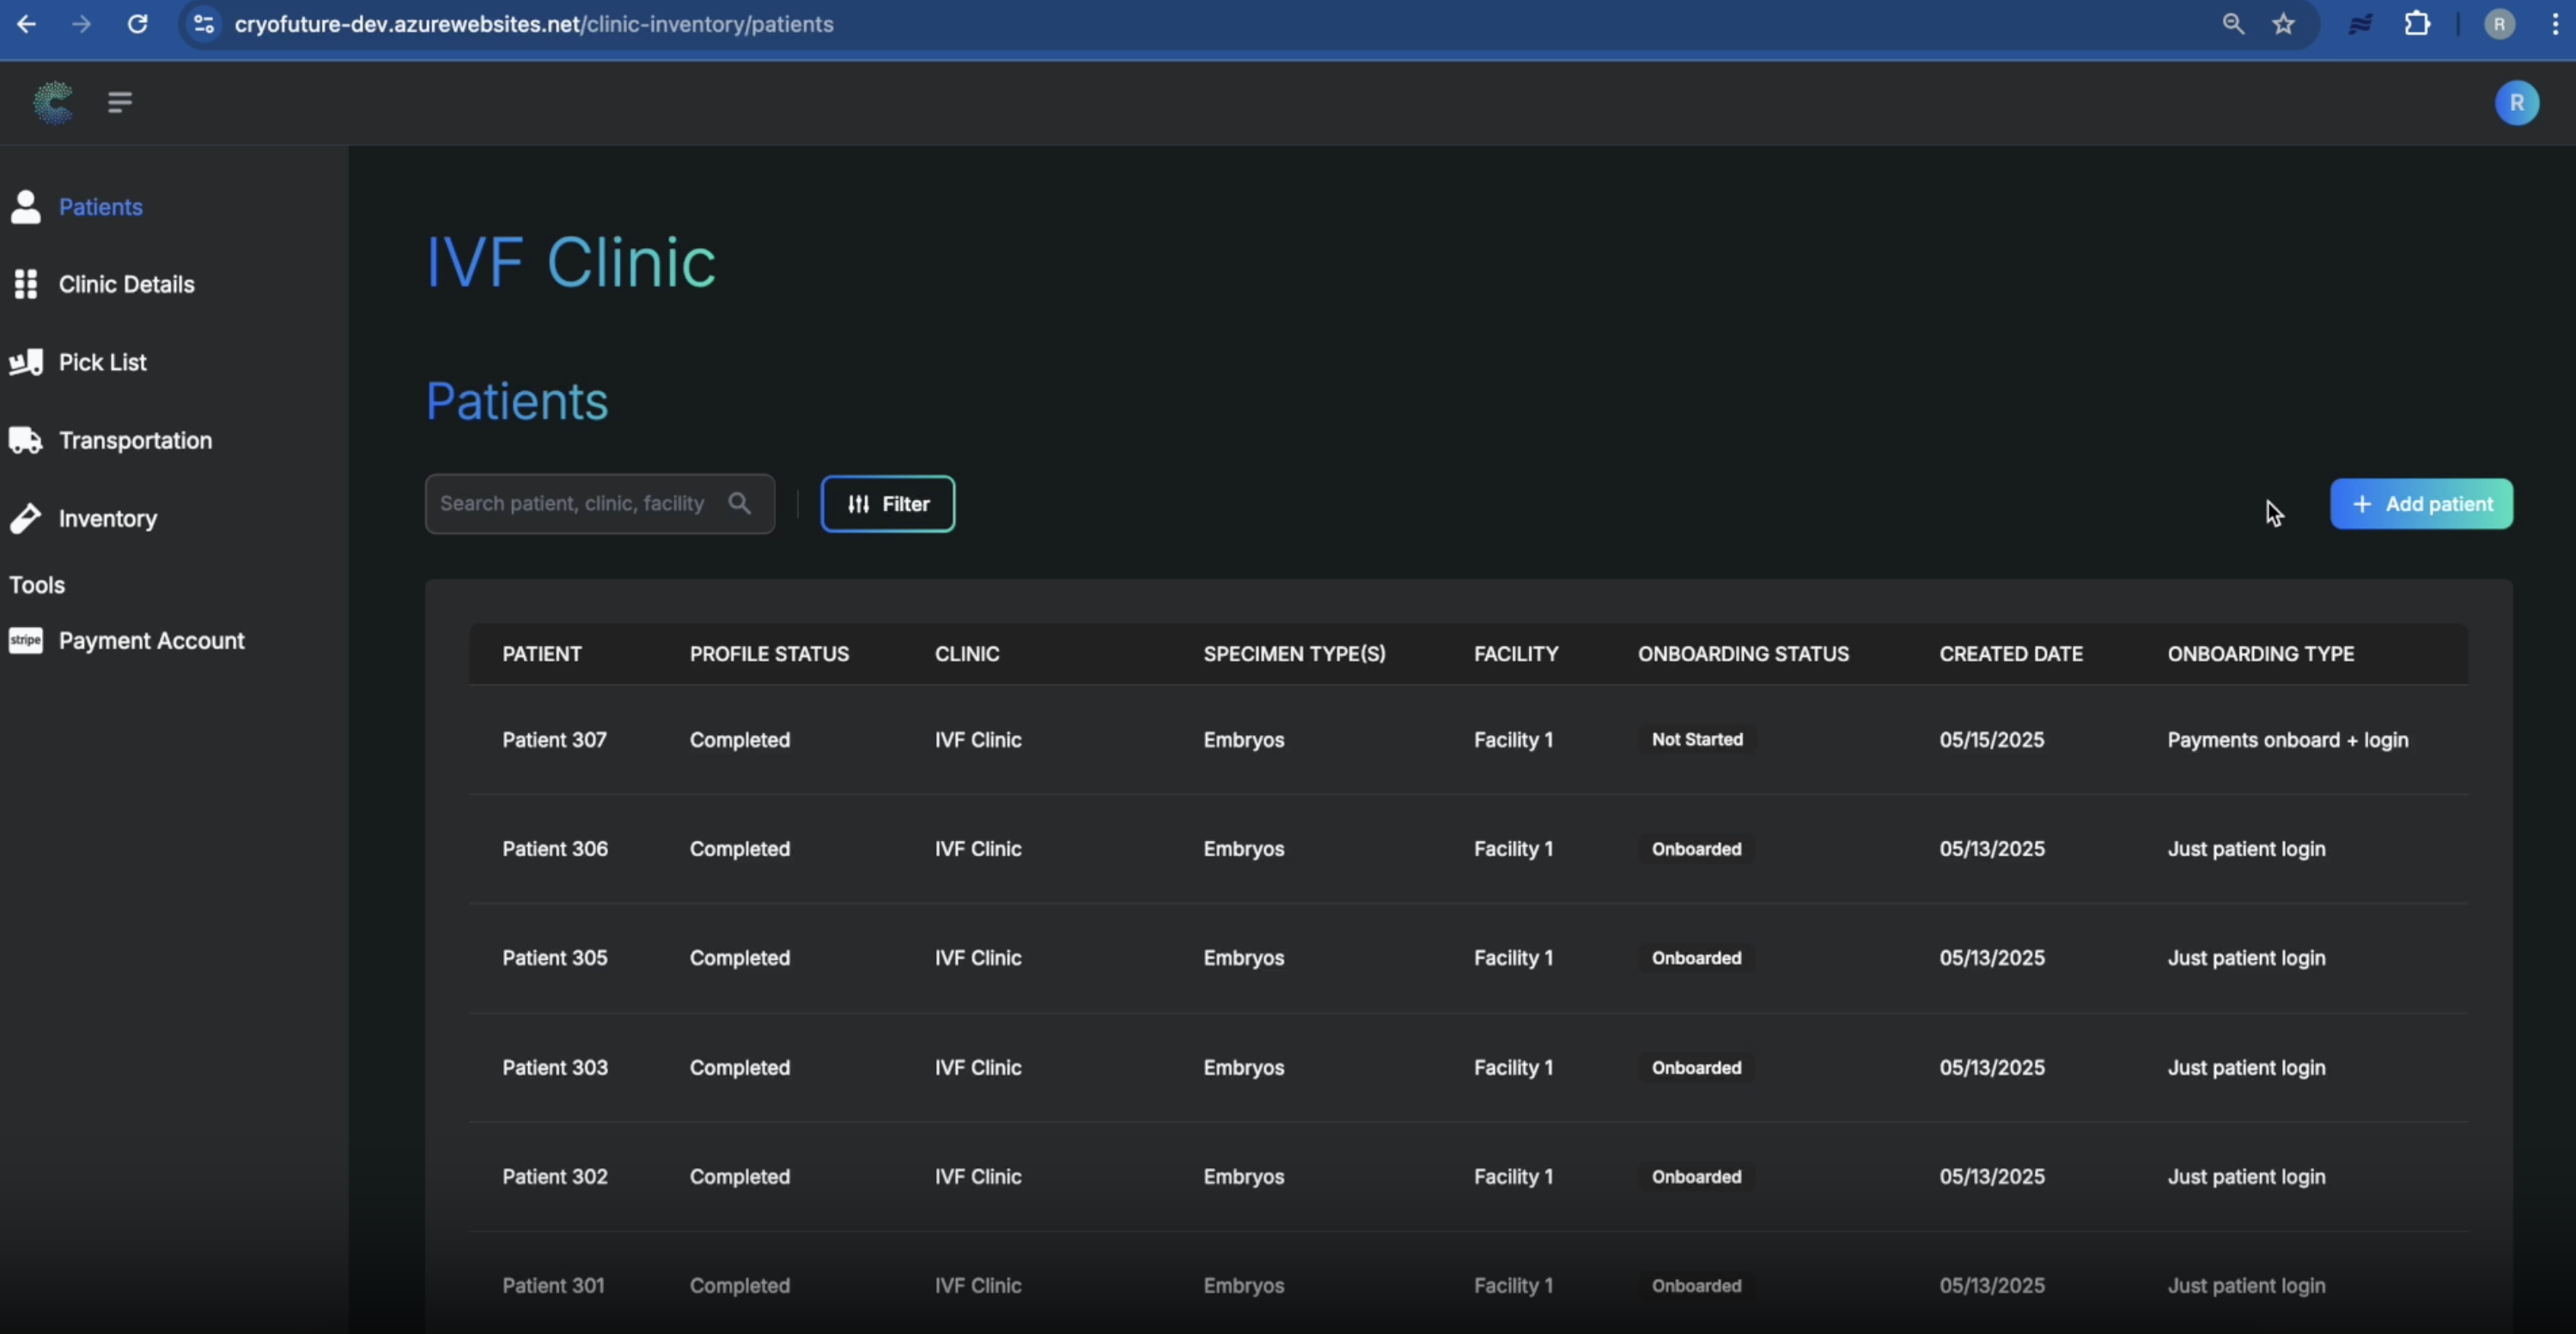
Navigate to the "Patient" tab and click the "Add Patient" button, typically found on the right side of the screen.
Fill in the required fields for the patient's general information (name, date of birth, contact details, etc.) and click "Next".
.png)
Choose to connect a partner to the patient's profile if applicable, or skip this step.
.png)
Input the information for the patient's emergency contact(s) and click "Next".
.png)
Choose the appropriate storage facility to associate with this patient and click "Next".
.png)
Enter details about the patient's specimens, including specimen type, number of canes, and onboarding type.
.png)
Once all specimen and onboarding details are entered, click the "Finish" button.
.png)
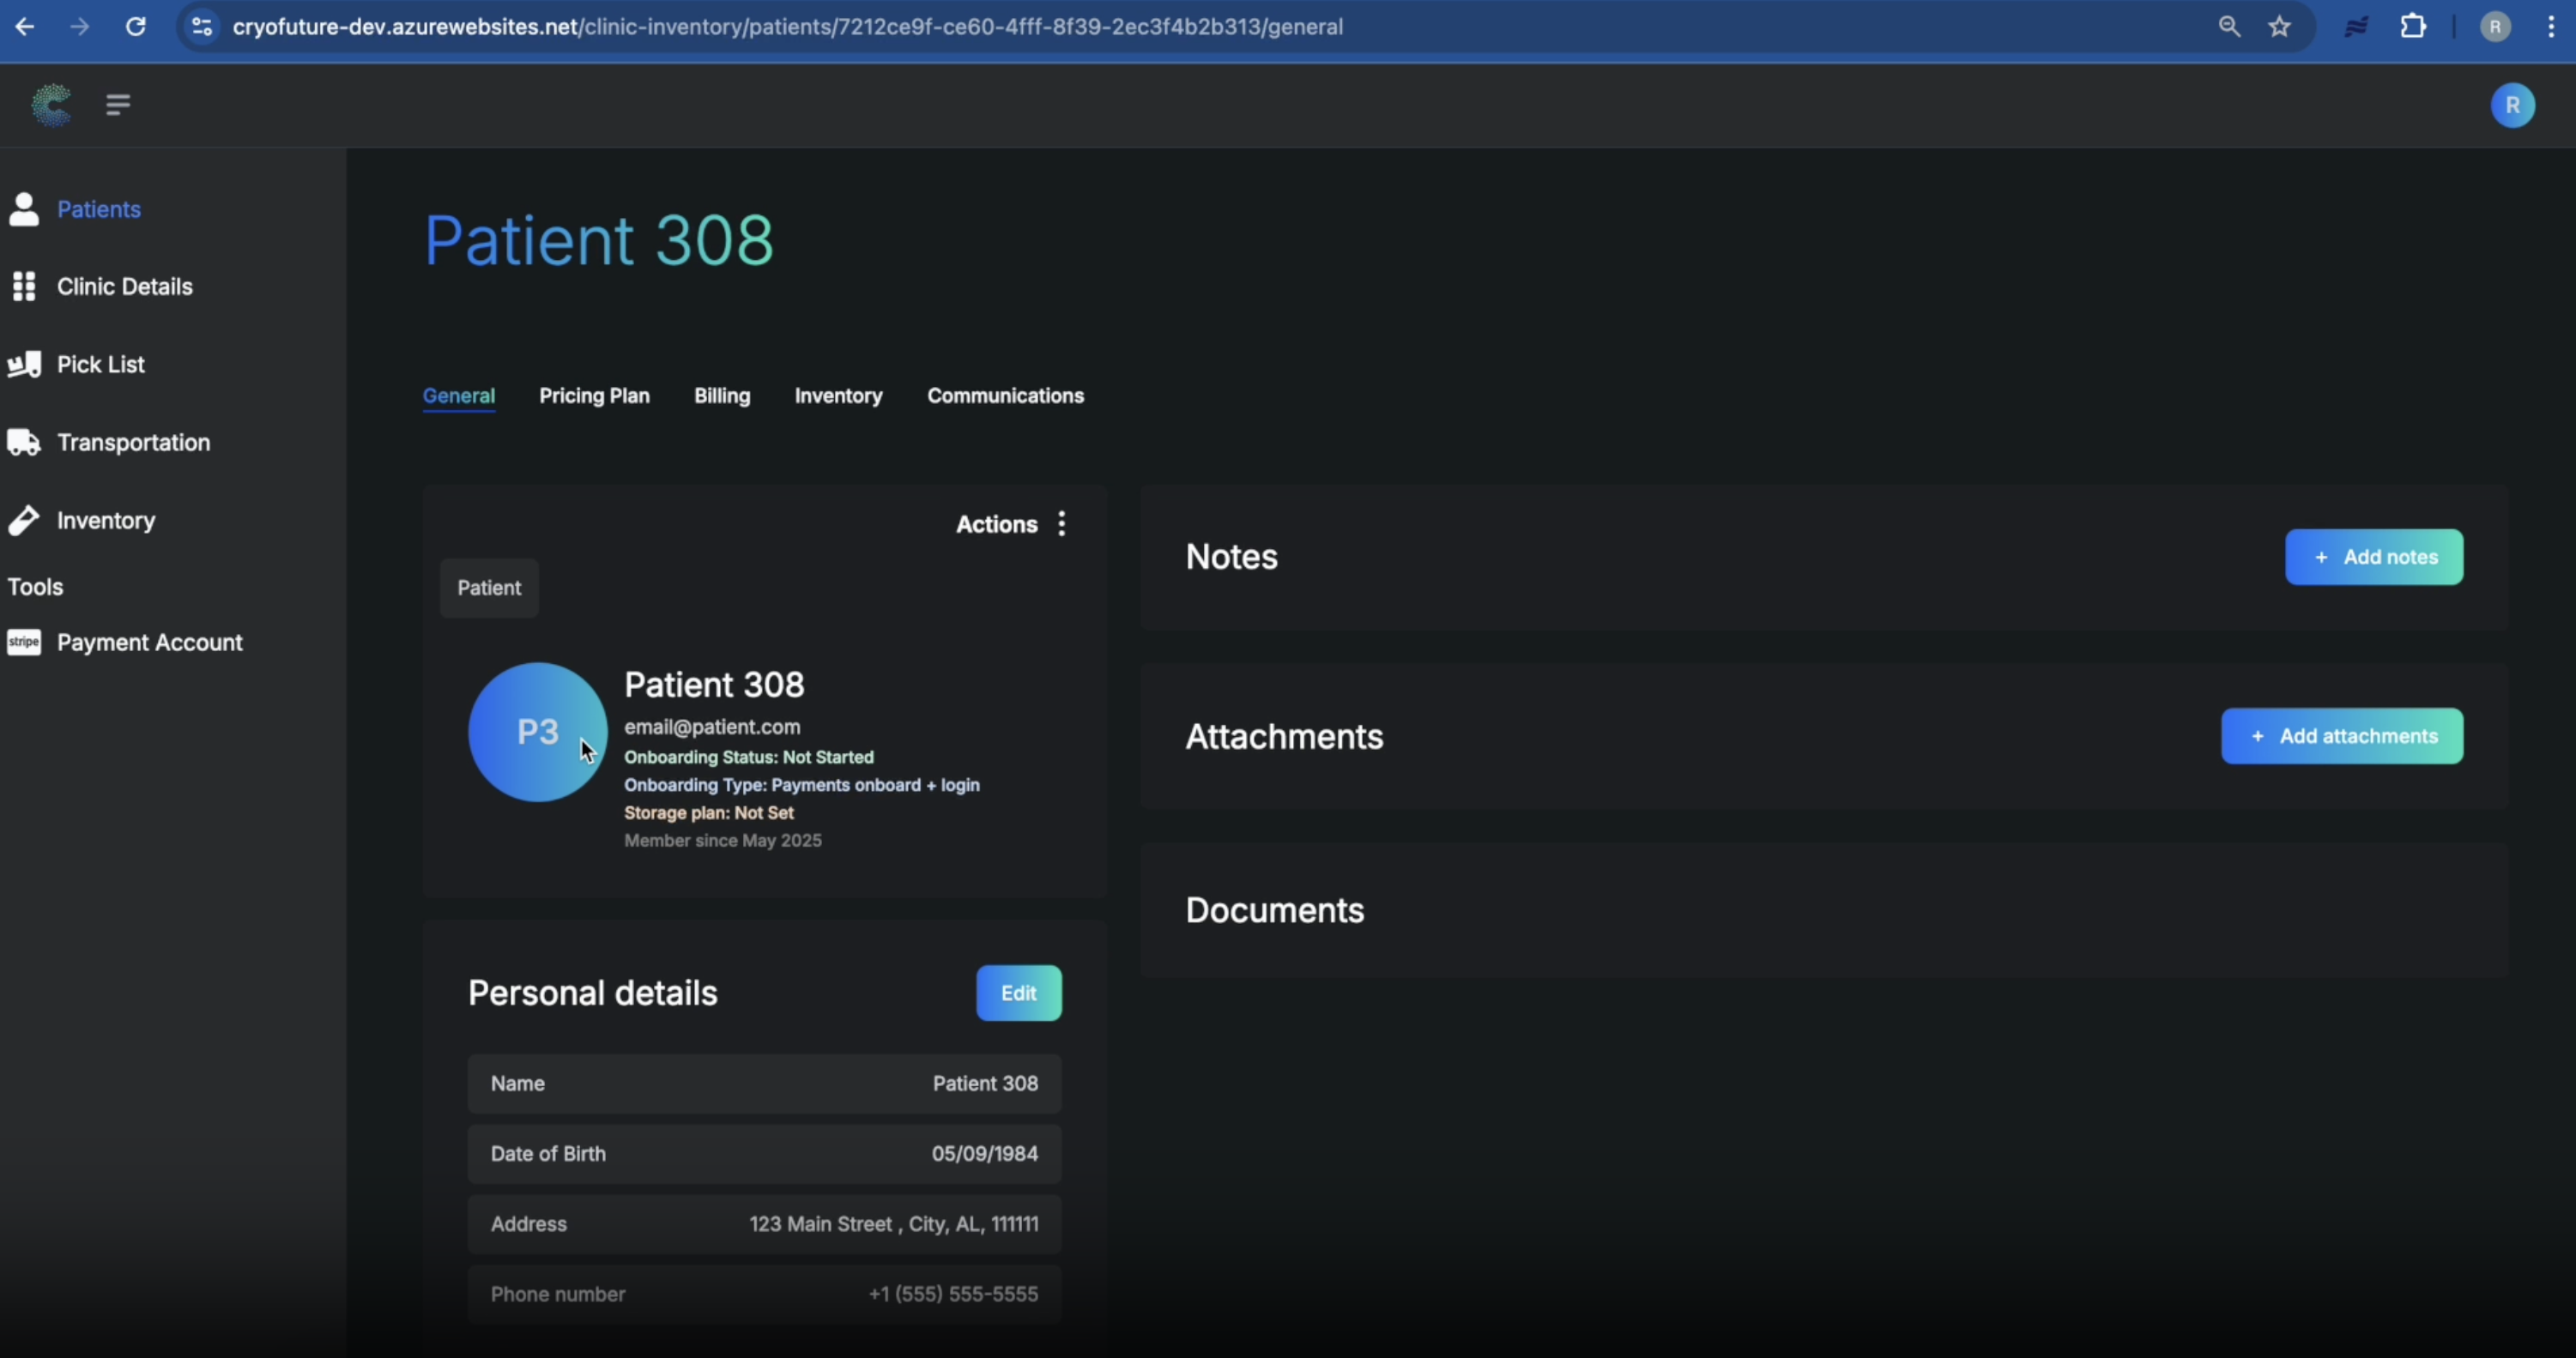
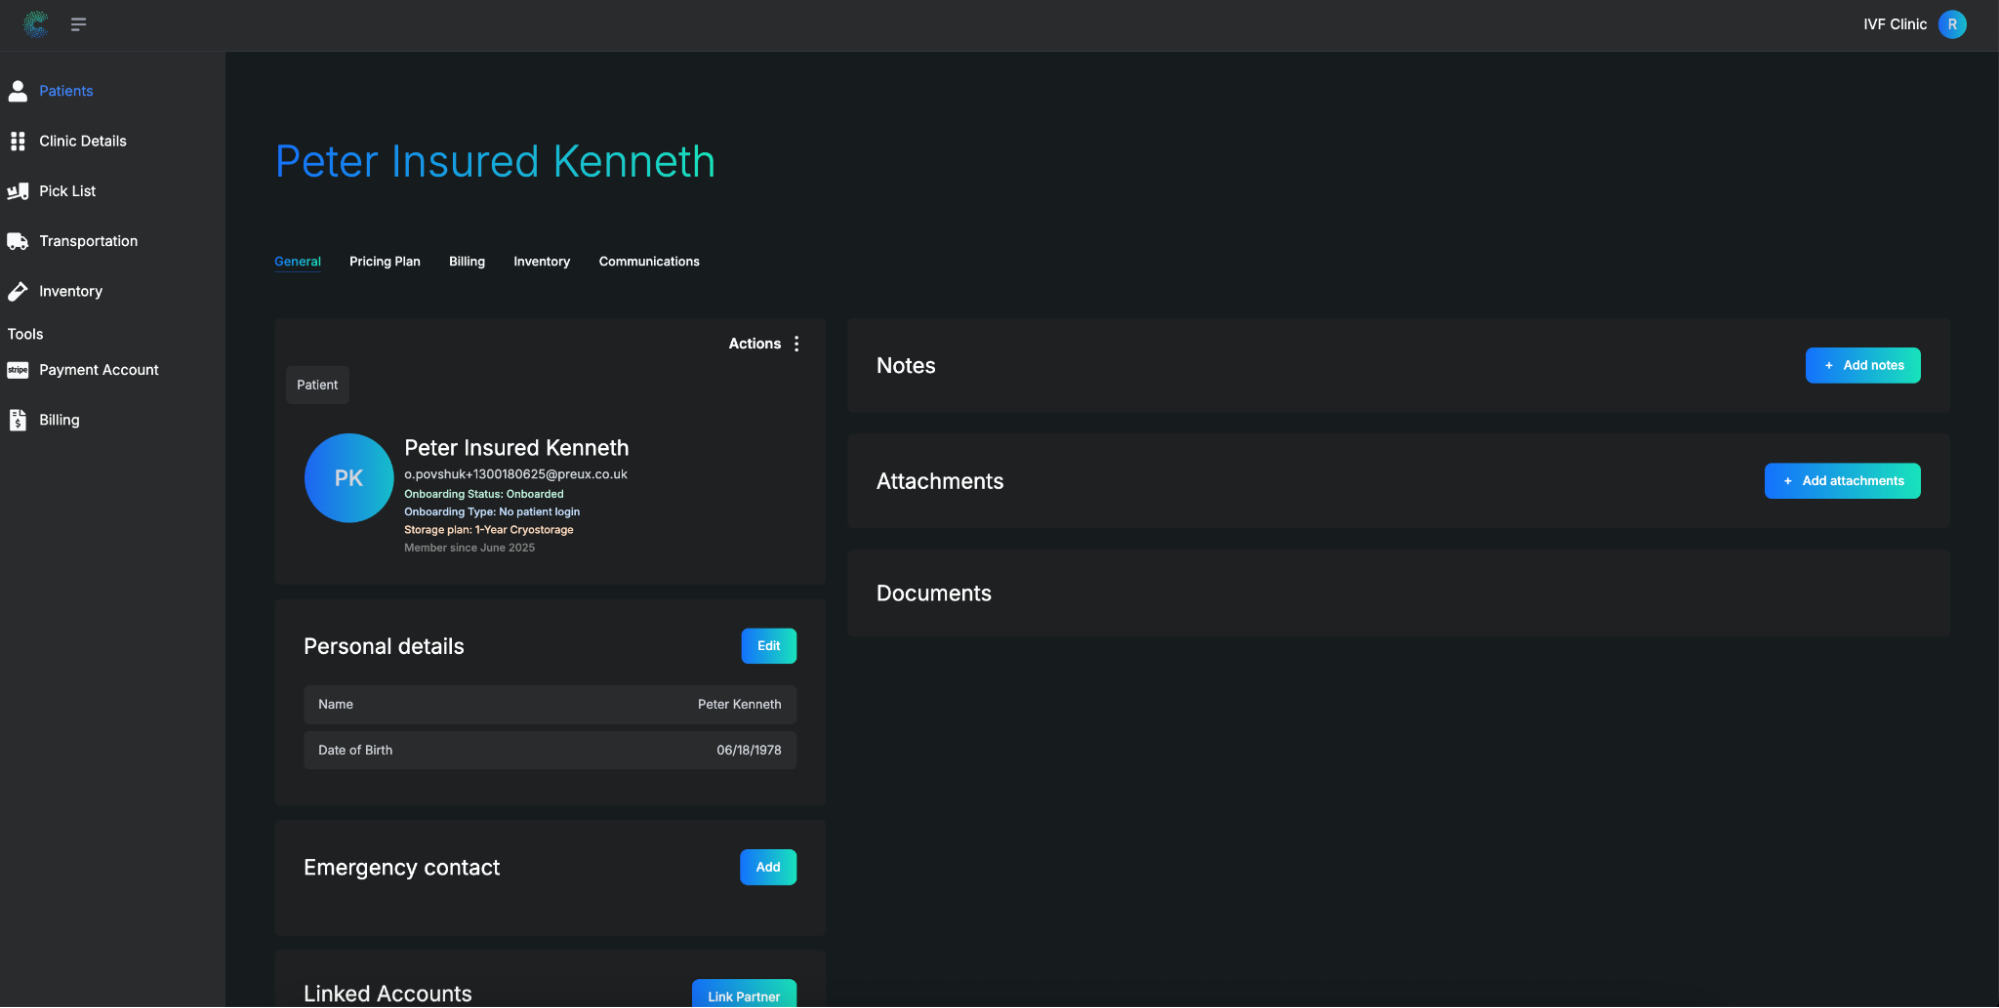
After creation, click on the newly created patient's name to view and verify their details, including general information, emergency contacts, linked accounts, billing information, and inventory details.
Troubleshooting
Common Issues:
- Unable to proceed: Check if all mandatory fields (marked with an asterisk *) are filled in.
- Incorrect data format: Ensure data is entered in the correct format (dates, phone numbers, etc.).
- Patient not appearing after creation: Refresh the patient list or try creating the patient again if the issue persists.
2. Managing Patient-Level Billing Actions
- Access to the CryoFuture system with Clinic Admin credentials
- A patient profile to view within the system
Overview
This section covers how to manage patient-level billing and communication functionalities within the CryoFuture system, including accessing billing details, managing payments (both through the platform and externally), and reviewing billing-related communications.
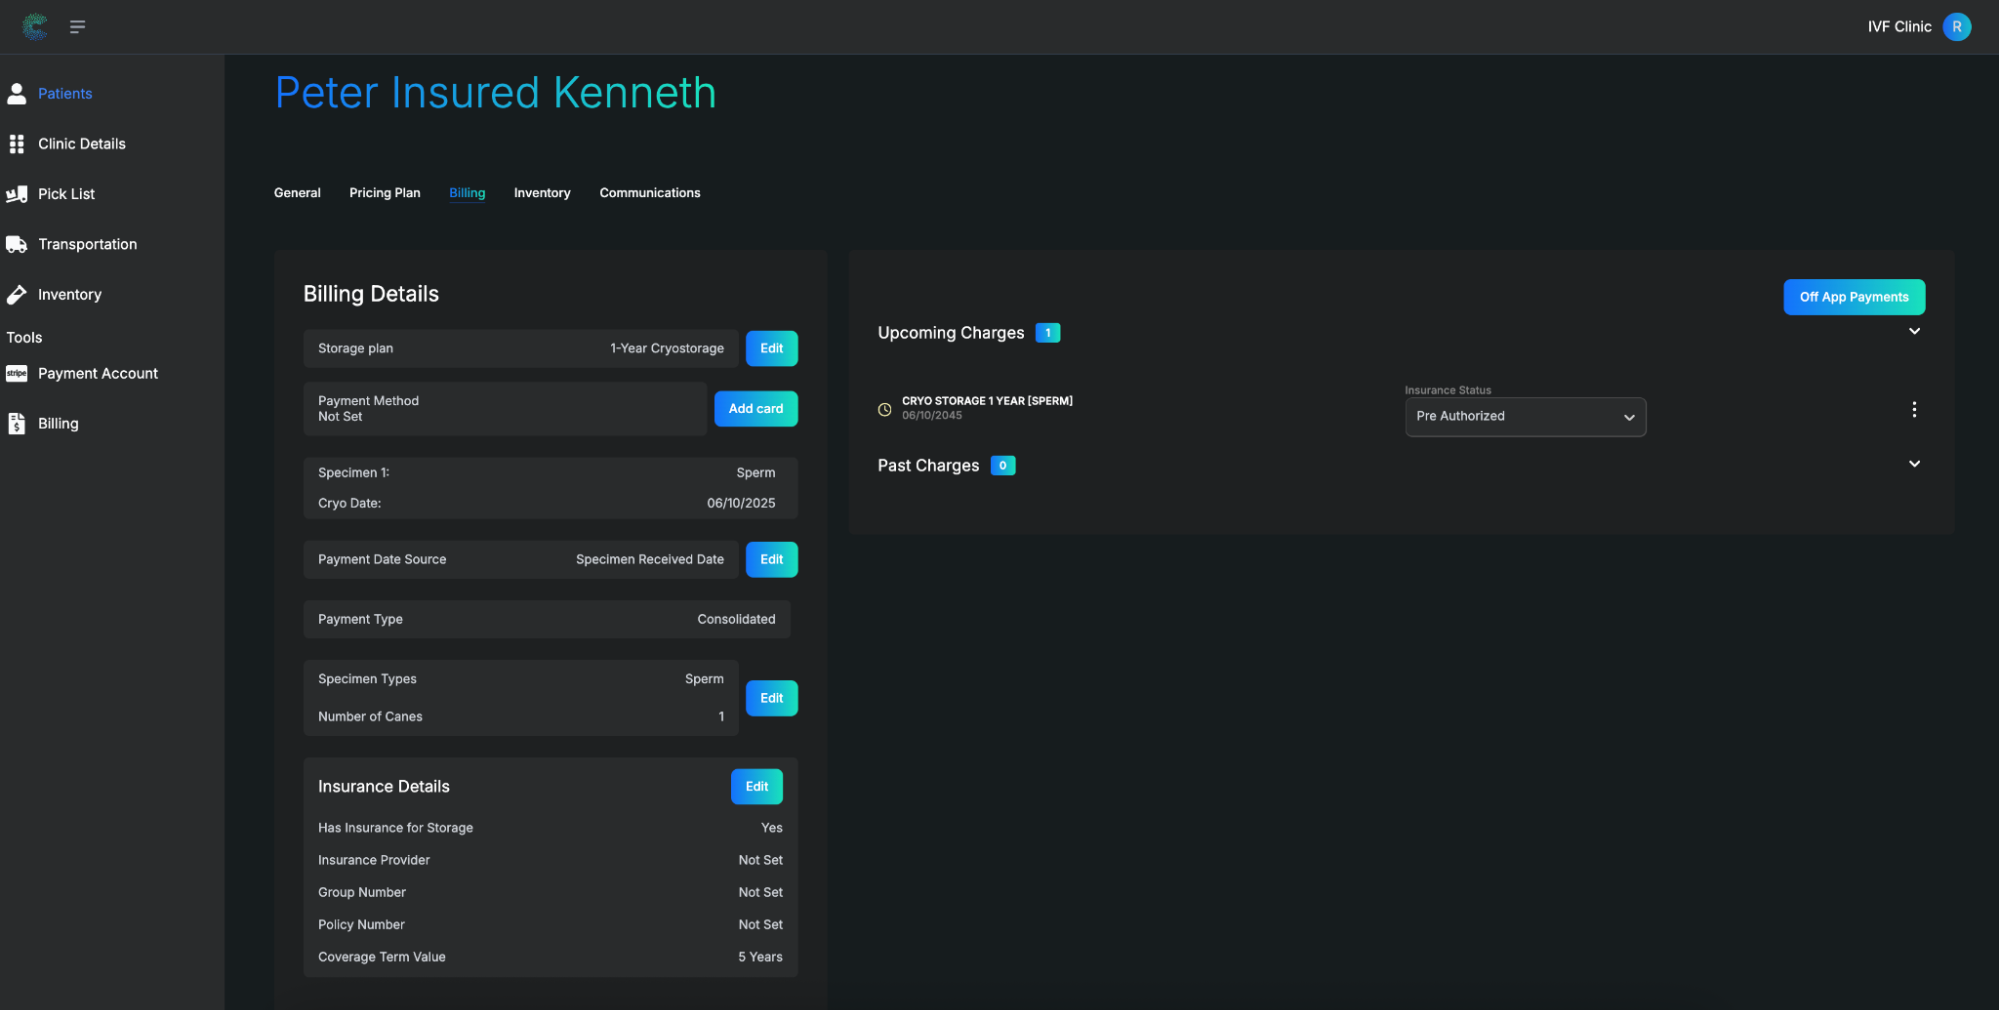
Log into CryoFuture with your clinic admin credentials, locate and select the desired patient, and click on the "Billing" tab on the patient's profile page.
.png)
On the Billing tab, carefully review the displayed information, including the patient's current storage plan, billing start date, registered payment method, and any associated specimens linked to the billing. You can also check for billing updates and access billing statements for viewing or downloading.
.png)
.png)
The CryoFuture system can manage payments through the platform or log payments made outside of it (off-app payments). To record an external payment (e.g., cash, check, direct bank transfer), select the option to "add an off-app payment."
You can either add the payment to an existing charge or create a standalone payment. After entering the payment, verify that it appears correctly in the patient's financial summary, specifically in their "upcoming and past charges" section.
From the patient's main profile page, navigate to the "Communications" tab to see a chronological log of all system-generated or manually logged communications sent to the patient, particularly those related to billing.
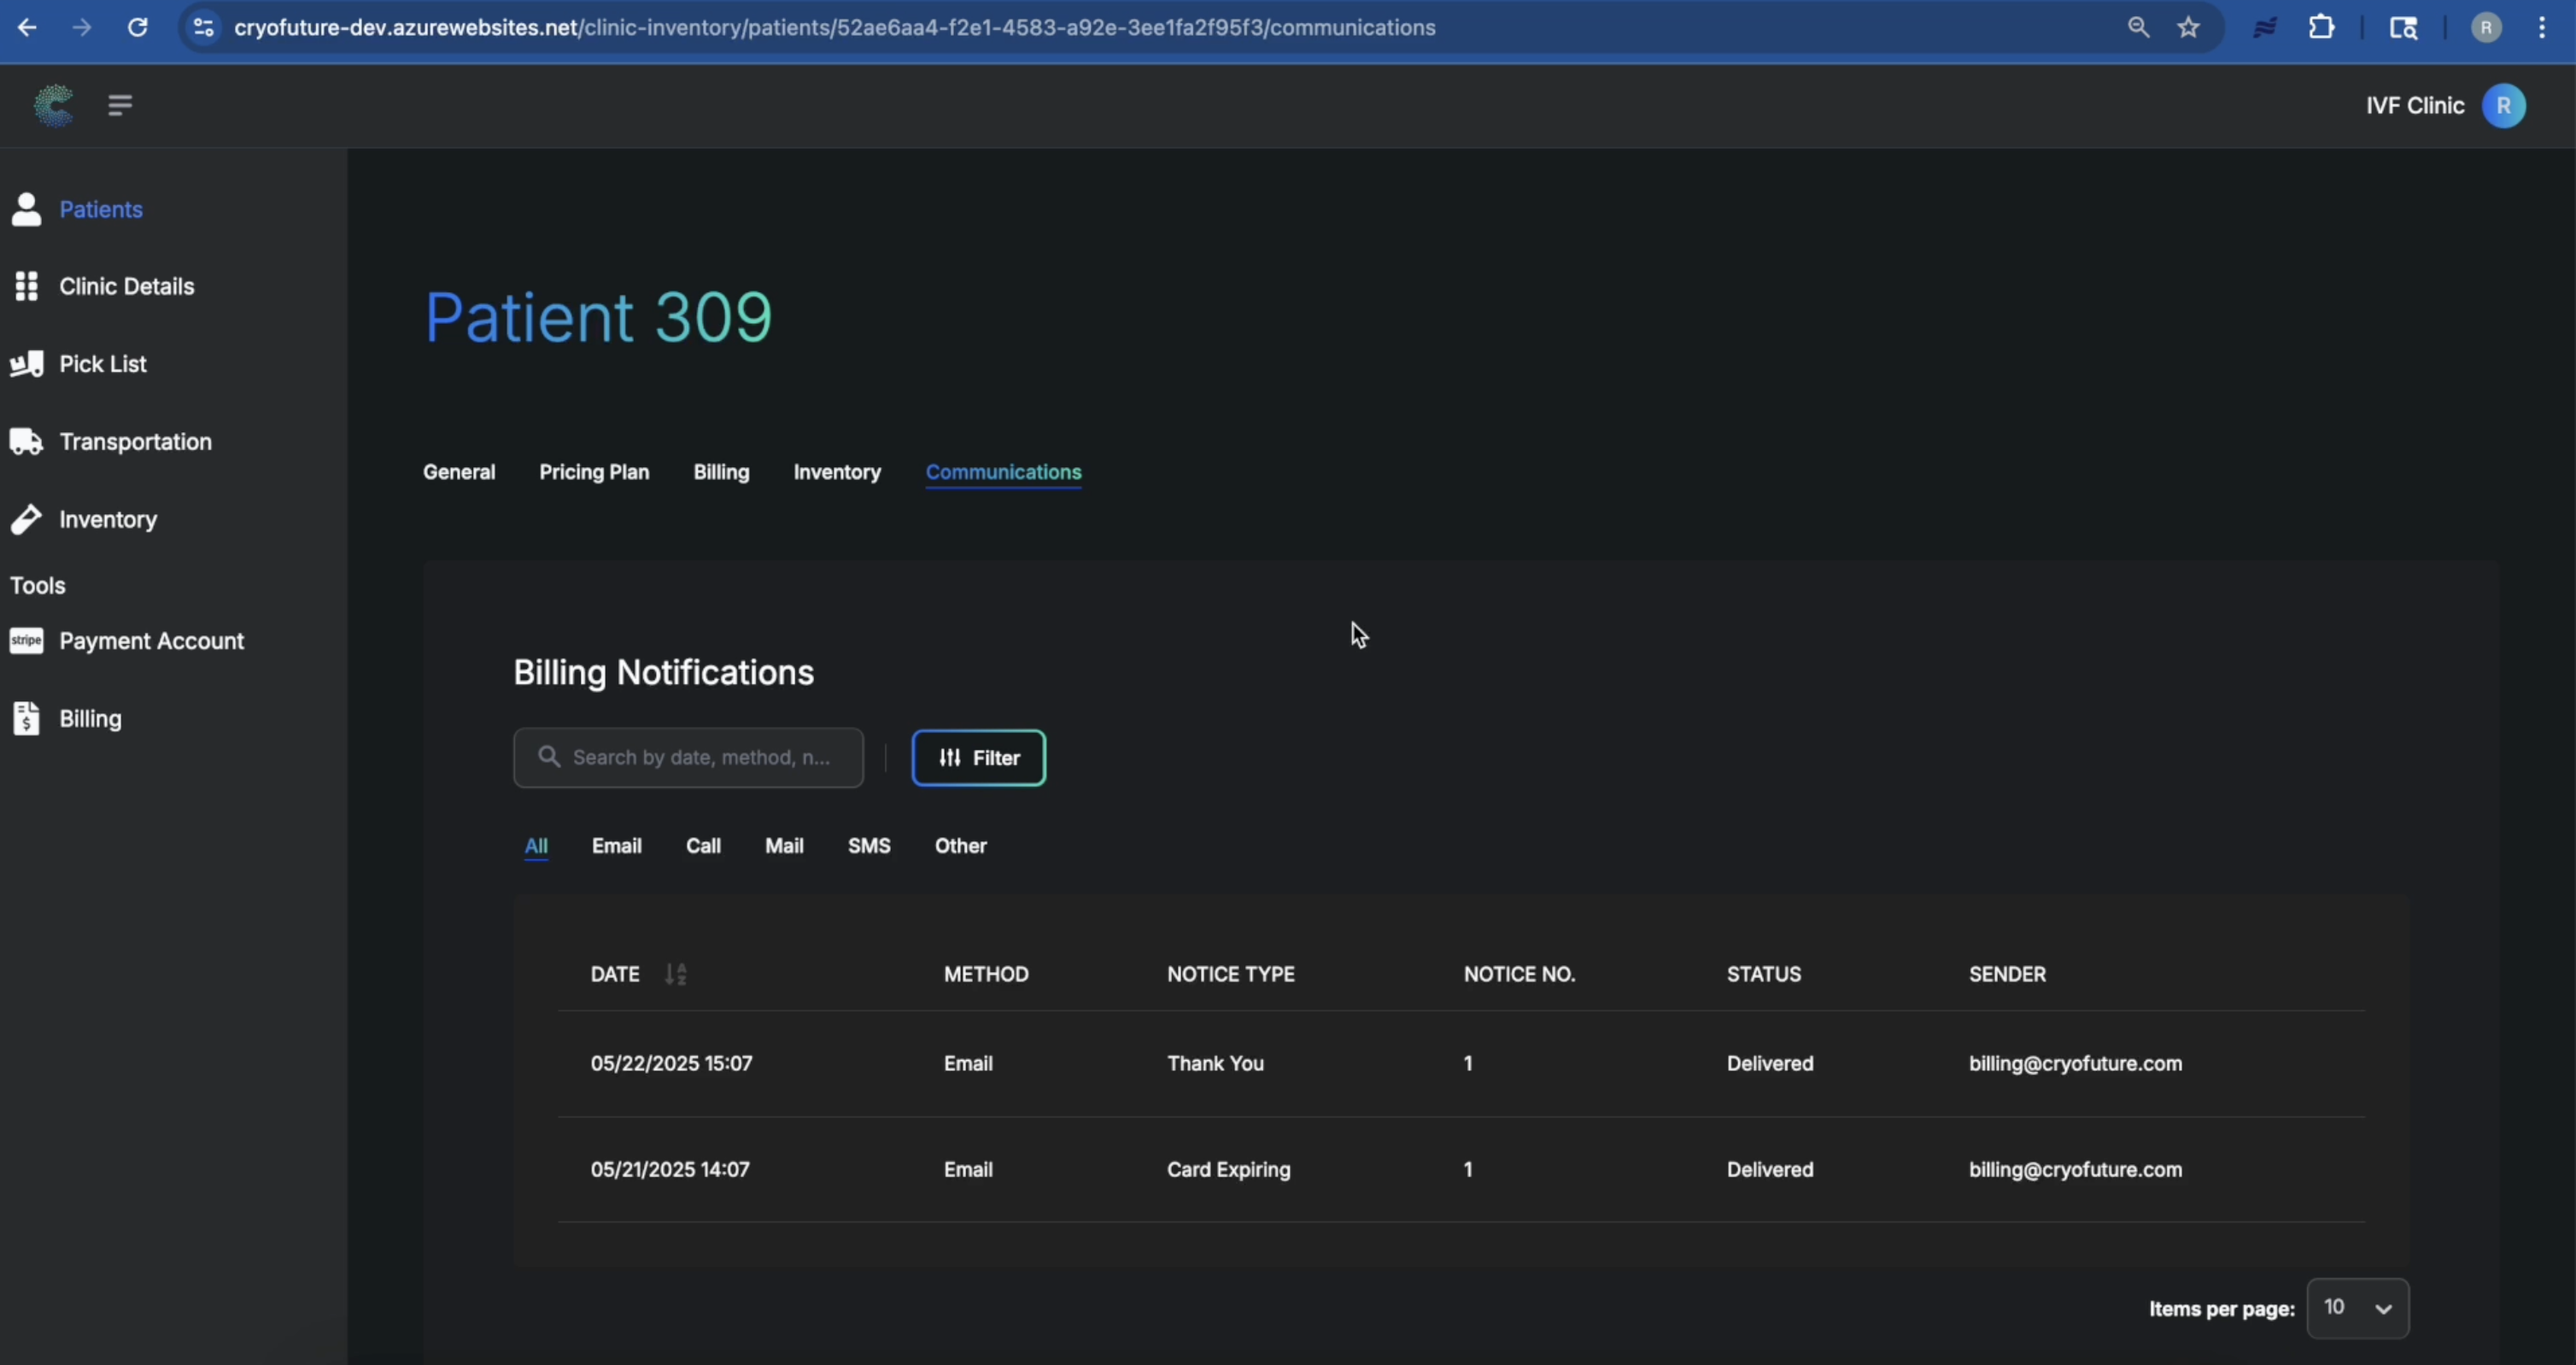
For each communication entry, the system typically displays the notice type (e.g., invoice due, payment confirmation, overdue reminder) and the medium through which the notification was delivered (e.g., email, SMS, internal portal message).
Troubleshooting
Common Issues:
- Cannot find patient profile: Check spelling or verify you have correct permissions.
- Off-app payment not appearing: Verify all required fields were completed and saved.
- Billing statement issues: Check your internet connection or review underlying billing entries.
- Incomplete communication log: Ensure the communication system is functioning correctly.
3. Setting Up CryoFuture Payments
- You must have access to CryoFuture as a Clinic Administrator
- You will need a valid email address and mobile phone number for Stripe account creation
- Have your business and bank details ready
Overview
Setting up your payment account involves connecting CryoFuture to Stripe for secure payment processing. The process includes providing business information, verifying your identity, linking a bank account, and configuring customer-facing information.
Log in to CryoFuture with Clinic Administrator credentials and navigate to the "Payment Account" tab in the left-hand navigation menu.
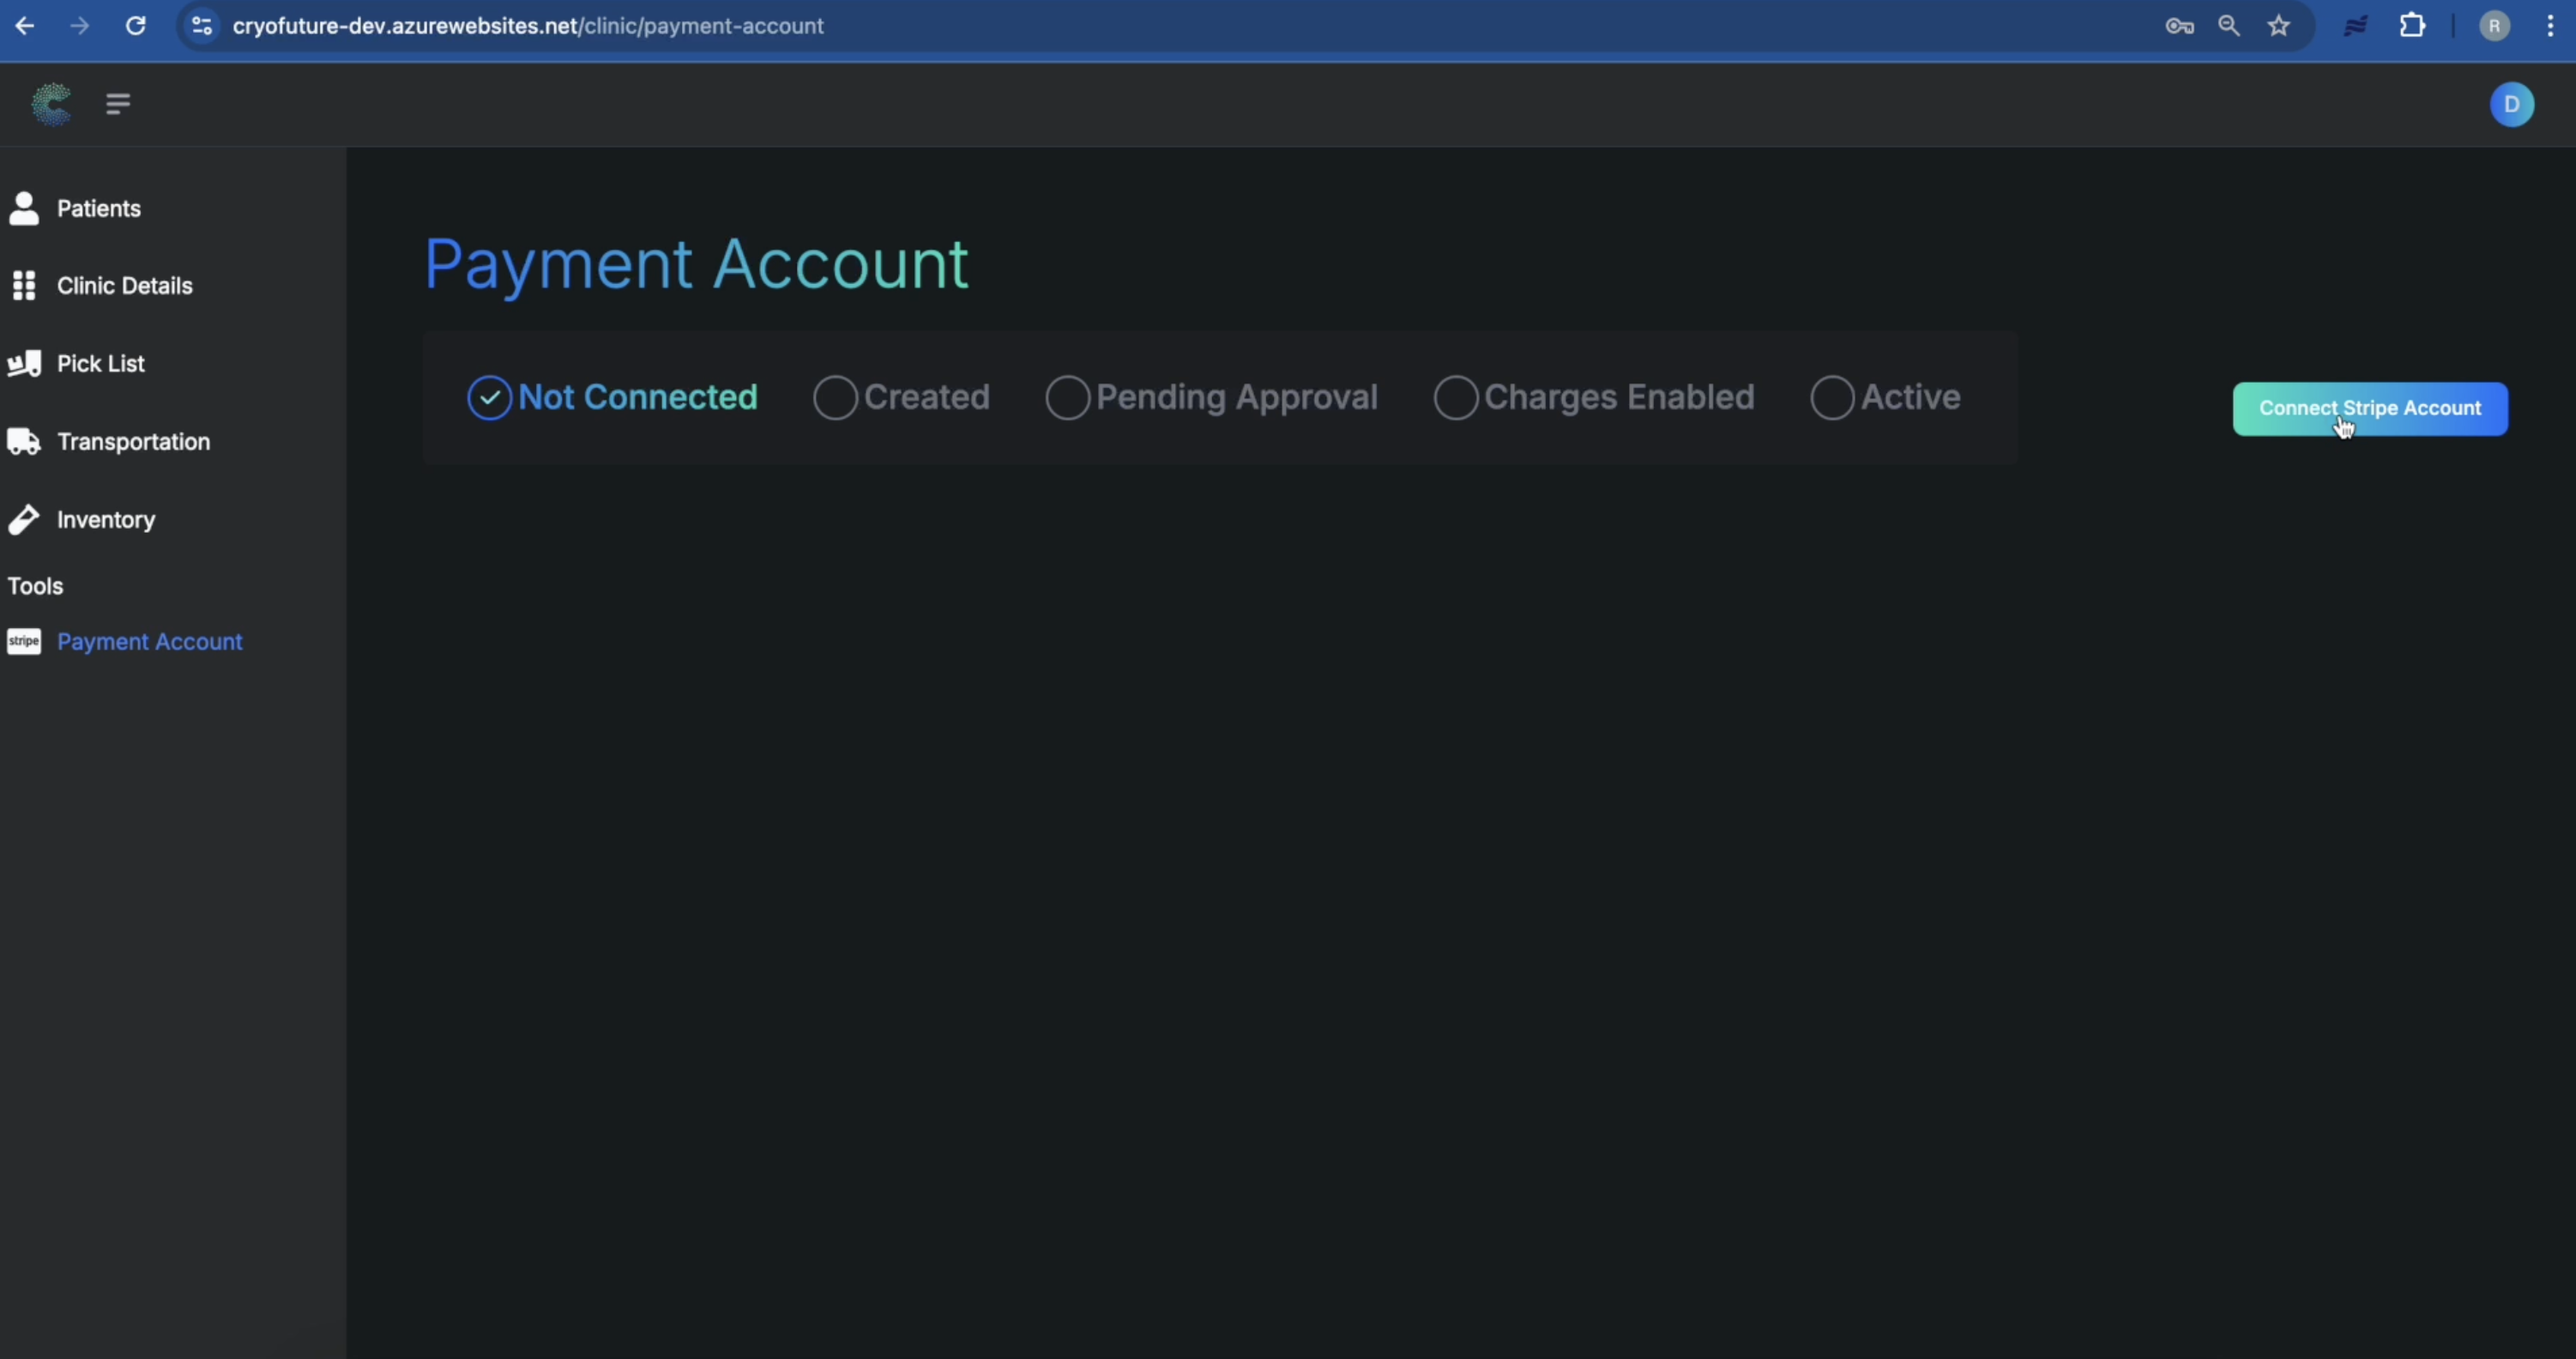
Within the "Payment Account" section, click the "Connect Stripe Account" button to be redirected to Stripe's secure onboarding portal.
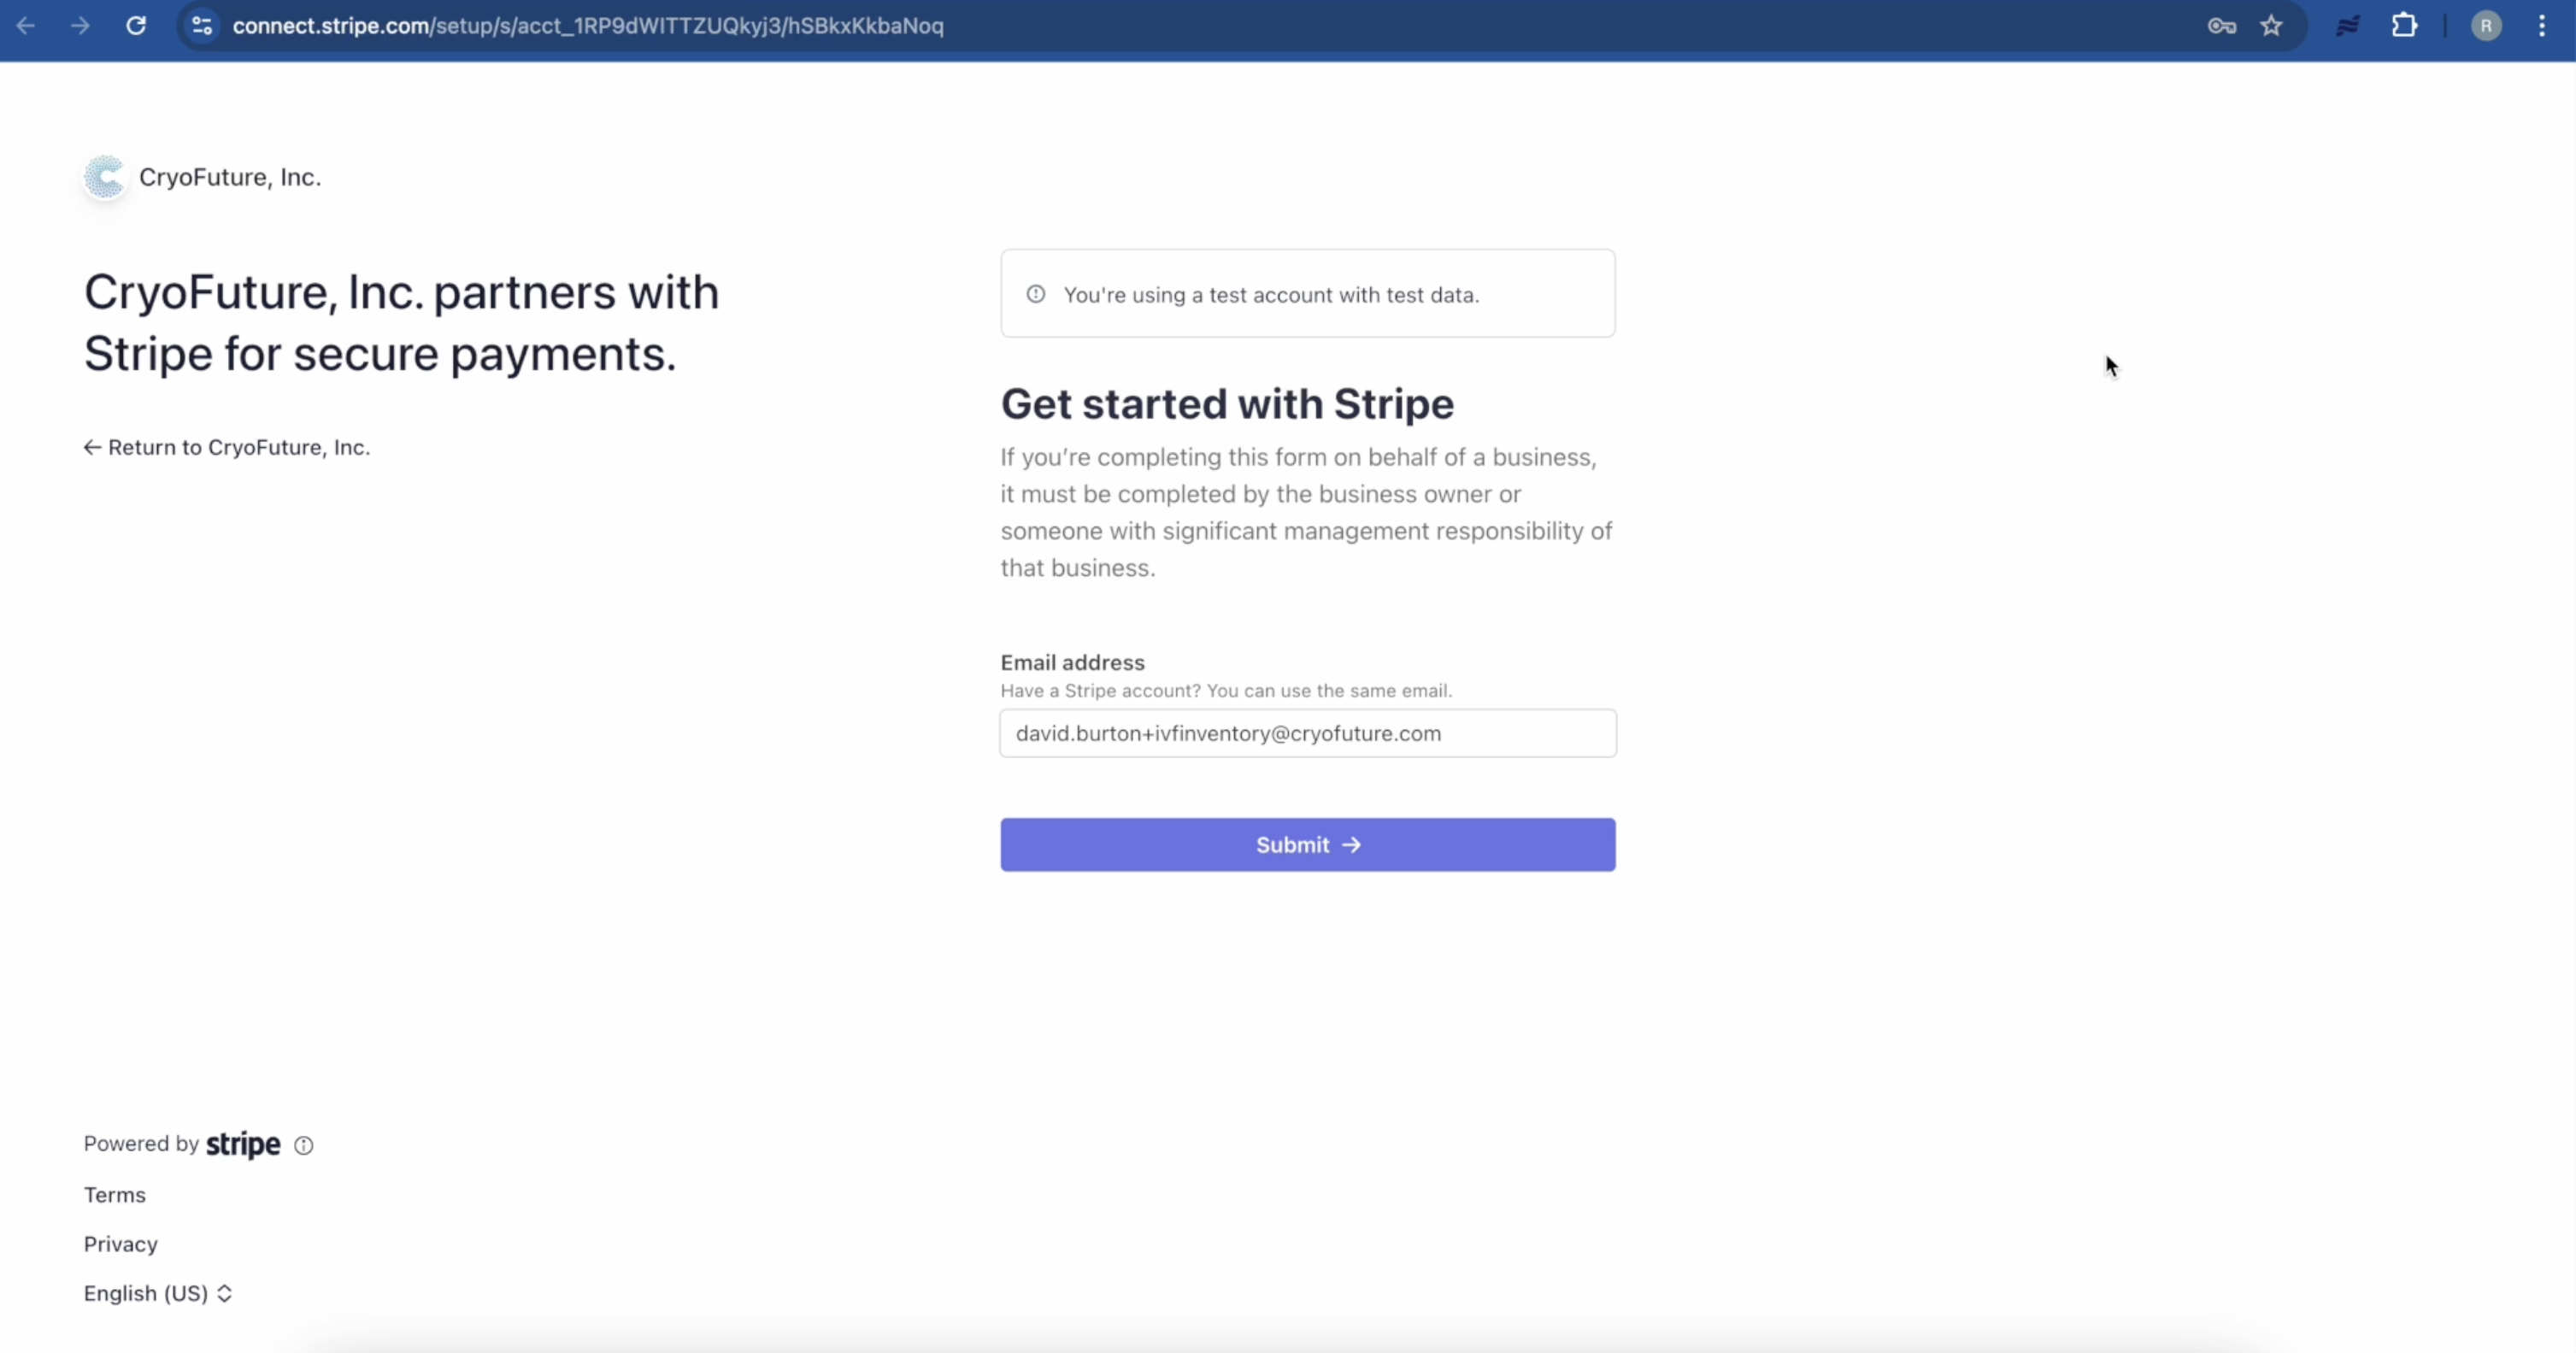
On the Stripe website, provide a valid email address and create a strong password for your new Stripe account.
.png)
Follow the prompts to set up two-step authentication by providing a mobile phone number or using an authenticator app. Be sure to save the backup codes provided by Stripe in a secure location.

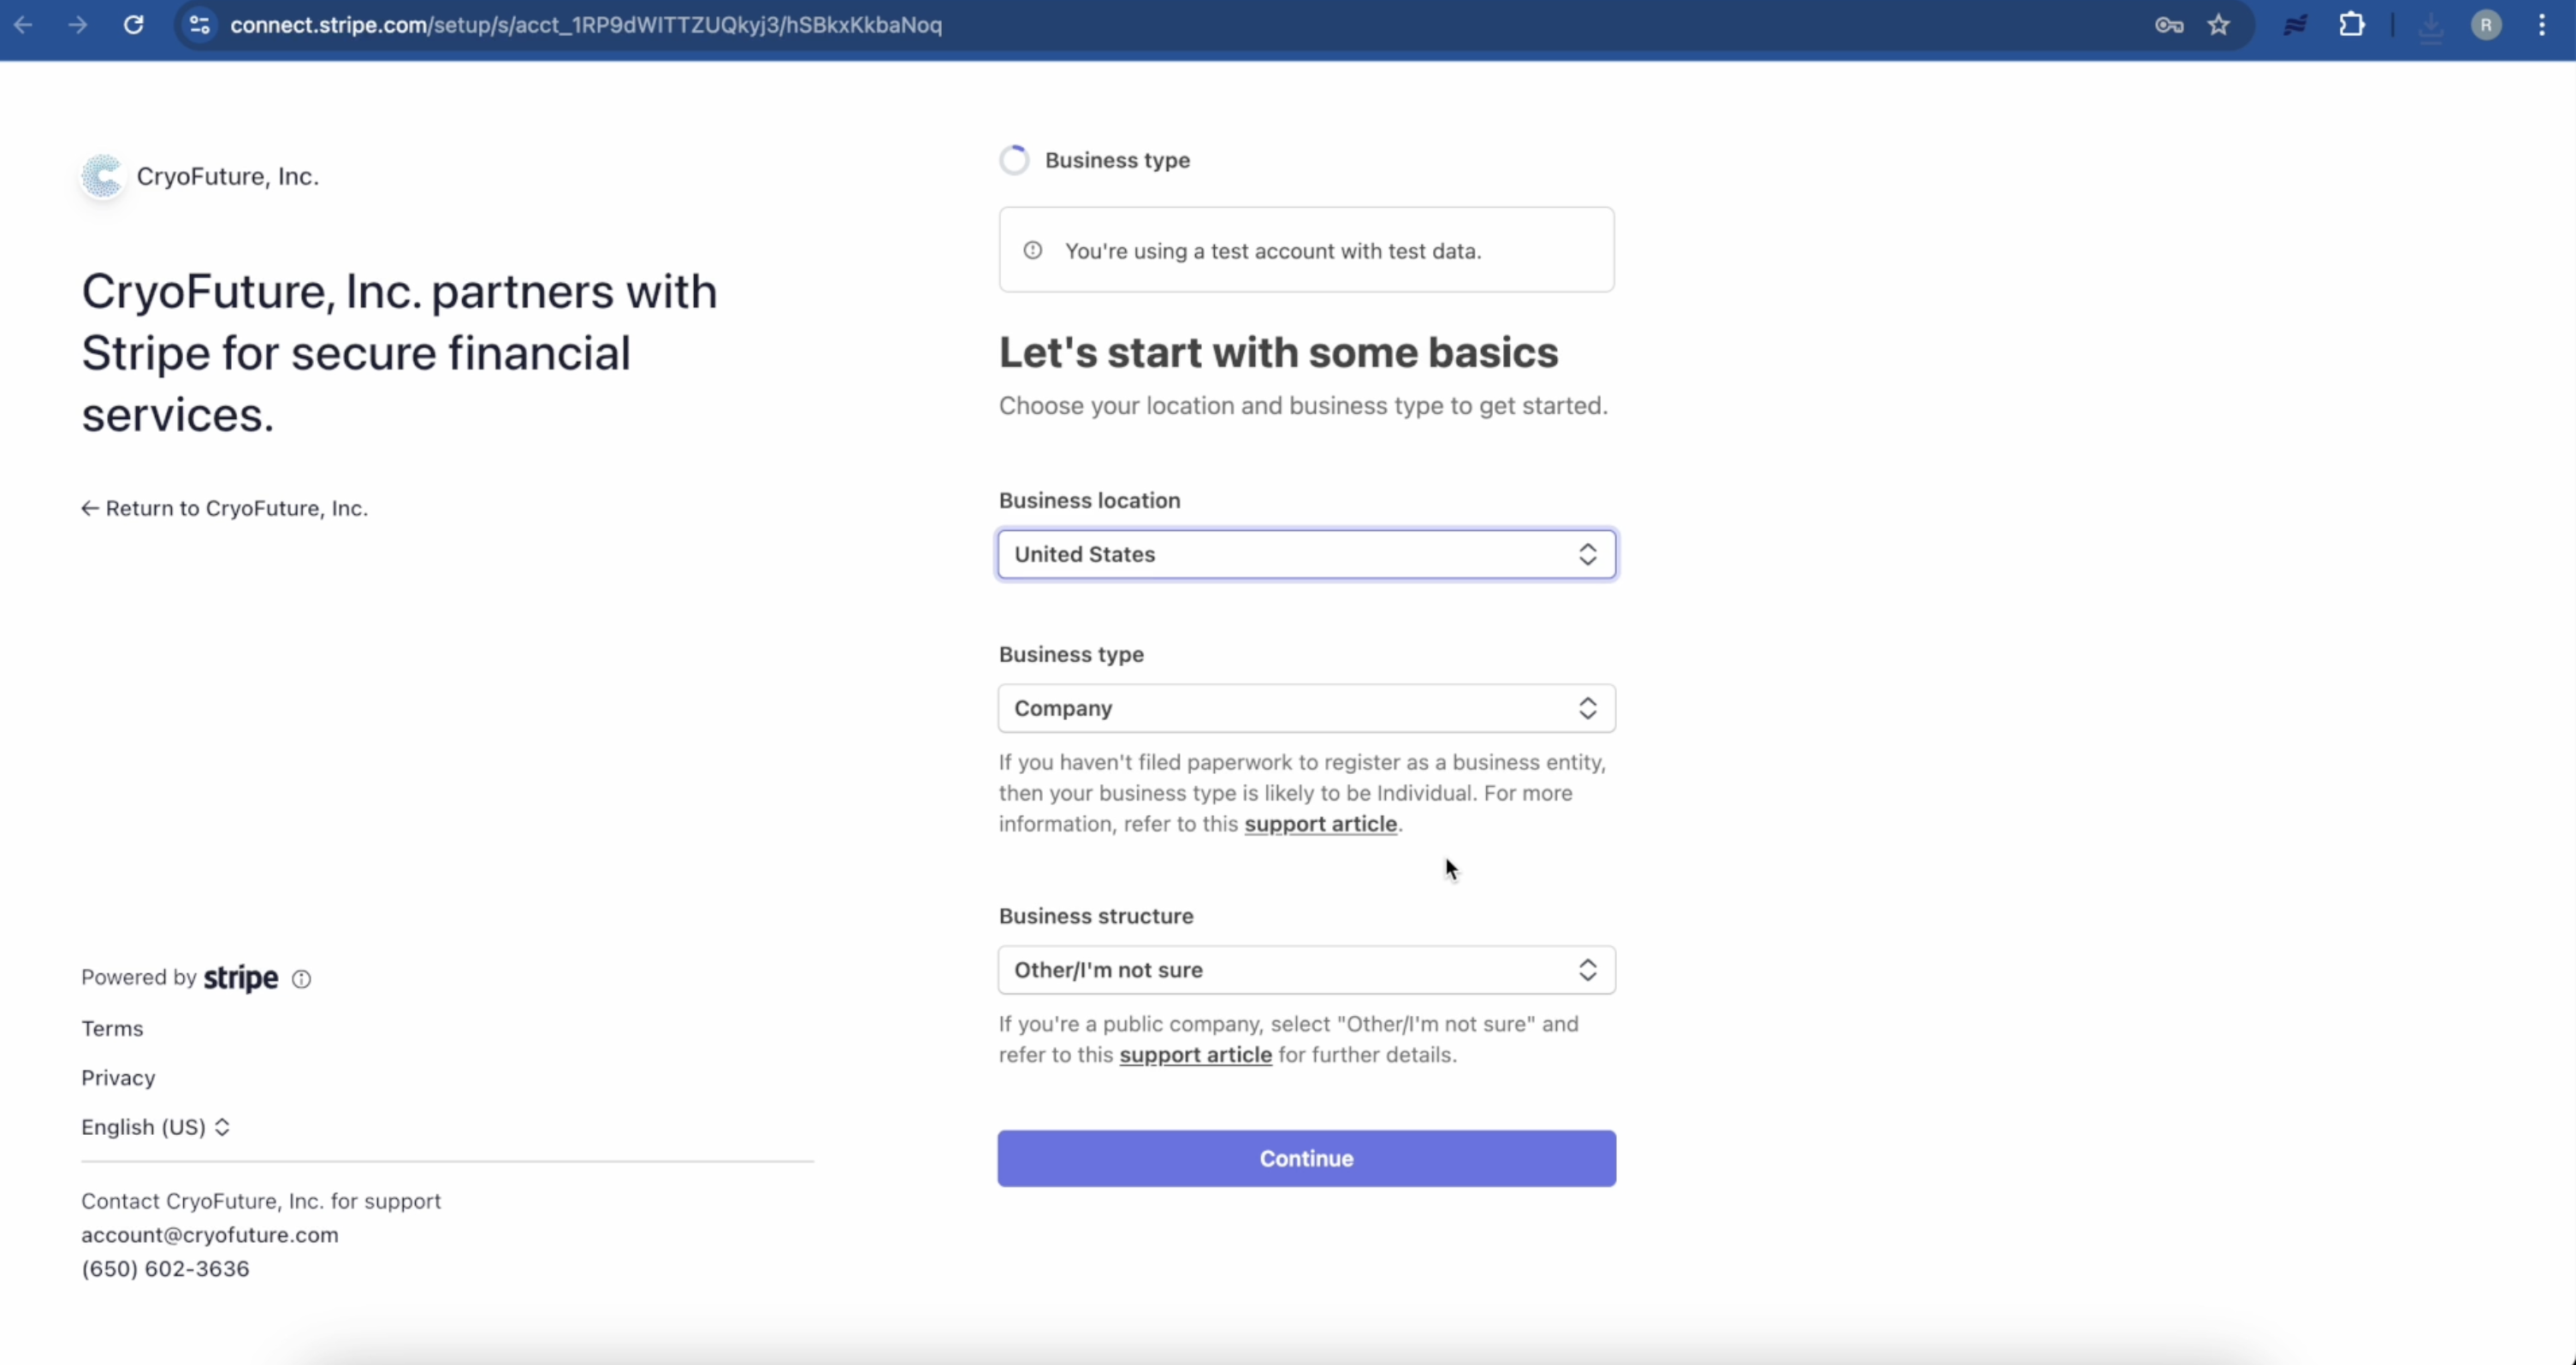
Enter the requested information about your business, including country of operation, business type, address, and industry.
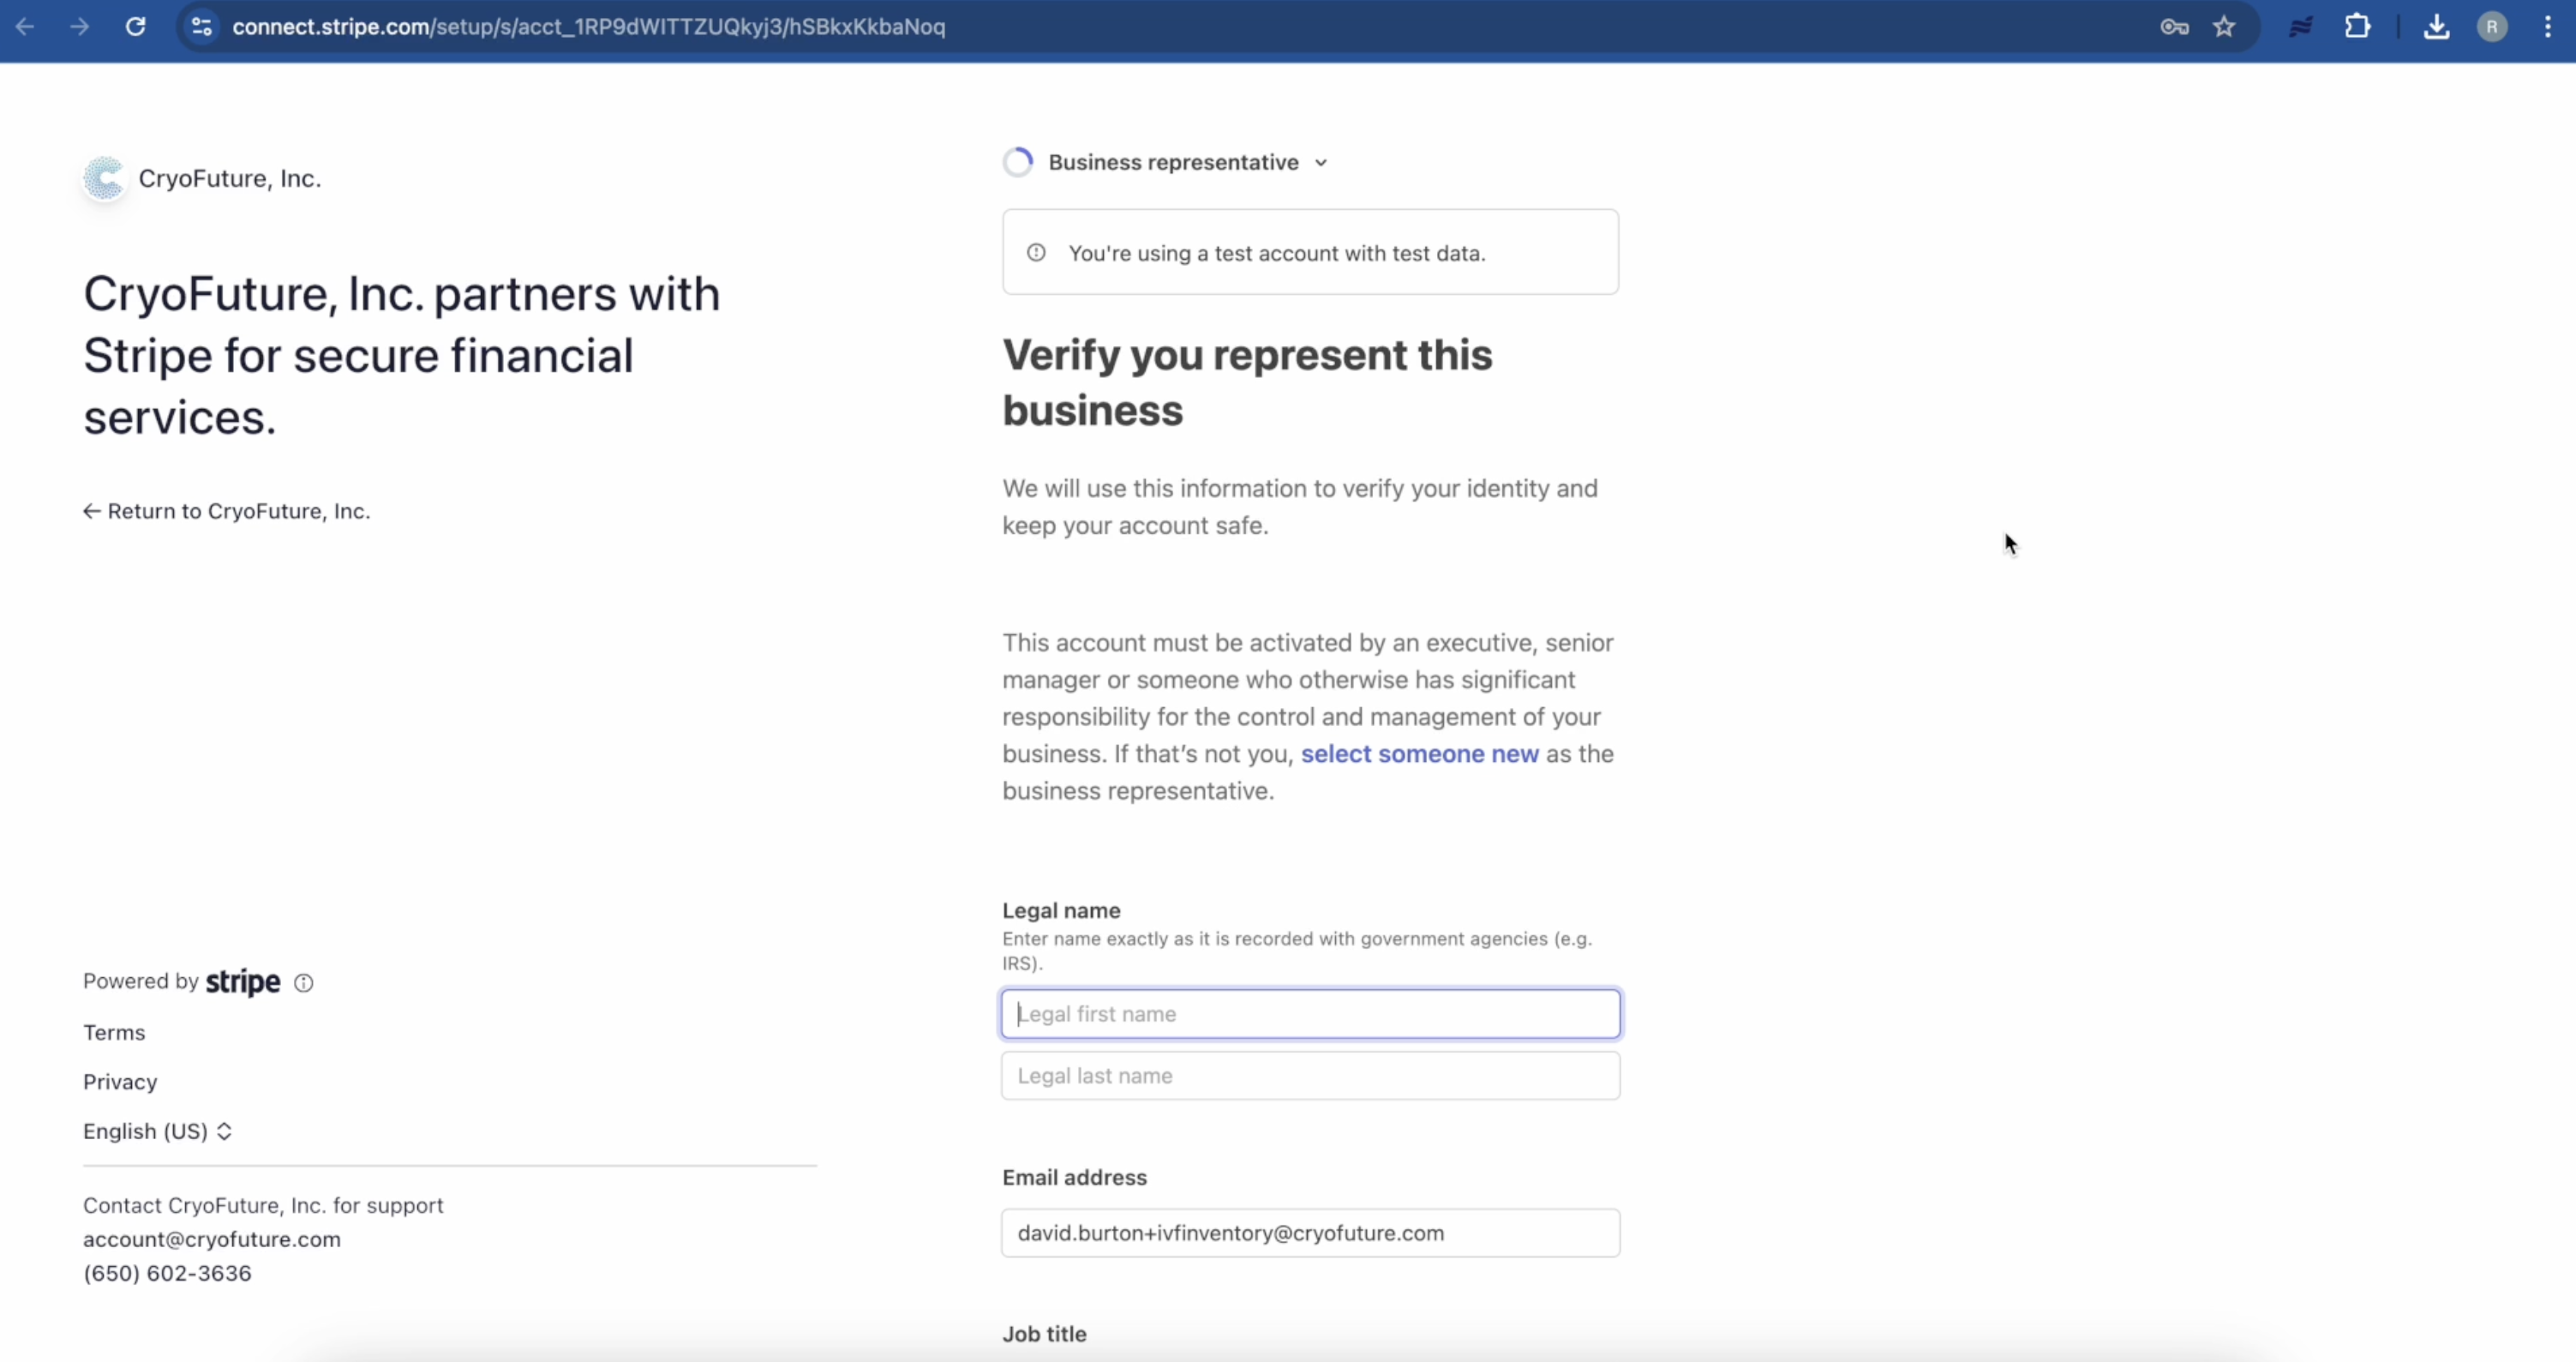
Enter personal information to verify that you are an authorized representative of the business. This may include your name, date of birth, and home address.
If applicable, provide information about individuals who own 25% or more of the business or exercise significant control.

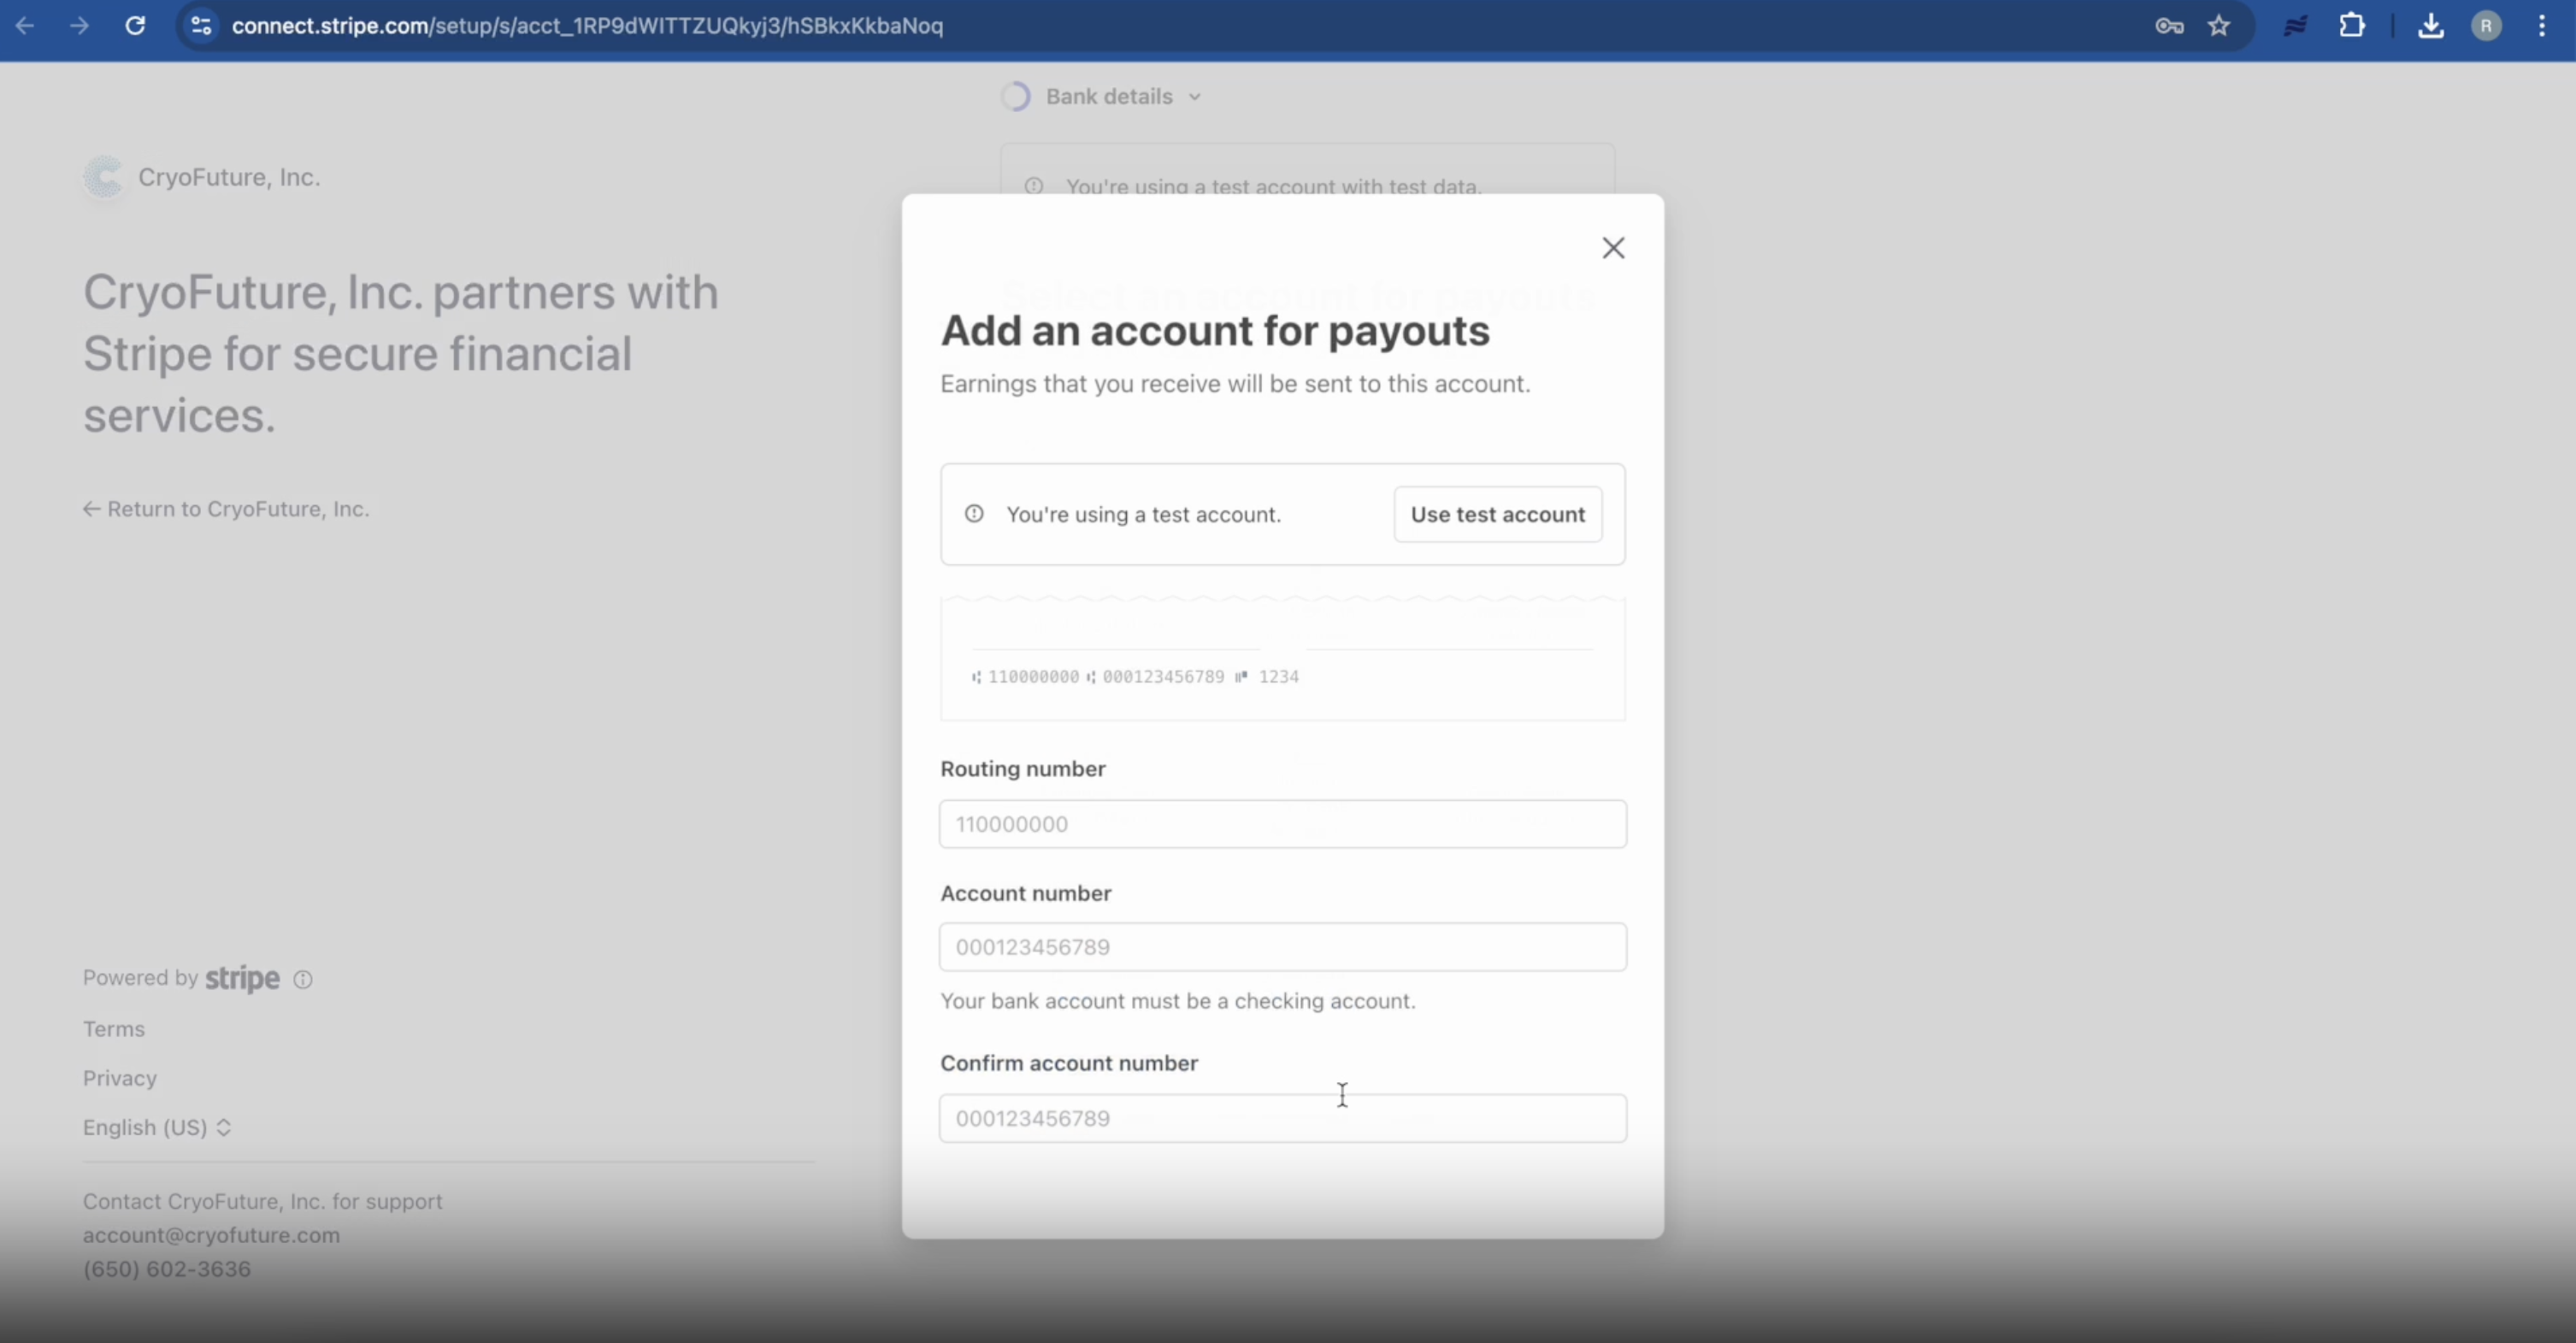
Provide your business's bank account details where Stripe will send payouts. You can either enter this information manually or securely connect through your online banking portal.
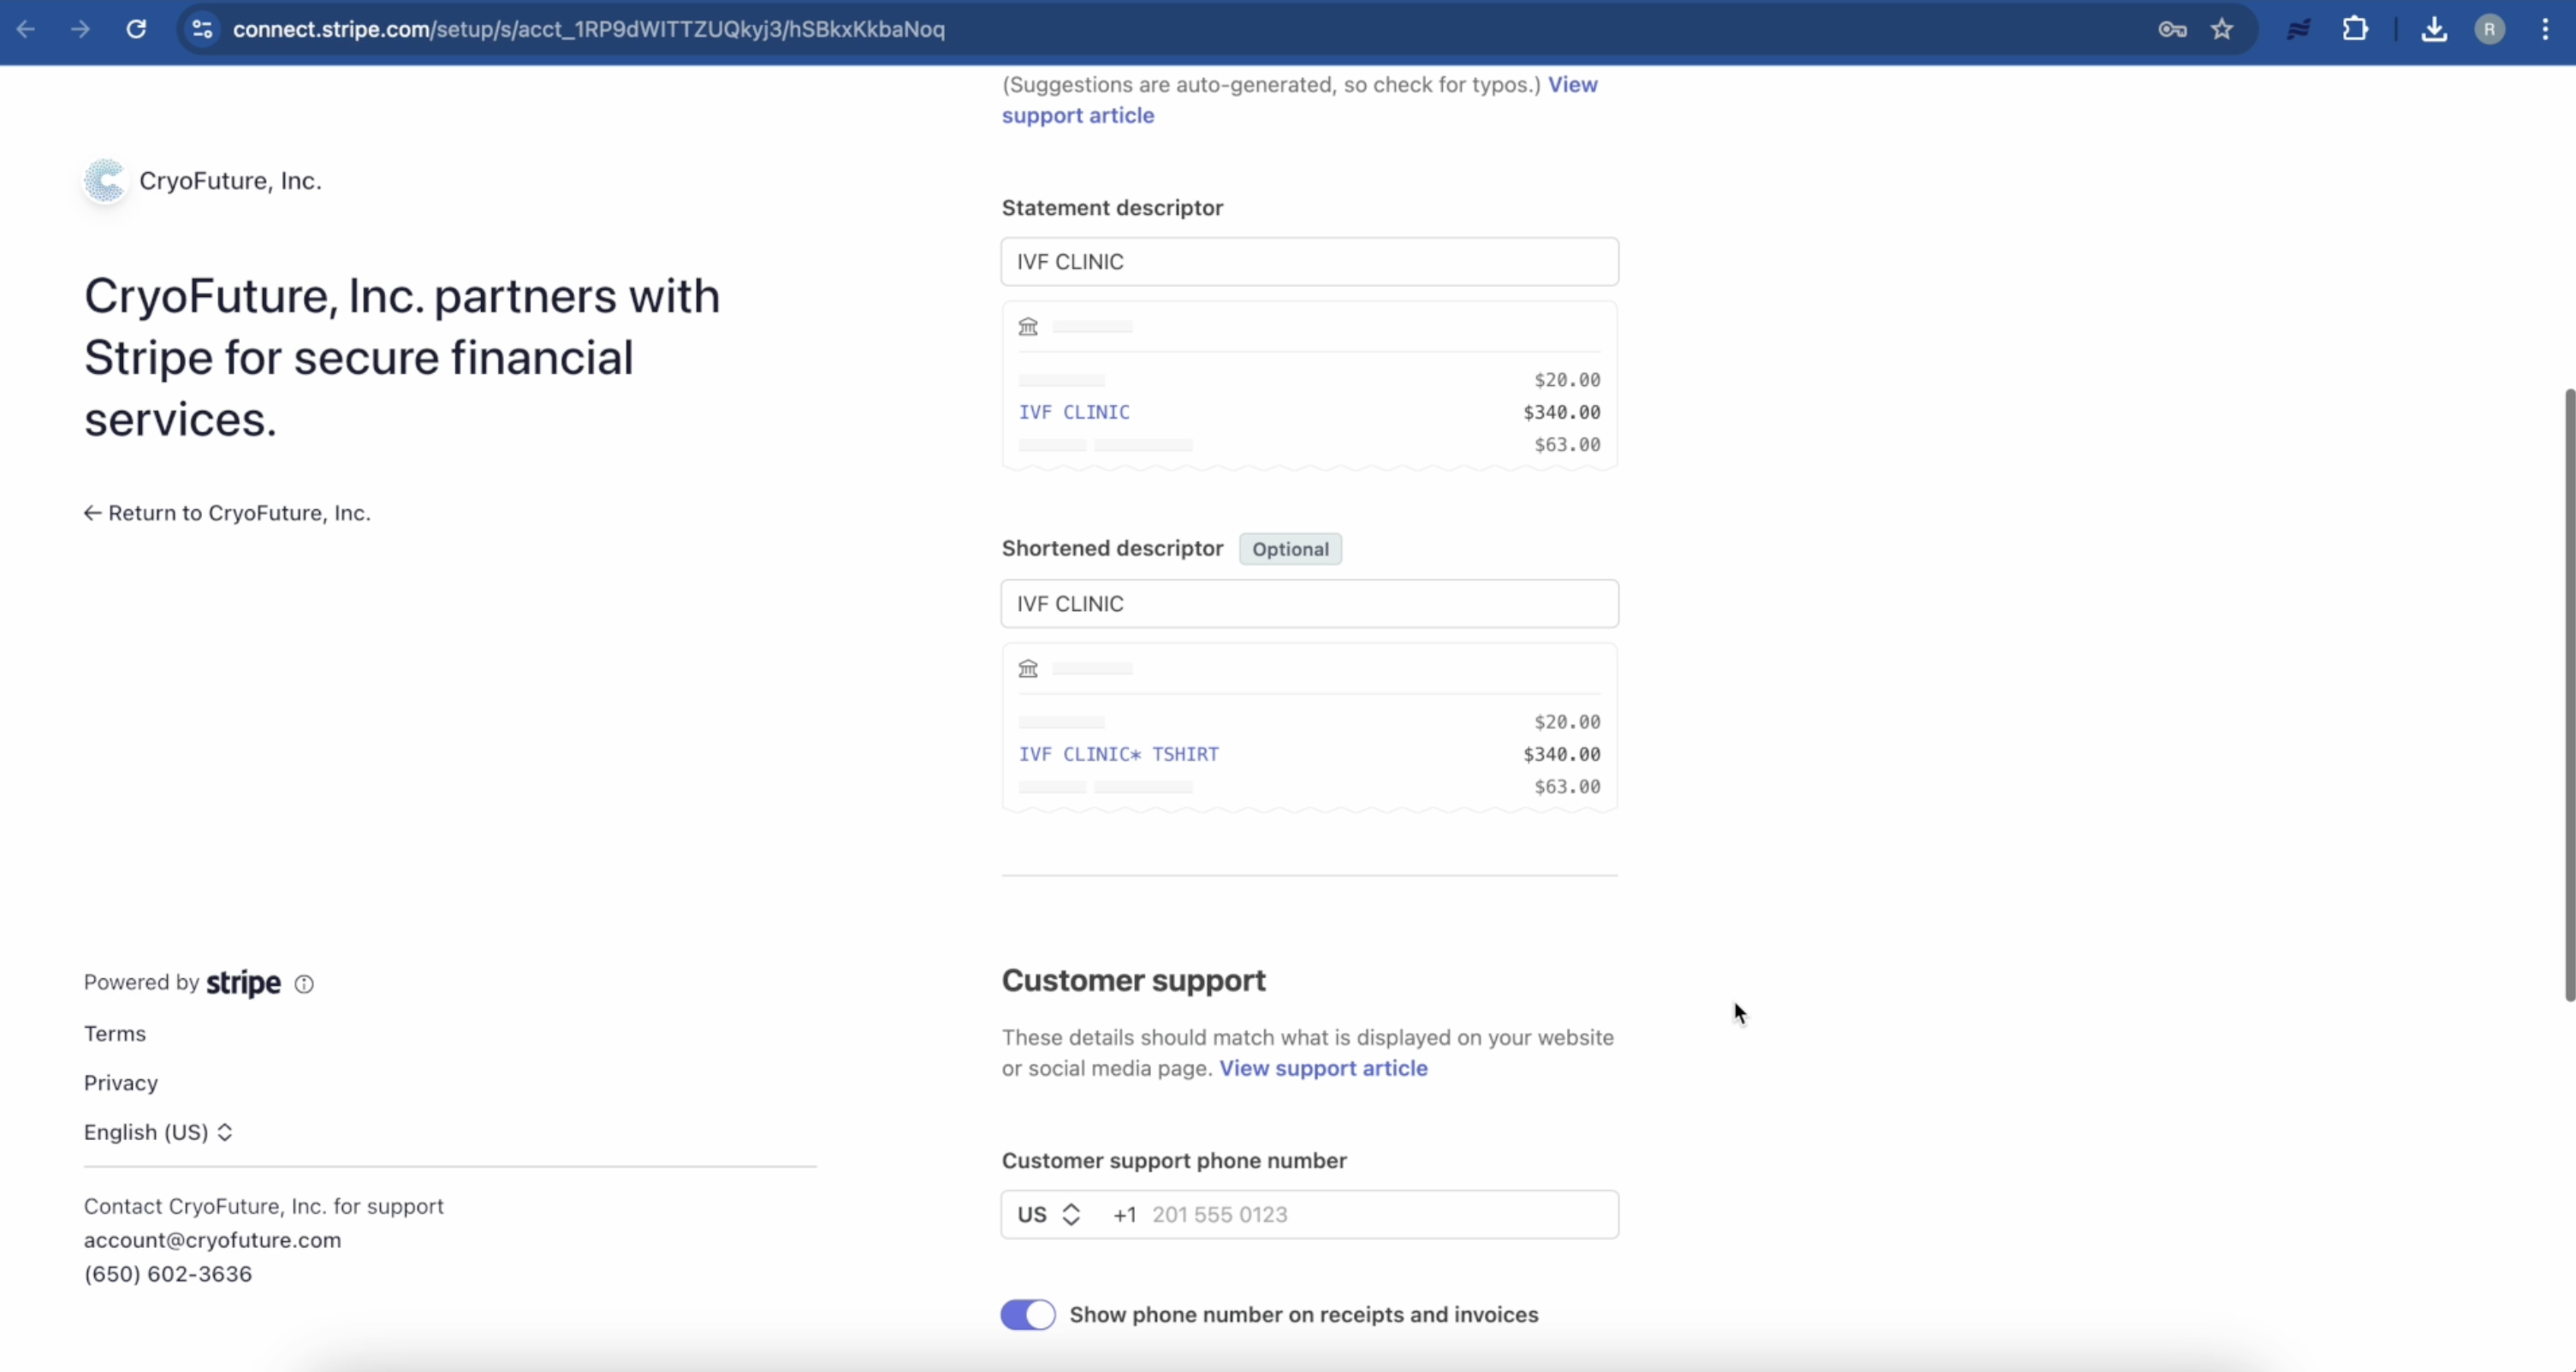
Enter the name you want customers to see on their bank statements and provide customer support contact information.
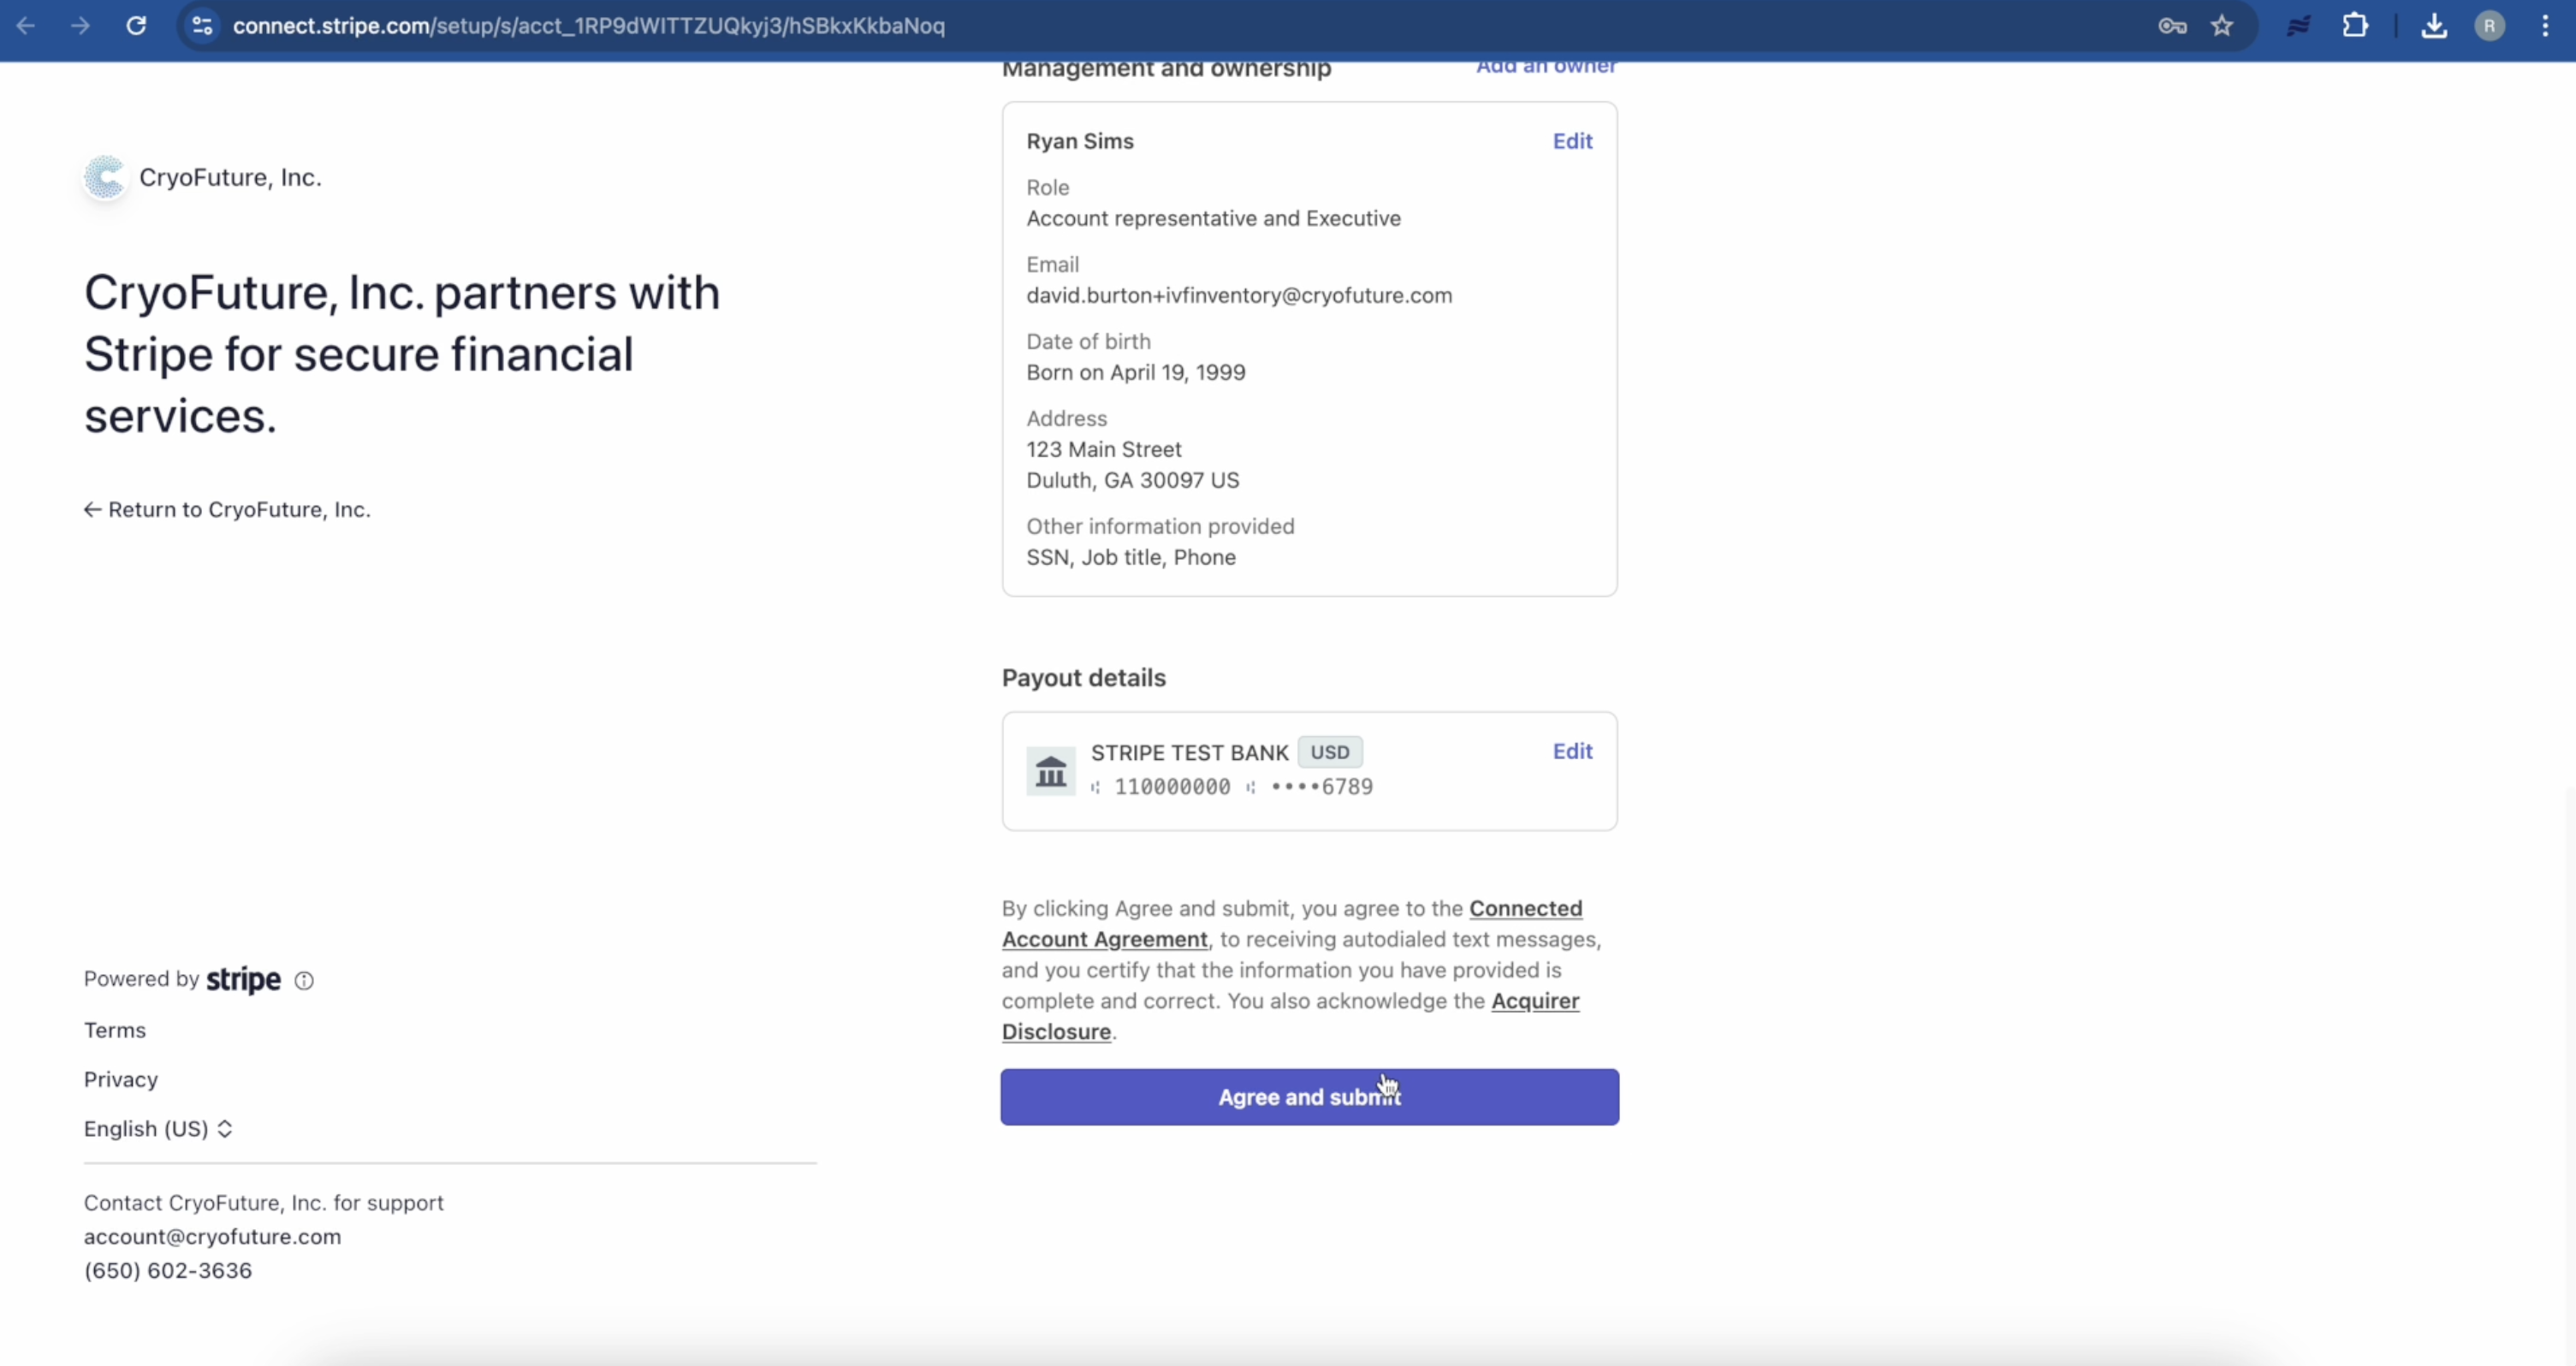
Carefully review all the information you've provided for accuracy and submit your Stripe account application.
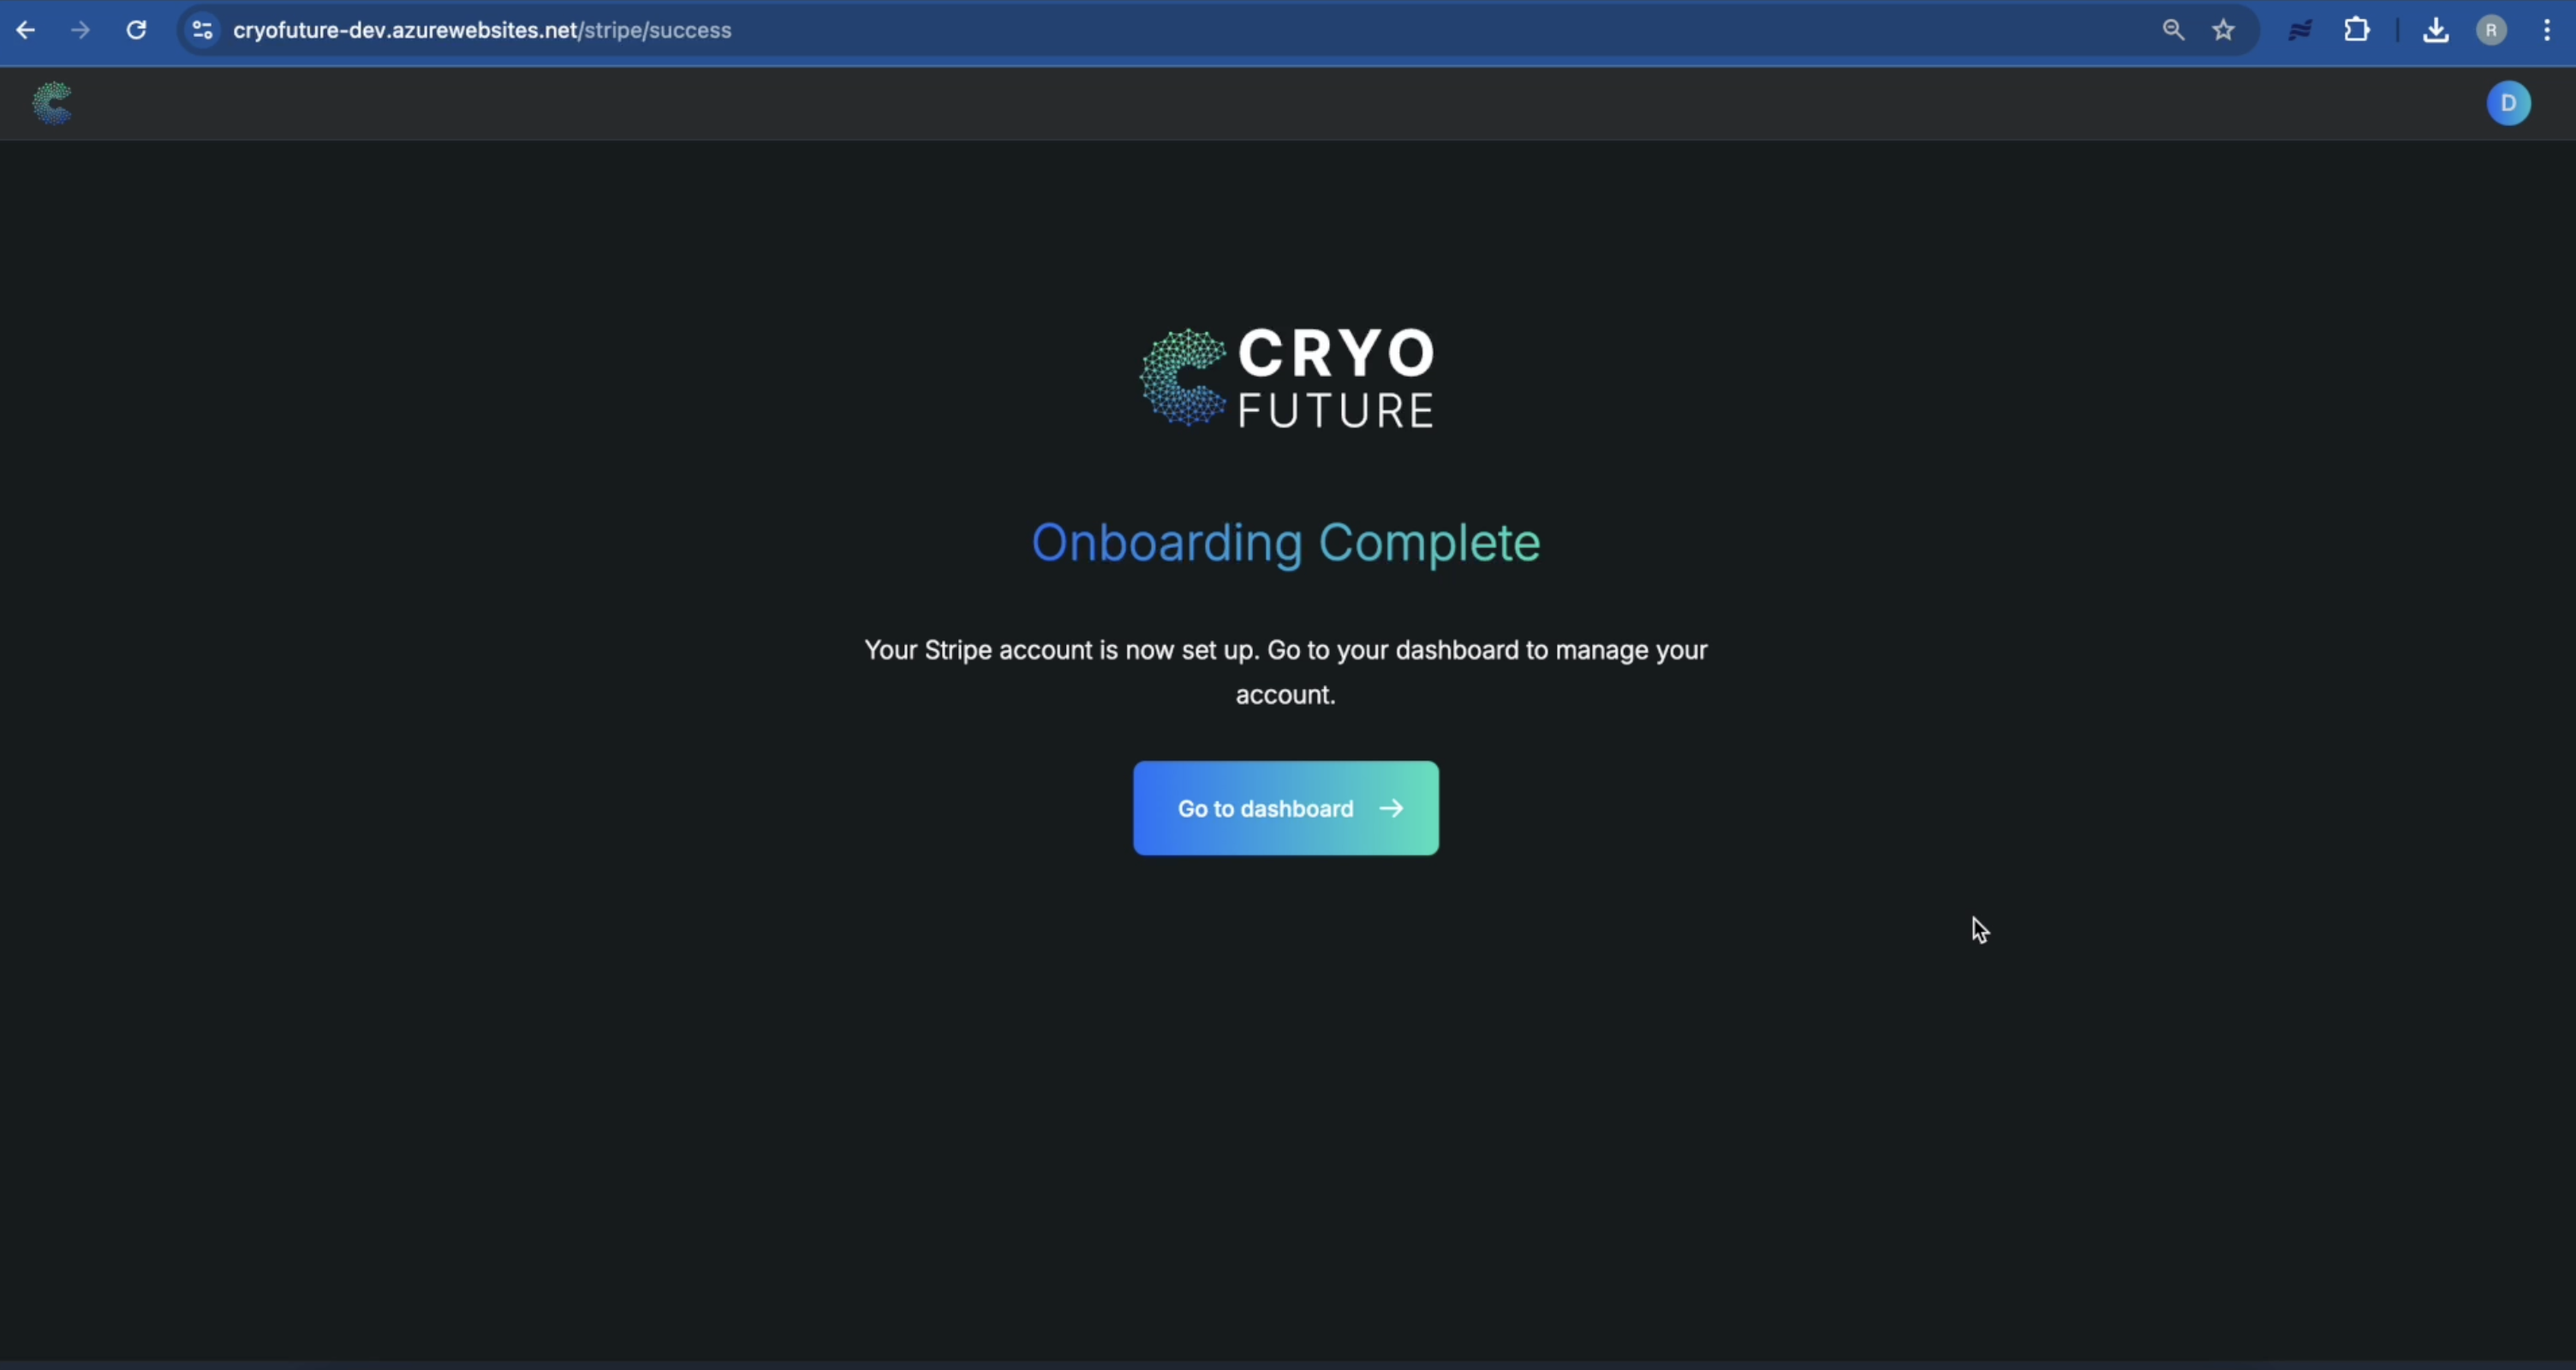
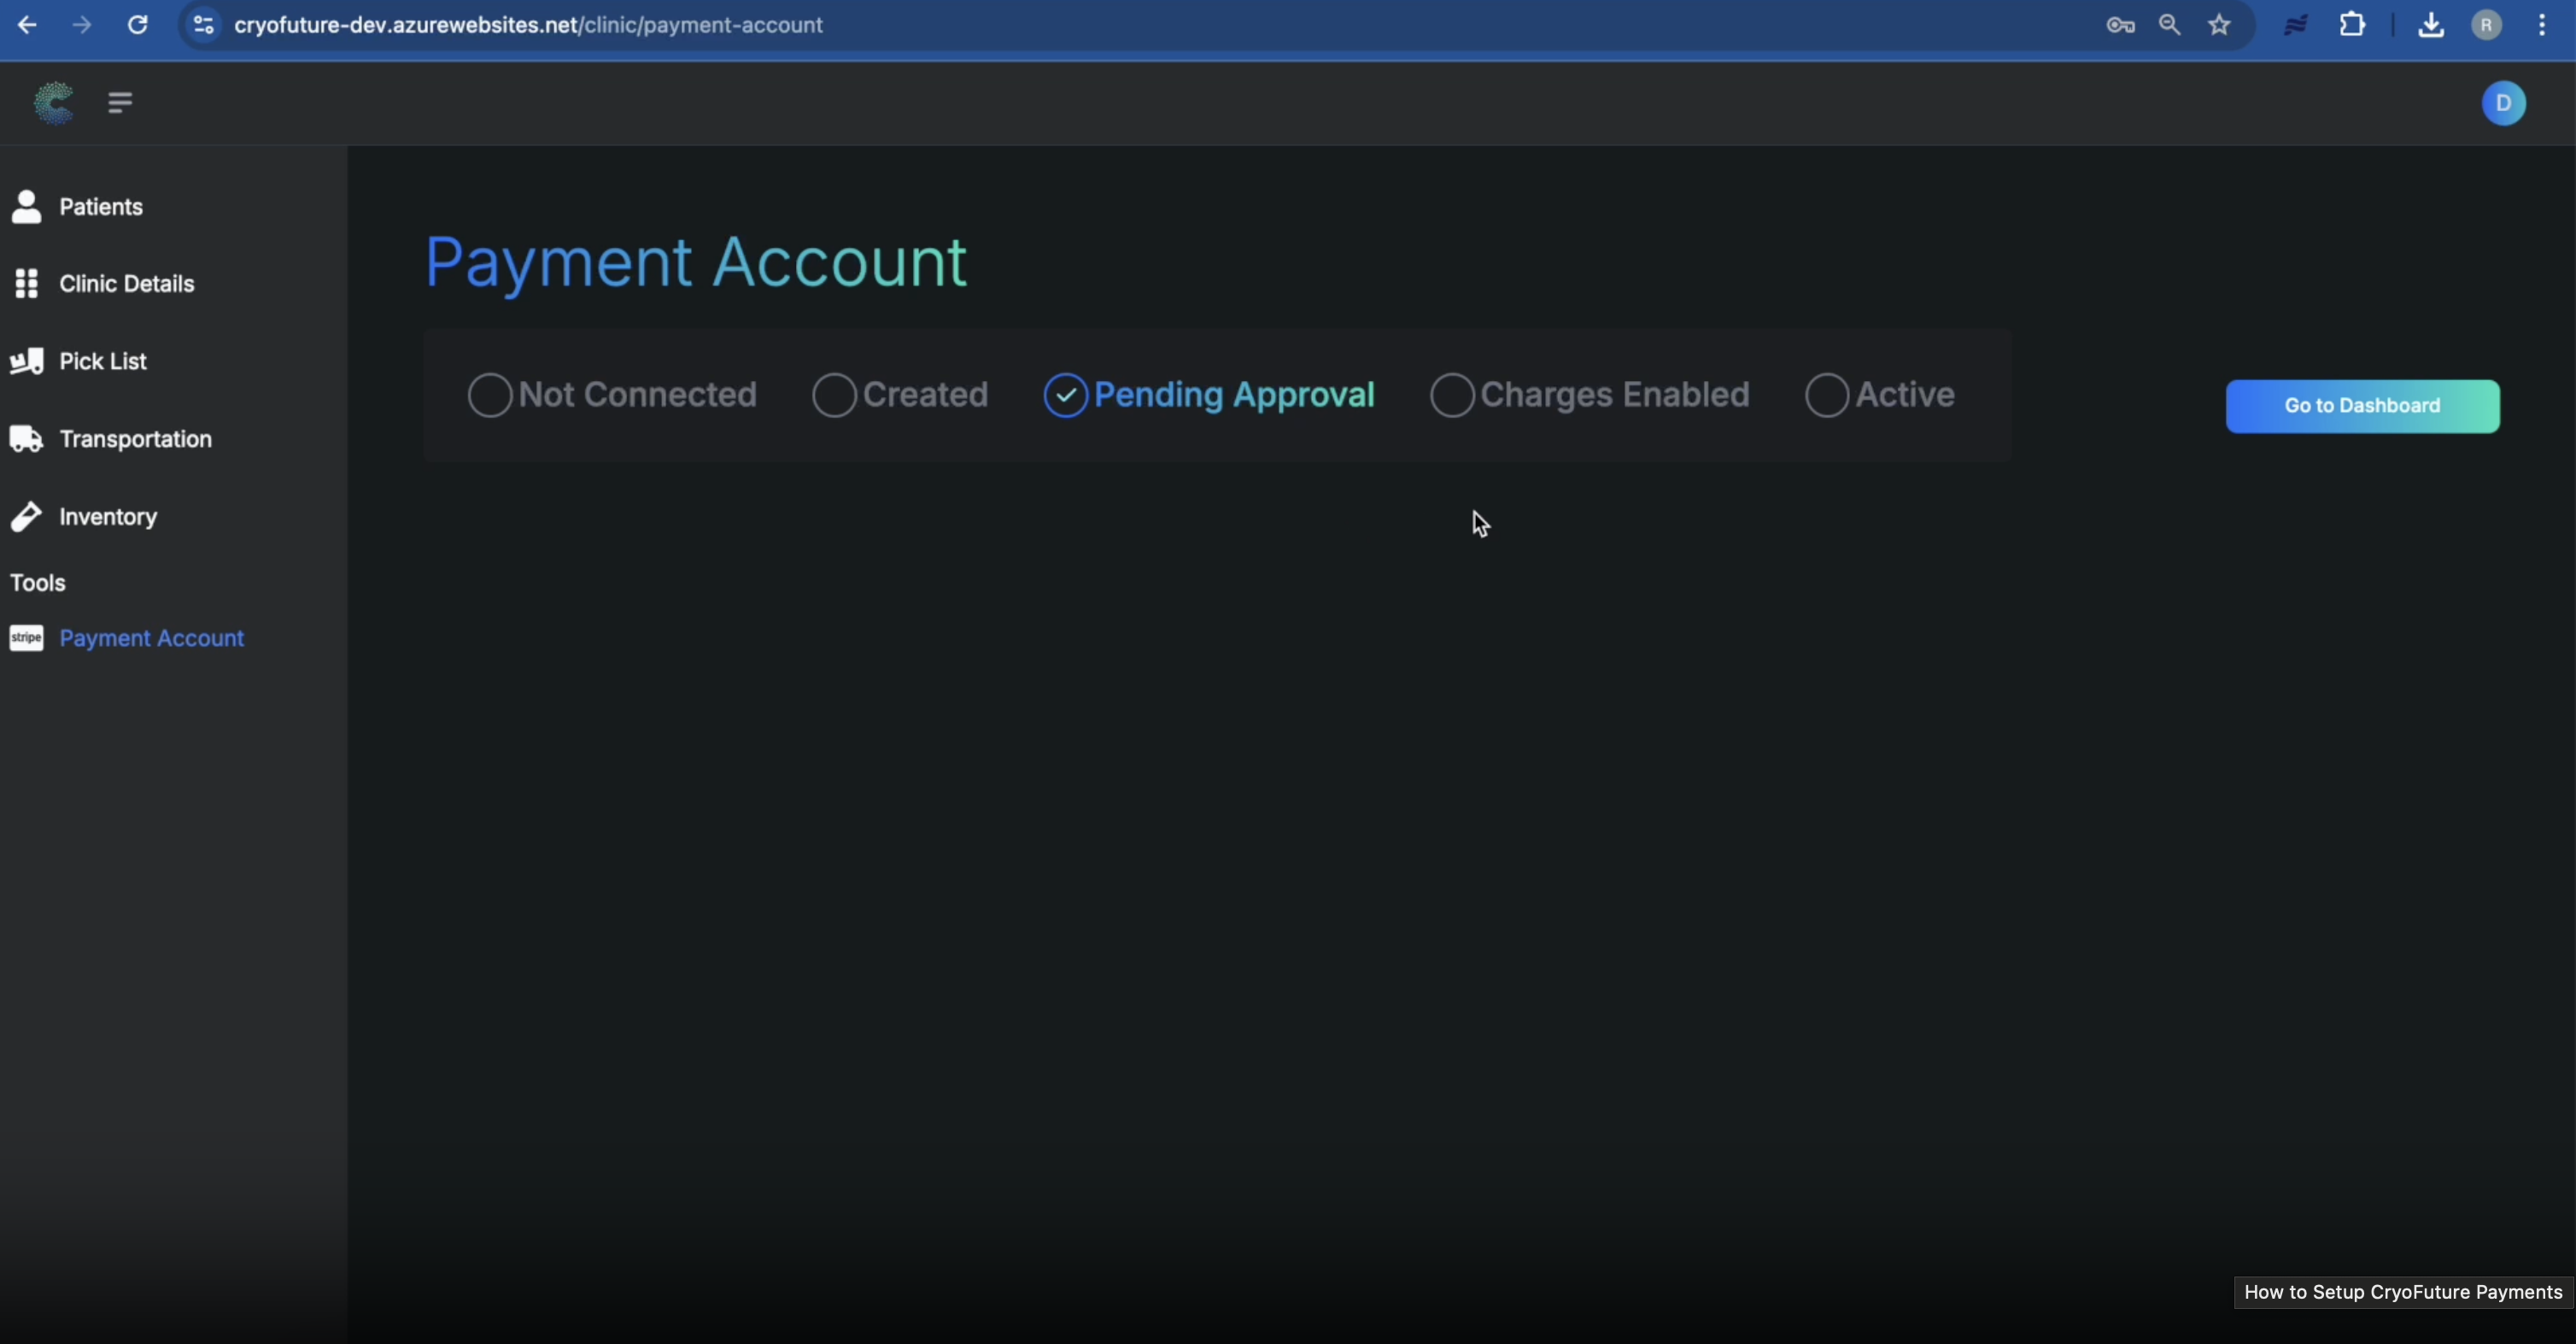
Verify that your Stripe account has been successfully connected to CryoFuture by checking your CryoFuture dashboard.
Check your Stripe dashboard to monitor all payment activity.
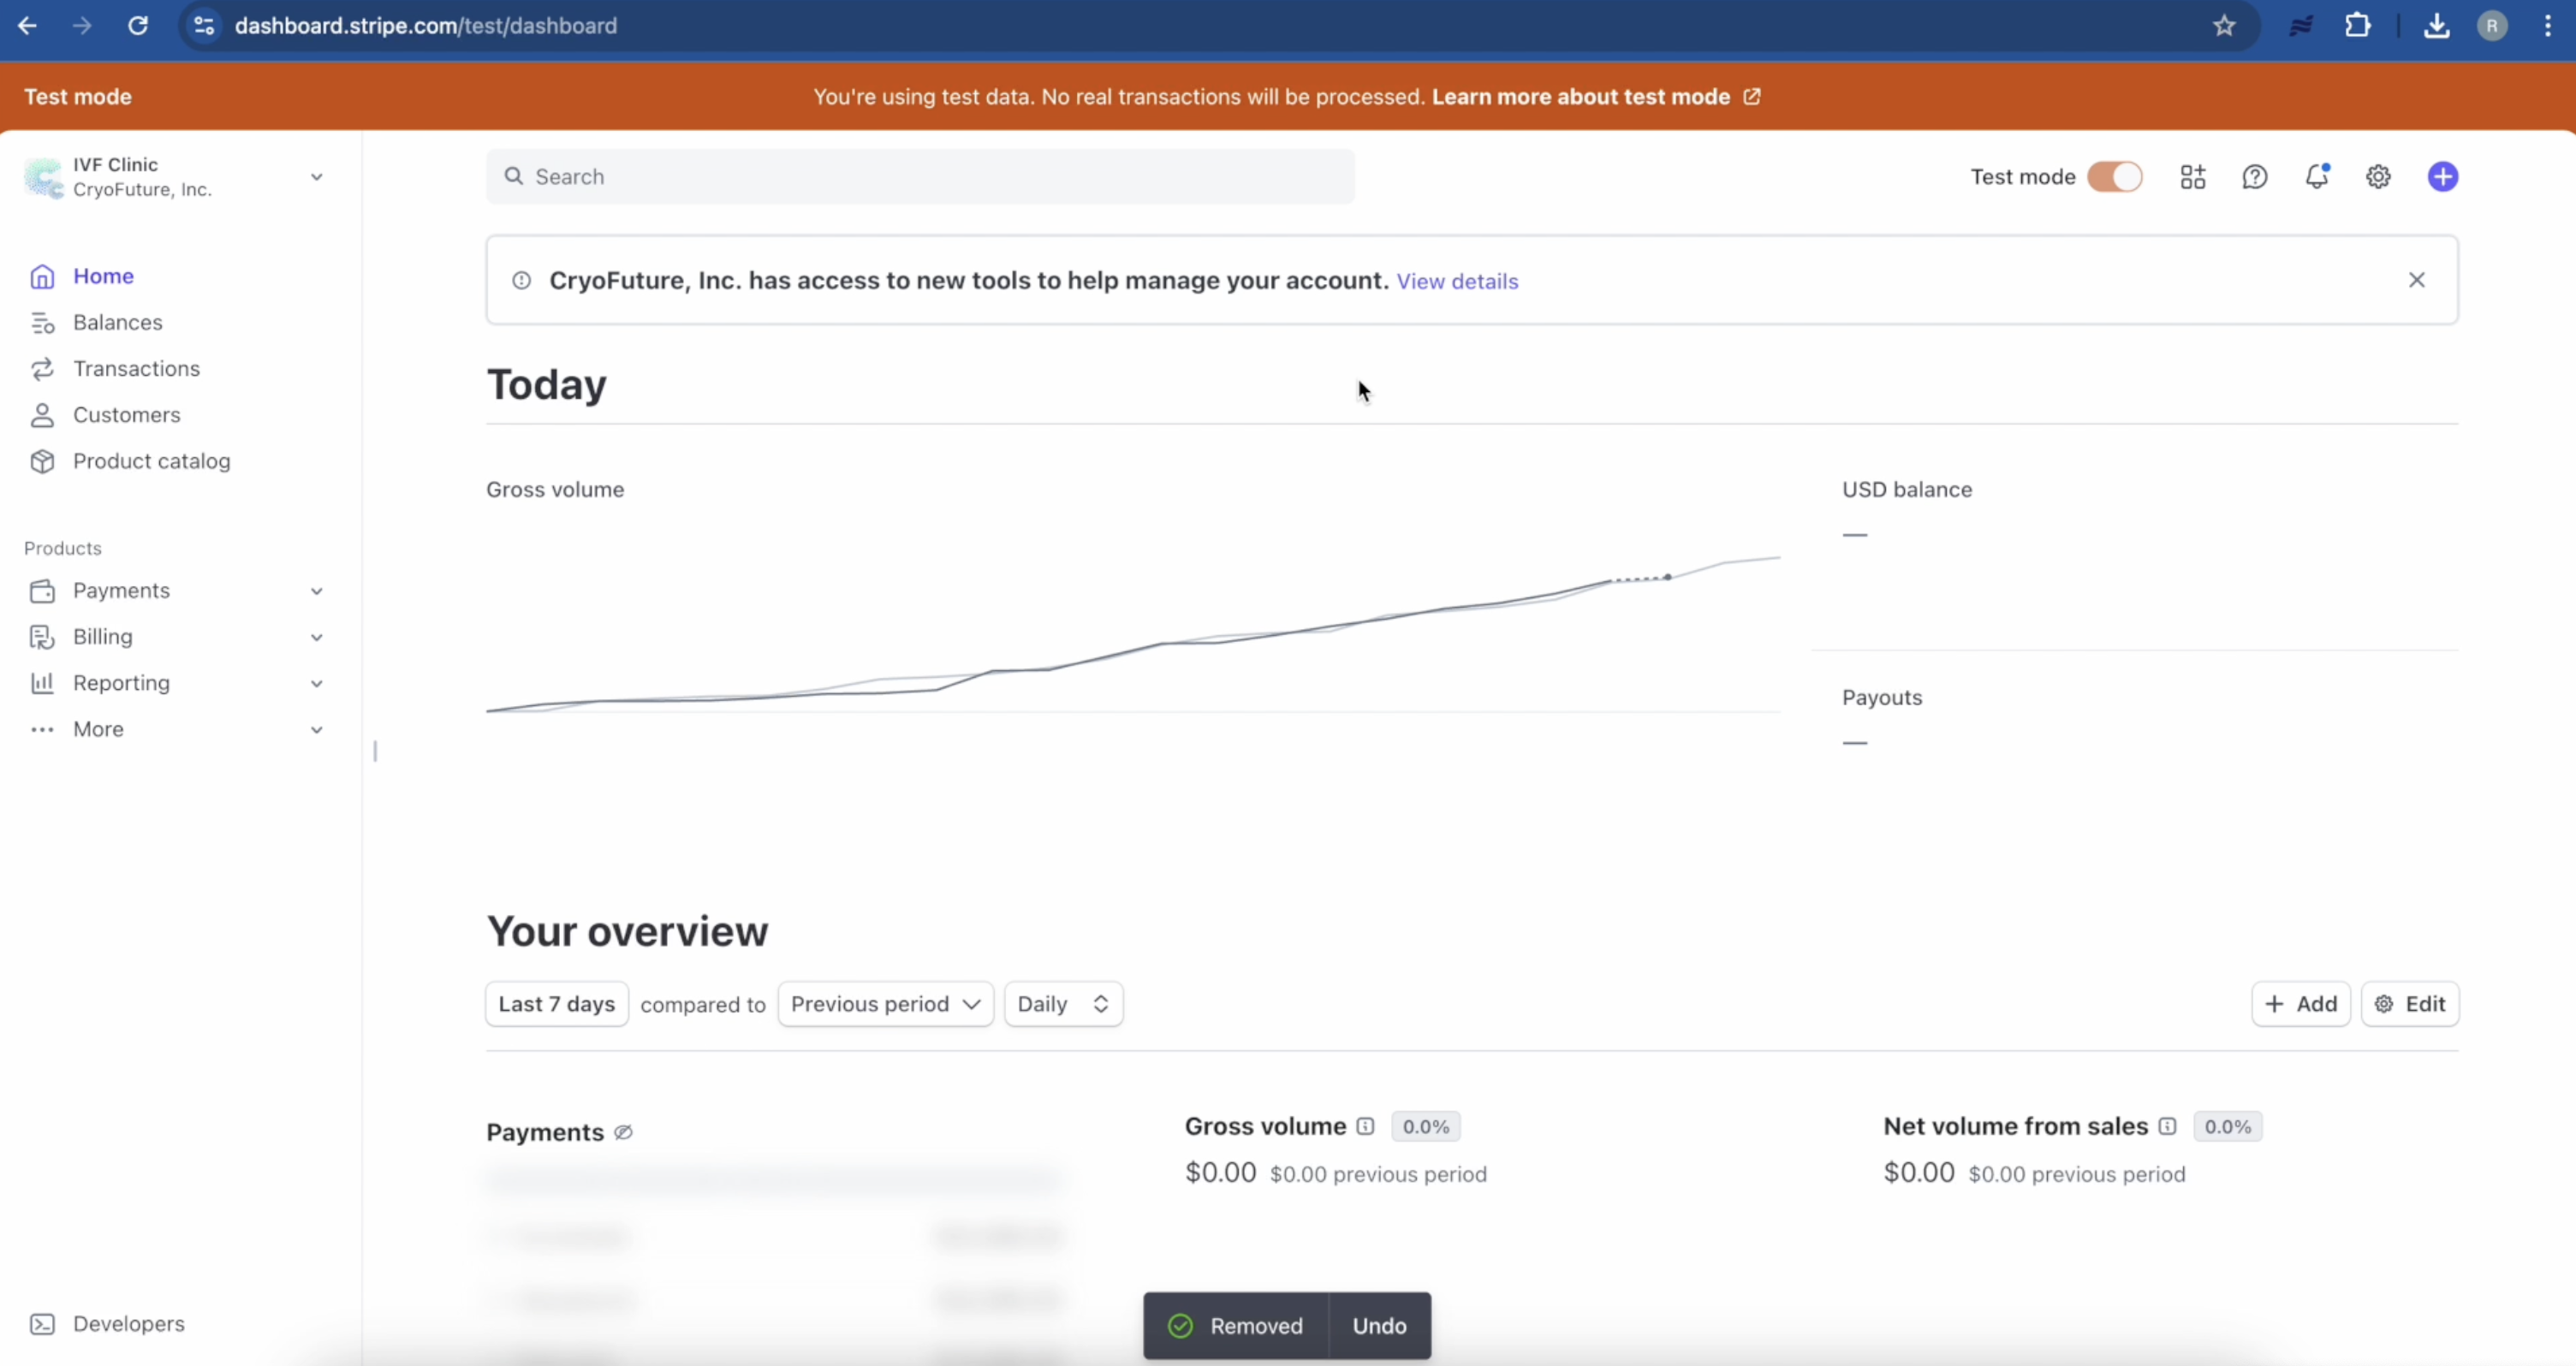
Check your CryoFuture dashboard to see when your payment account status changes from "Pending Approval" to fully approved.
Troubleshooting
Common Issues:
- Incorrect Information: Log in to your Stripe dashboard to update information or contact Stripe support.
- 2FA Issues: Use your backup codes or contact Stripe support for account recovery.
- Verification Delays: Check for any requests for additional documentation in your Stripe dashboard.
4. How to Add an Off-App Payment
- Access to the CryoFuture platform
- Logged in with clinic admin privileges
Overview
Use this workflow to record a payment that was collected outside the CryoFuture platform and apply it to an existing charge or create a new charge. Adding the payment keeps the patient's balance and payment history accurate.
From the main dashboard, search for and open the patient whose payment you need to record.
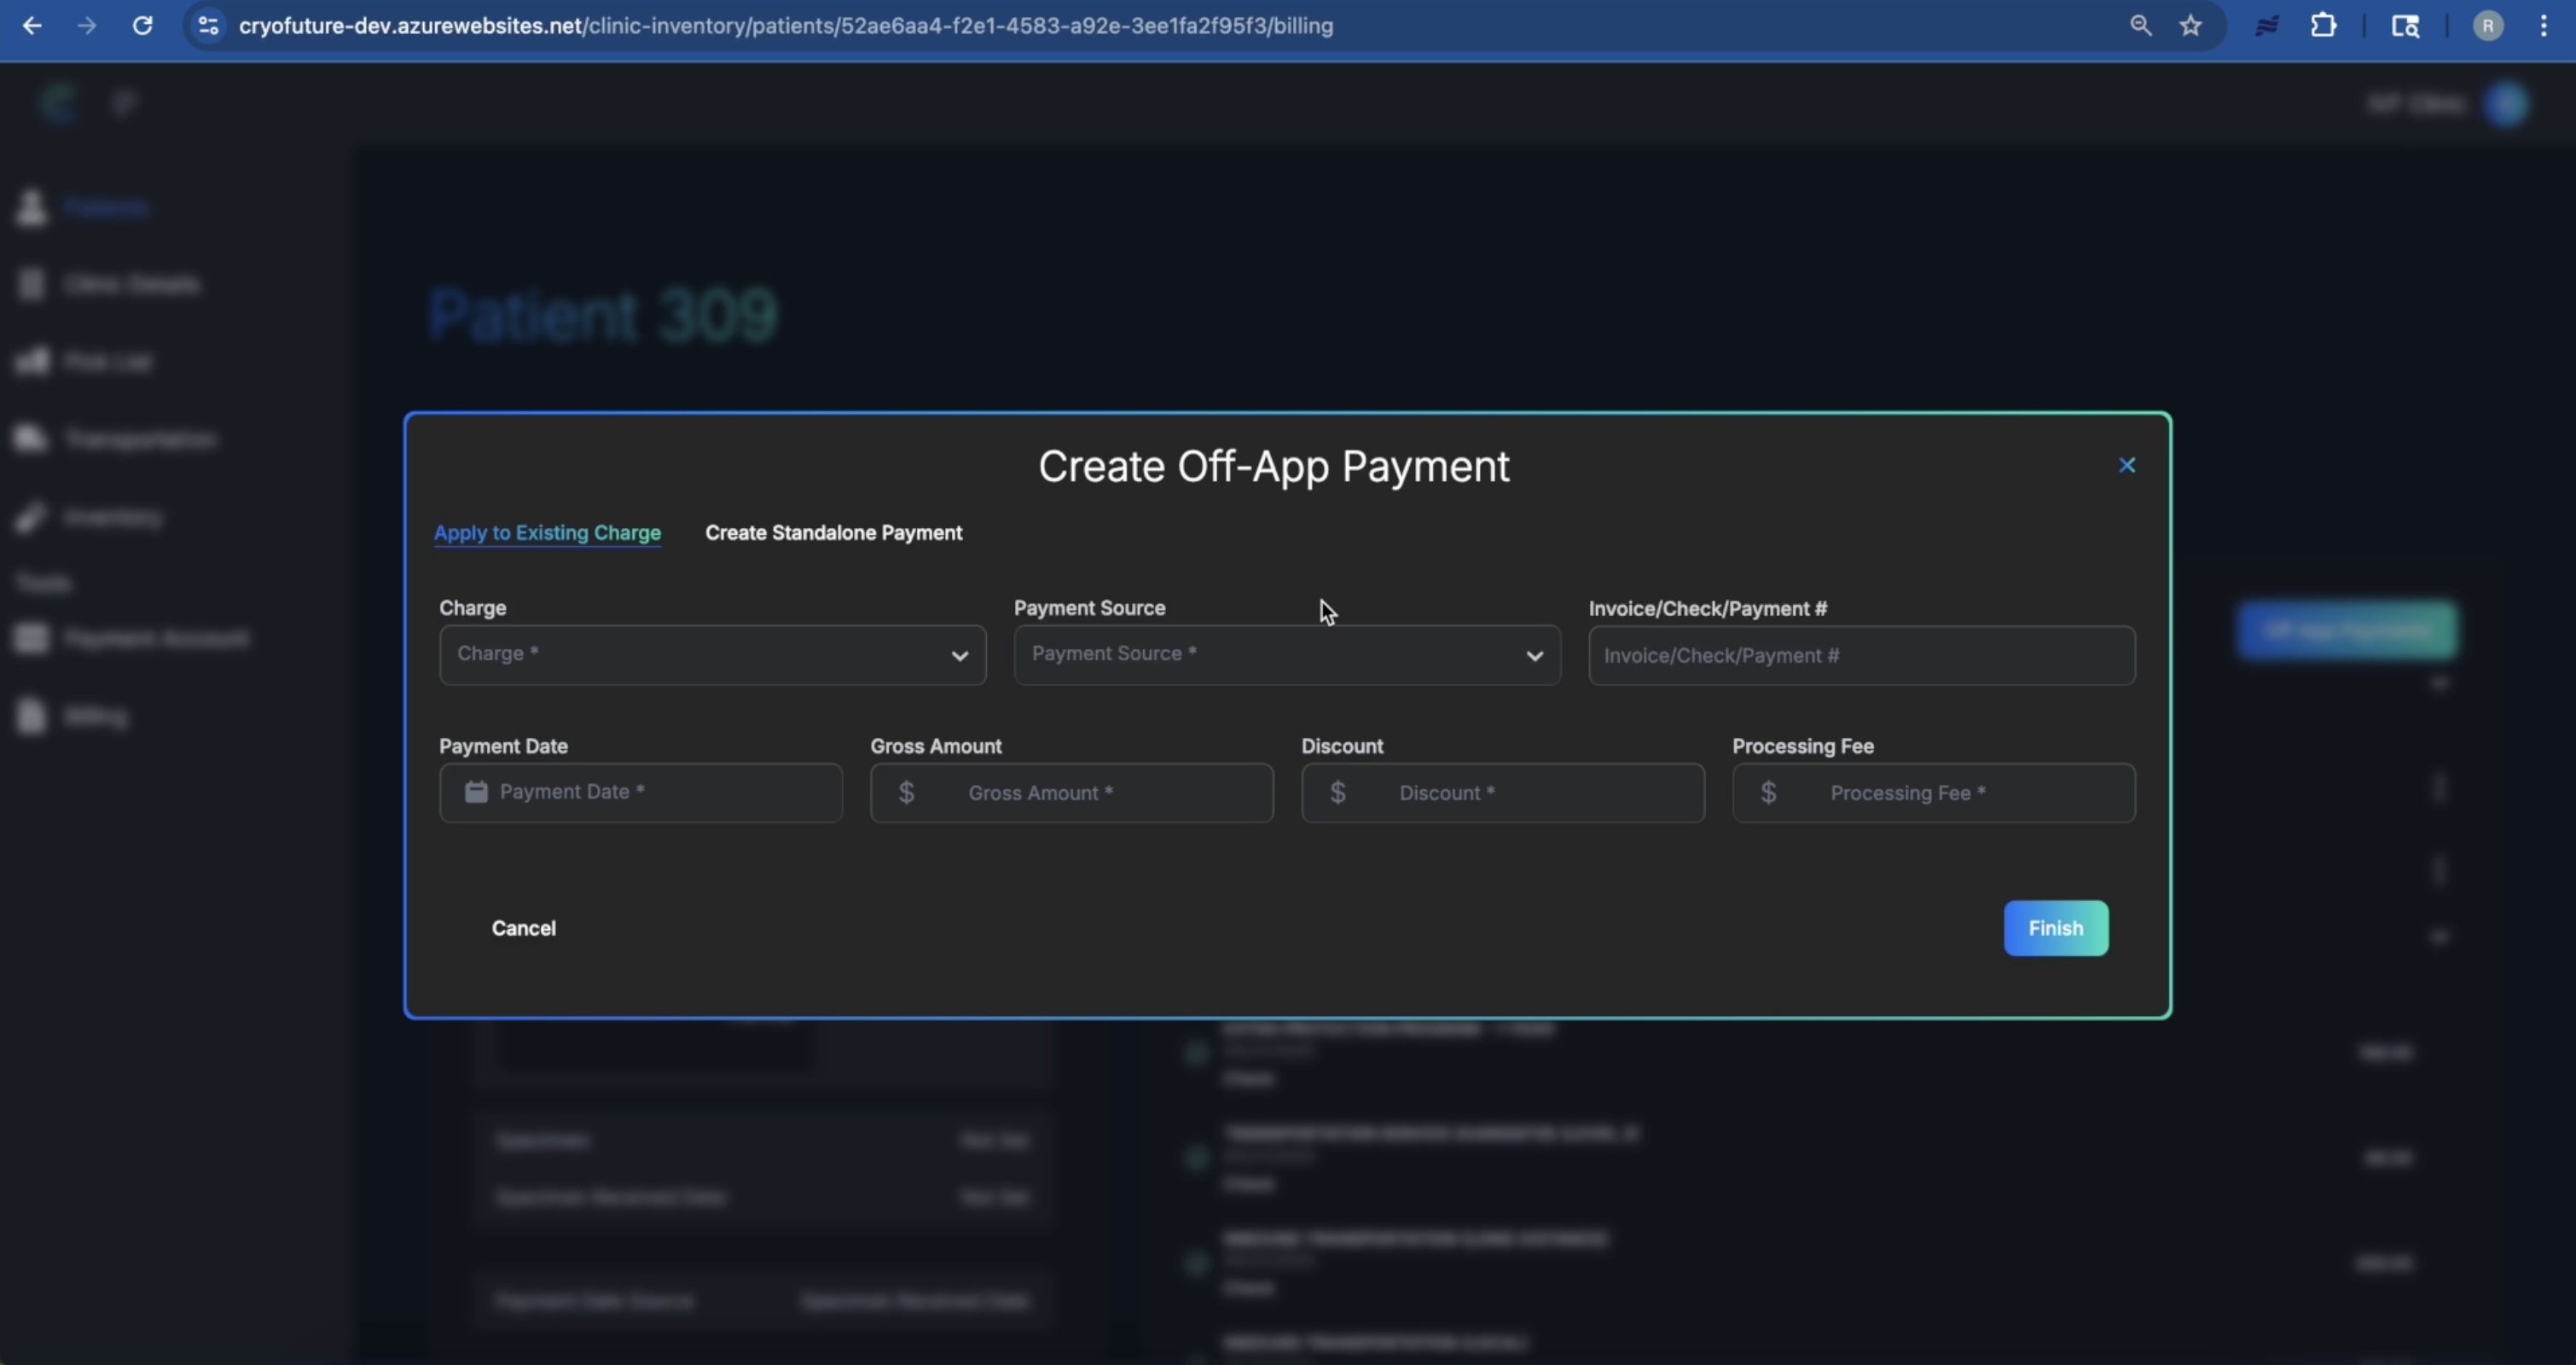
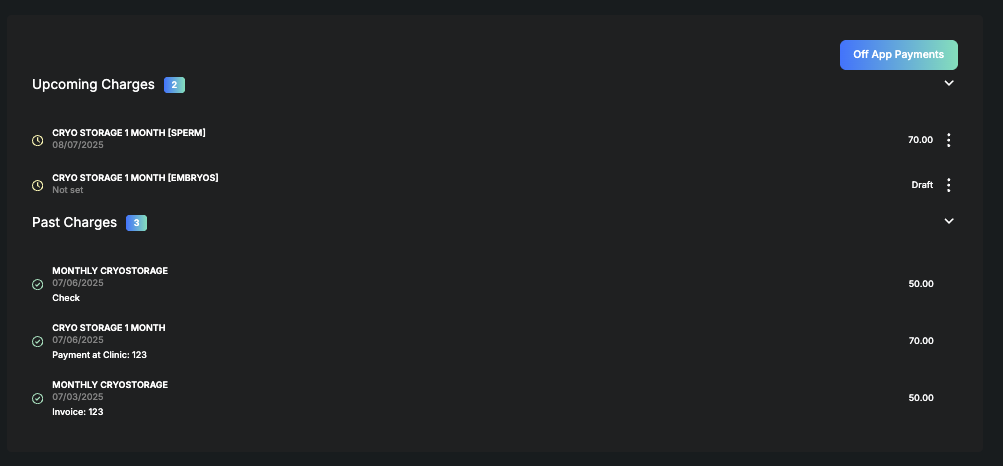
Click Billing in the top menu. The Upcoming and Past Charges panel appears on the right; Click "Add Off-App Payment"
- Apply to Existing Charge – Match the payment to an open invoice
- Create Stand-Alone Payment – Record a payment that is not tied to one specific charge
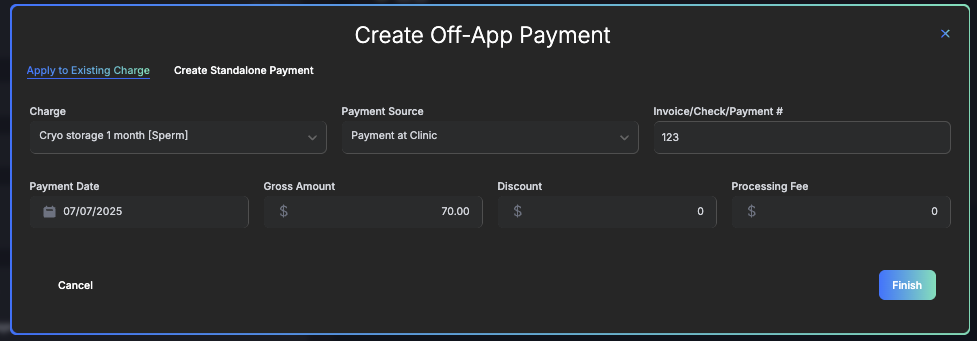
- Charge Type: choose the category that best fits the payment
- Payment Source: Cash, Check, External Card, or Other
- Invoice / Check / Payment #: optional reference or transaction ID
- Payment Date: use the date picker or type MM/DD/YYYY
- Gross Amount: full amount collected
- Discount: any discount applied
- Processing Fee: fee deducted by the processor
Click Finish and the payment will now appear in the Past Charges section of the patient's billing profile, and all balances update automatically.
Video Tutorial Available: For a visual walkthrough of this process, check out our video tutorial.
5. How to Stop a Payment
- Access to the CryoFuture platform
- Logged in with clinic admin privileges
Overview
This guide explains how to pause or stop billing for a patient within the CryoFuture platform.
Navigate to the profile of the patient whose billing needs to be updated.

Click on the Billing tab and look for the Upcoming Charge section on the right.

You'll see two options:
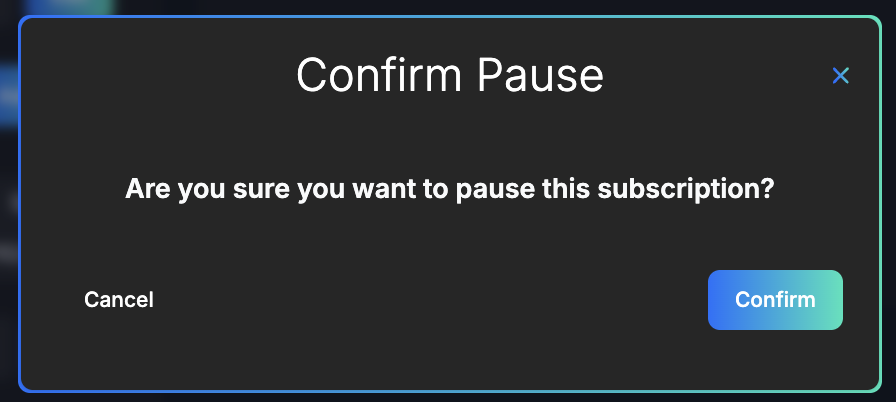
- Pause Billing: Use this when billing needs to be temporarily halted—such as when resolving insurance issues or addressing patient questions.
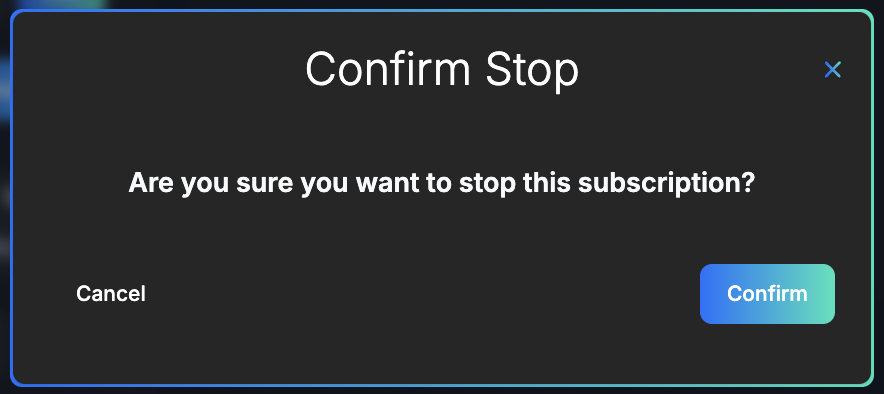
- Stop Billing: Select this when the patient will no longer be charged going forward. This action effectively deactivates all future payments for the patient.
A confirmation prompt will appear. Review your selection and click Confirm to finalize the update.
6. How to Toggle Insurance On or Off
- Access to the CryoFuture platform
- Logged in with clinic admin privileges
Overview
This guide walks you through the steps to enable or disable insurance for a patient within the CryoFuture platform.
Navigate to the patient's profile you want to update.
Click on the Billing tab and scroll to the Insurance Details section.

Select the Edit button within the Insurance Details section.
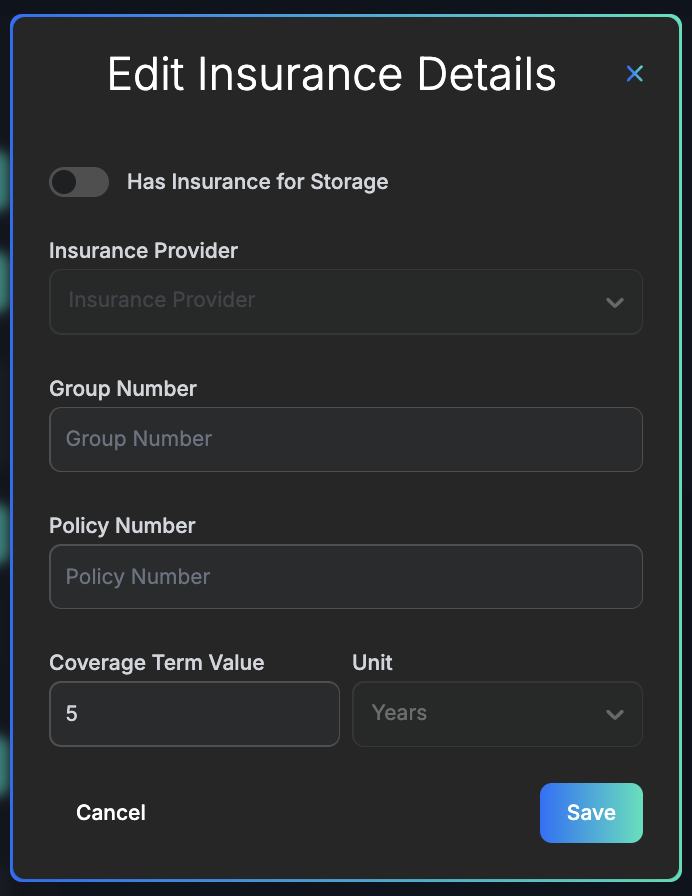
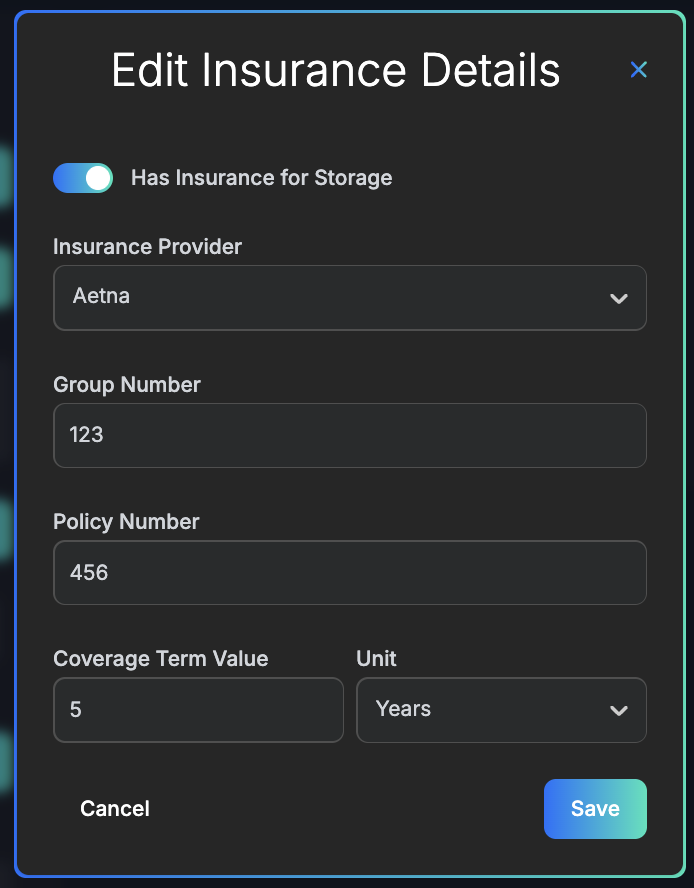
Use the toggle switch at the top to enable or disable insurance for the patient.
If enabling insurance, you'll be required to enter the following:
- Provider Name
- Group Number
- Policy Number
- Coverage Term
7. Using the Inventory Tab
- Access to the CryoFuture system with Clinic Admin credentials.
Overview
This section explains how to use the Inventory tab to view, filter, and manage all canes associated with your clinic, including those stored at your facility and at CryoFuture's storage centers.
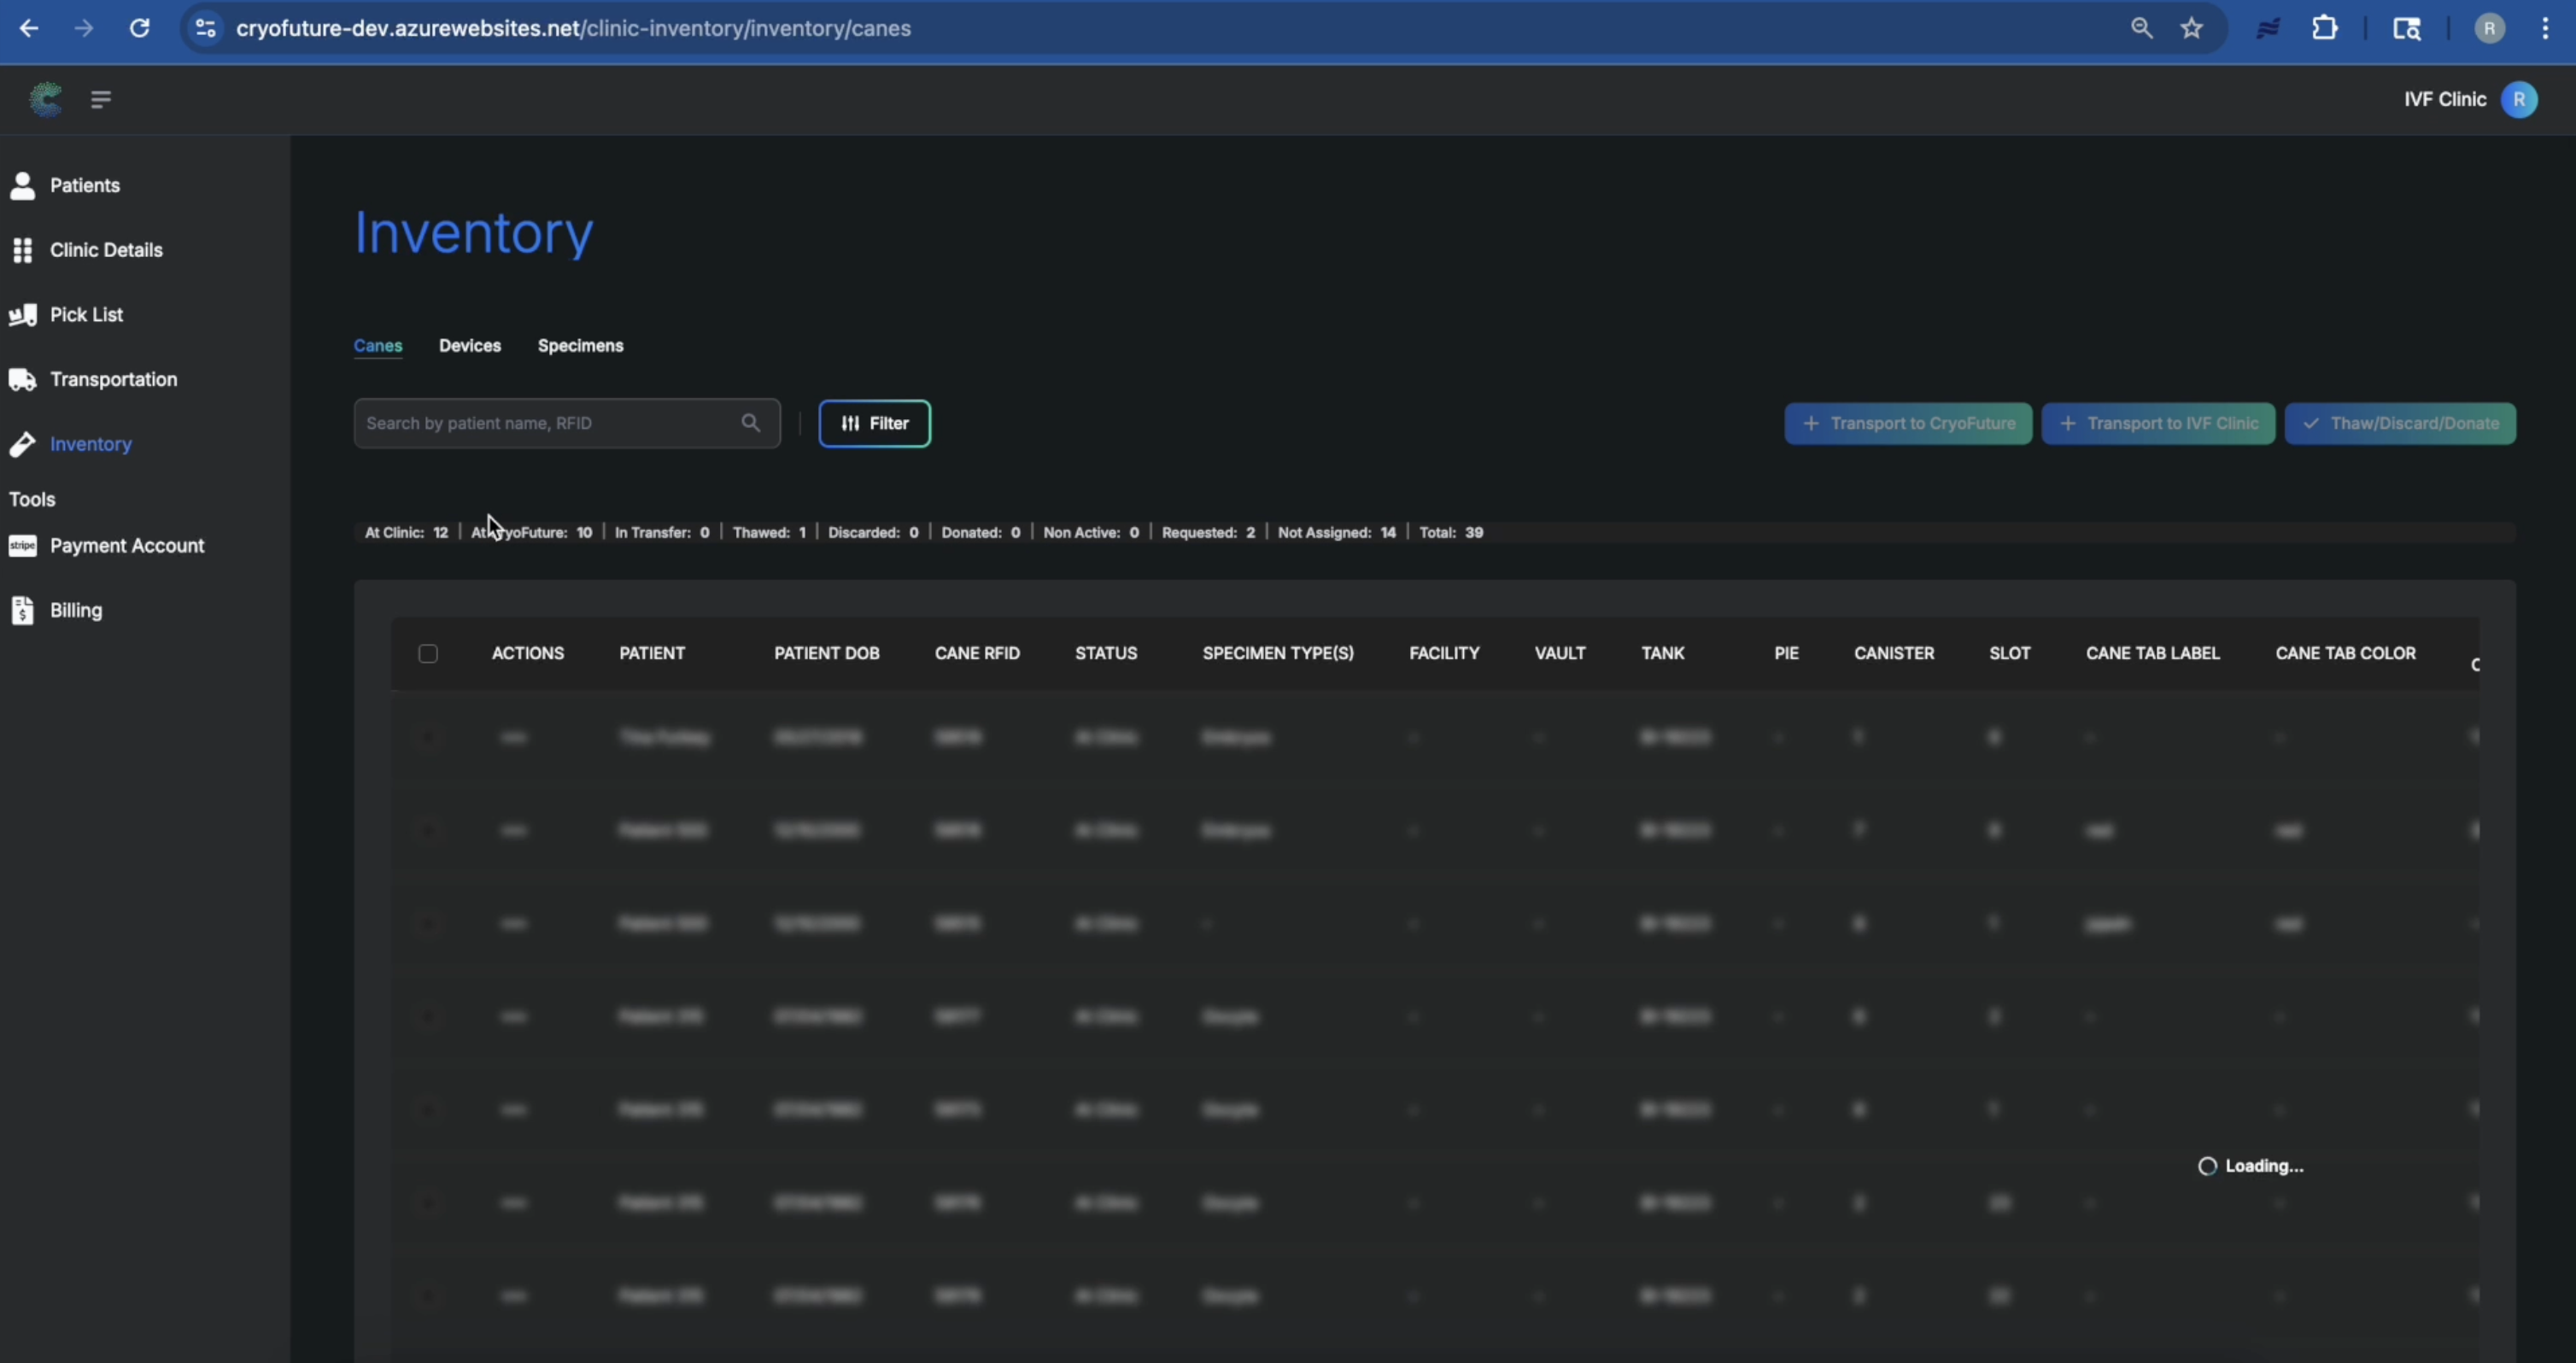
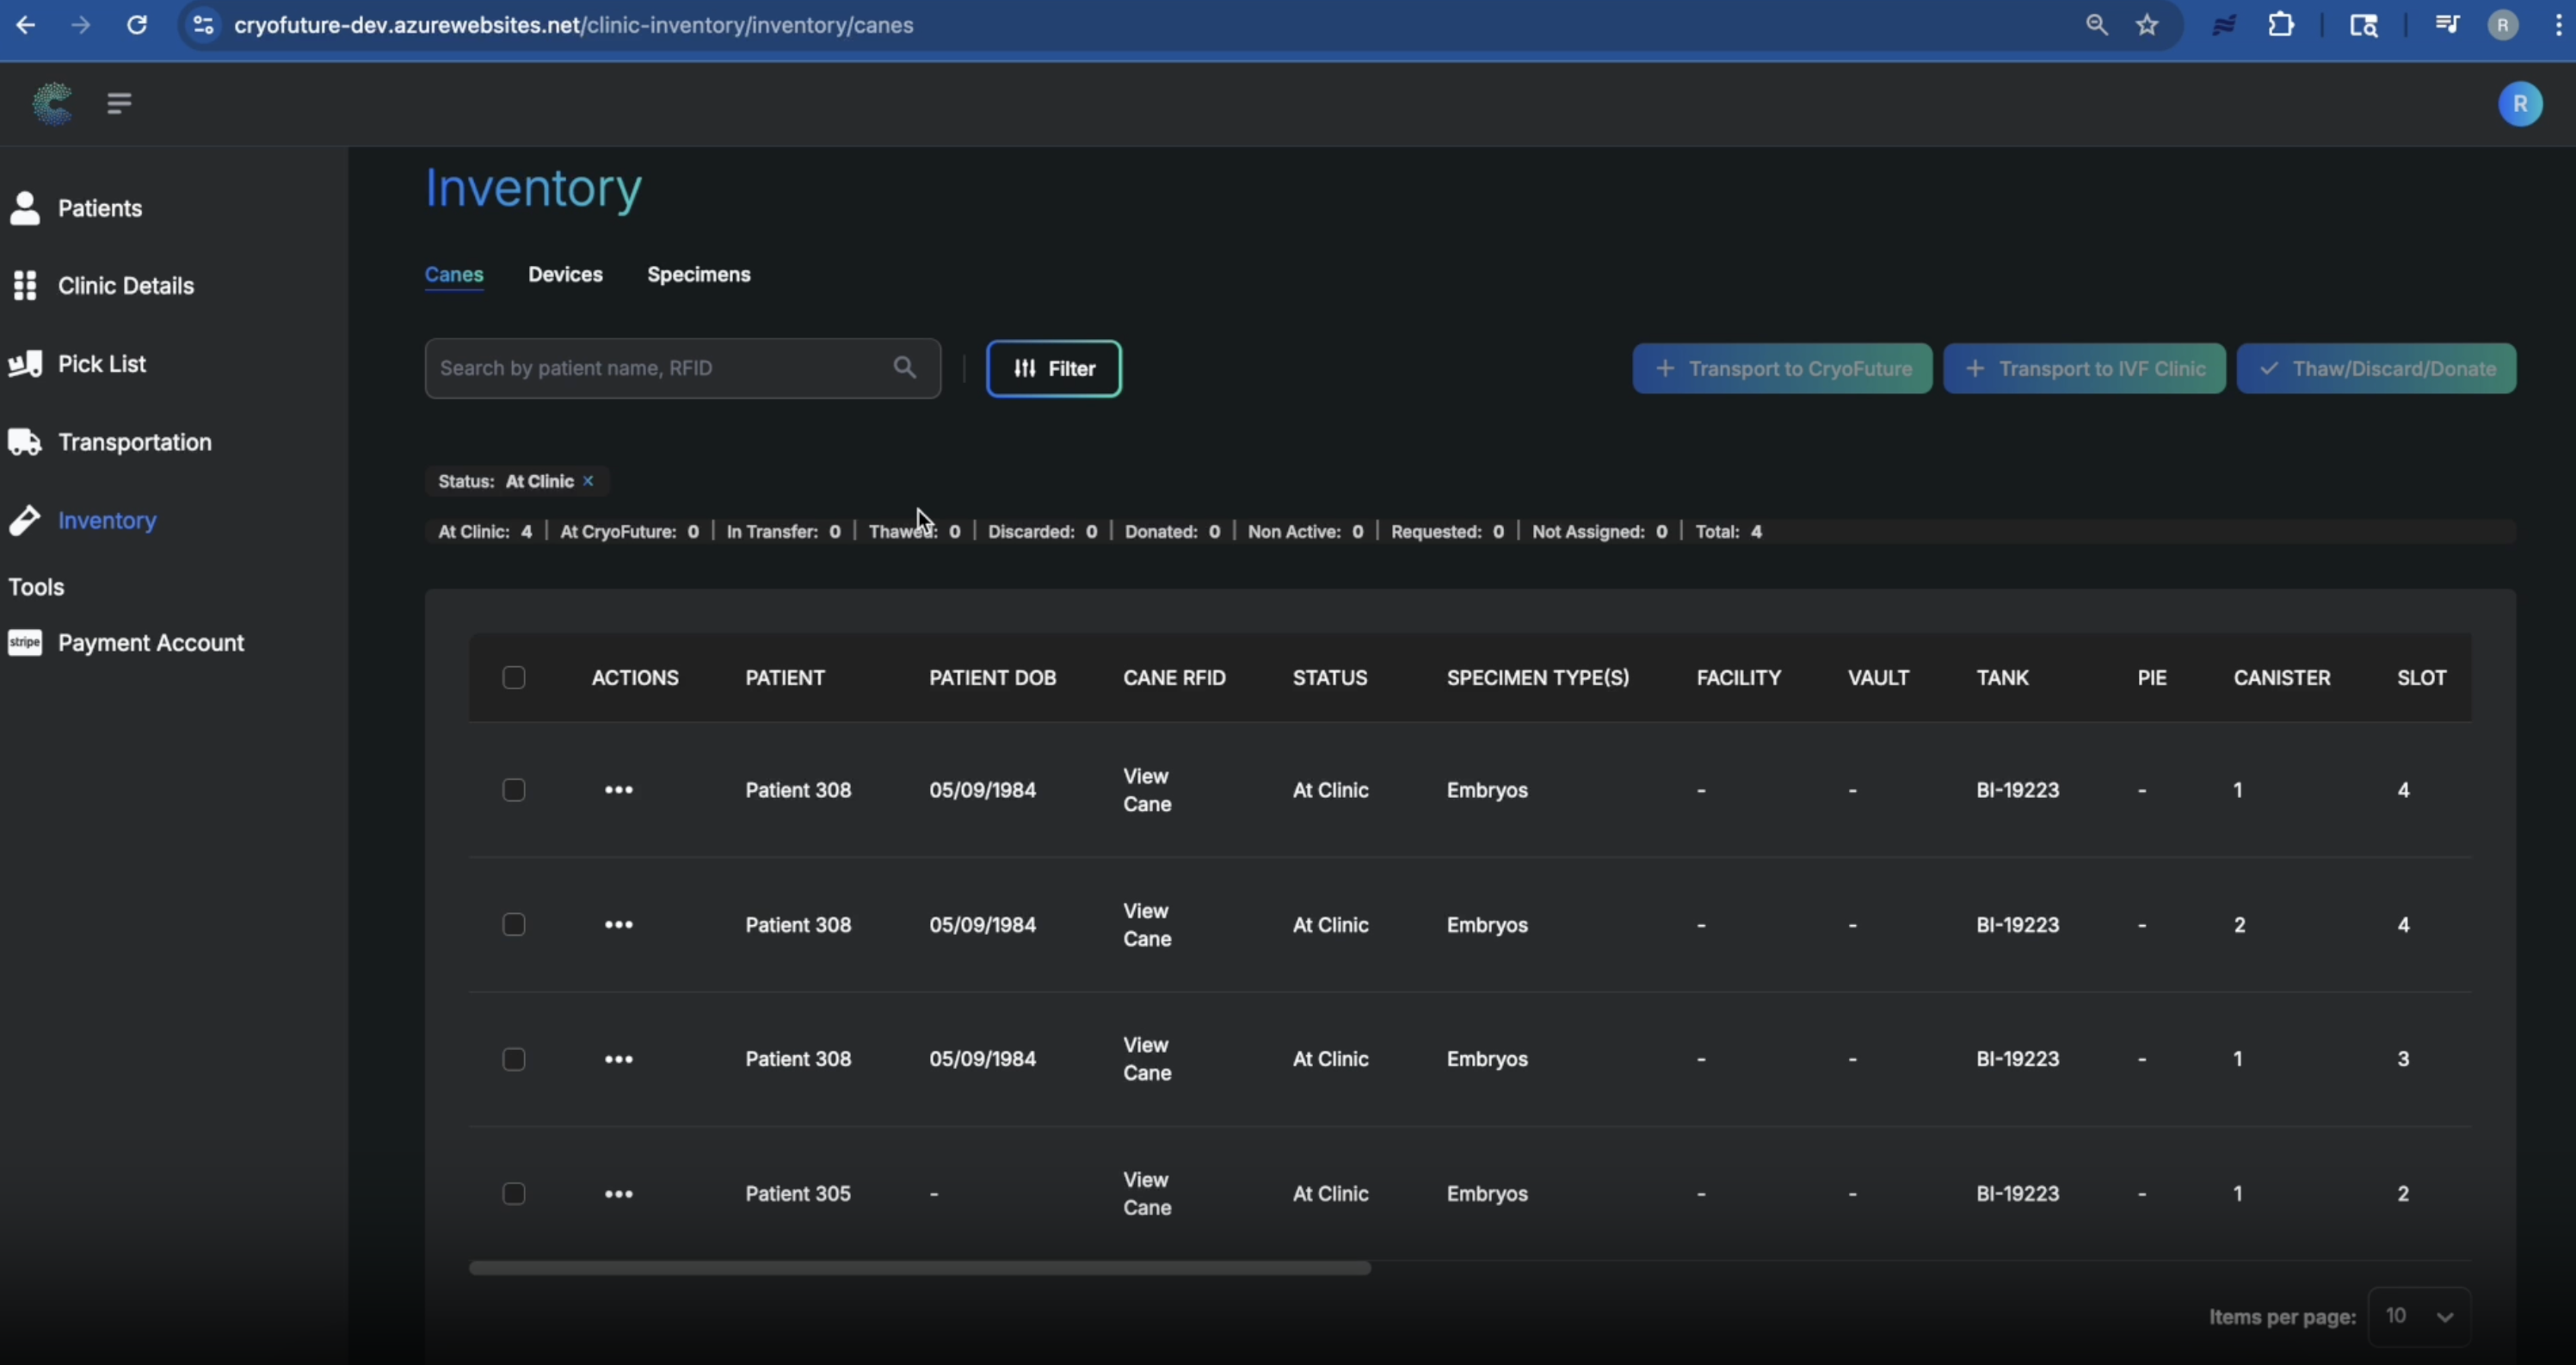
Log in to CryoFuture and navigate to the "Inventory" tab. This will display a default view of items stored at your clinic.
Review the counts at the top of the table to see a quick overview of your inventory distribution across different locations and statuses.

To see a complete list of all inventory, remove the default "At Clinic" filter. The table will then populate with all canes associated with your clinic, regardless of location.
Select the "At CryoFuture" filter to view all inventory that is currently stored at CryoFuture's storage centers.
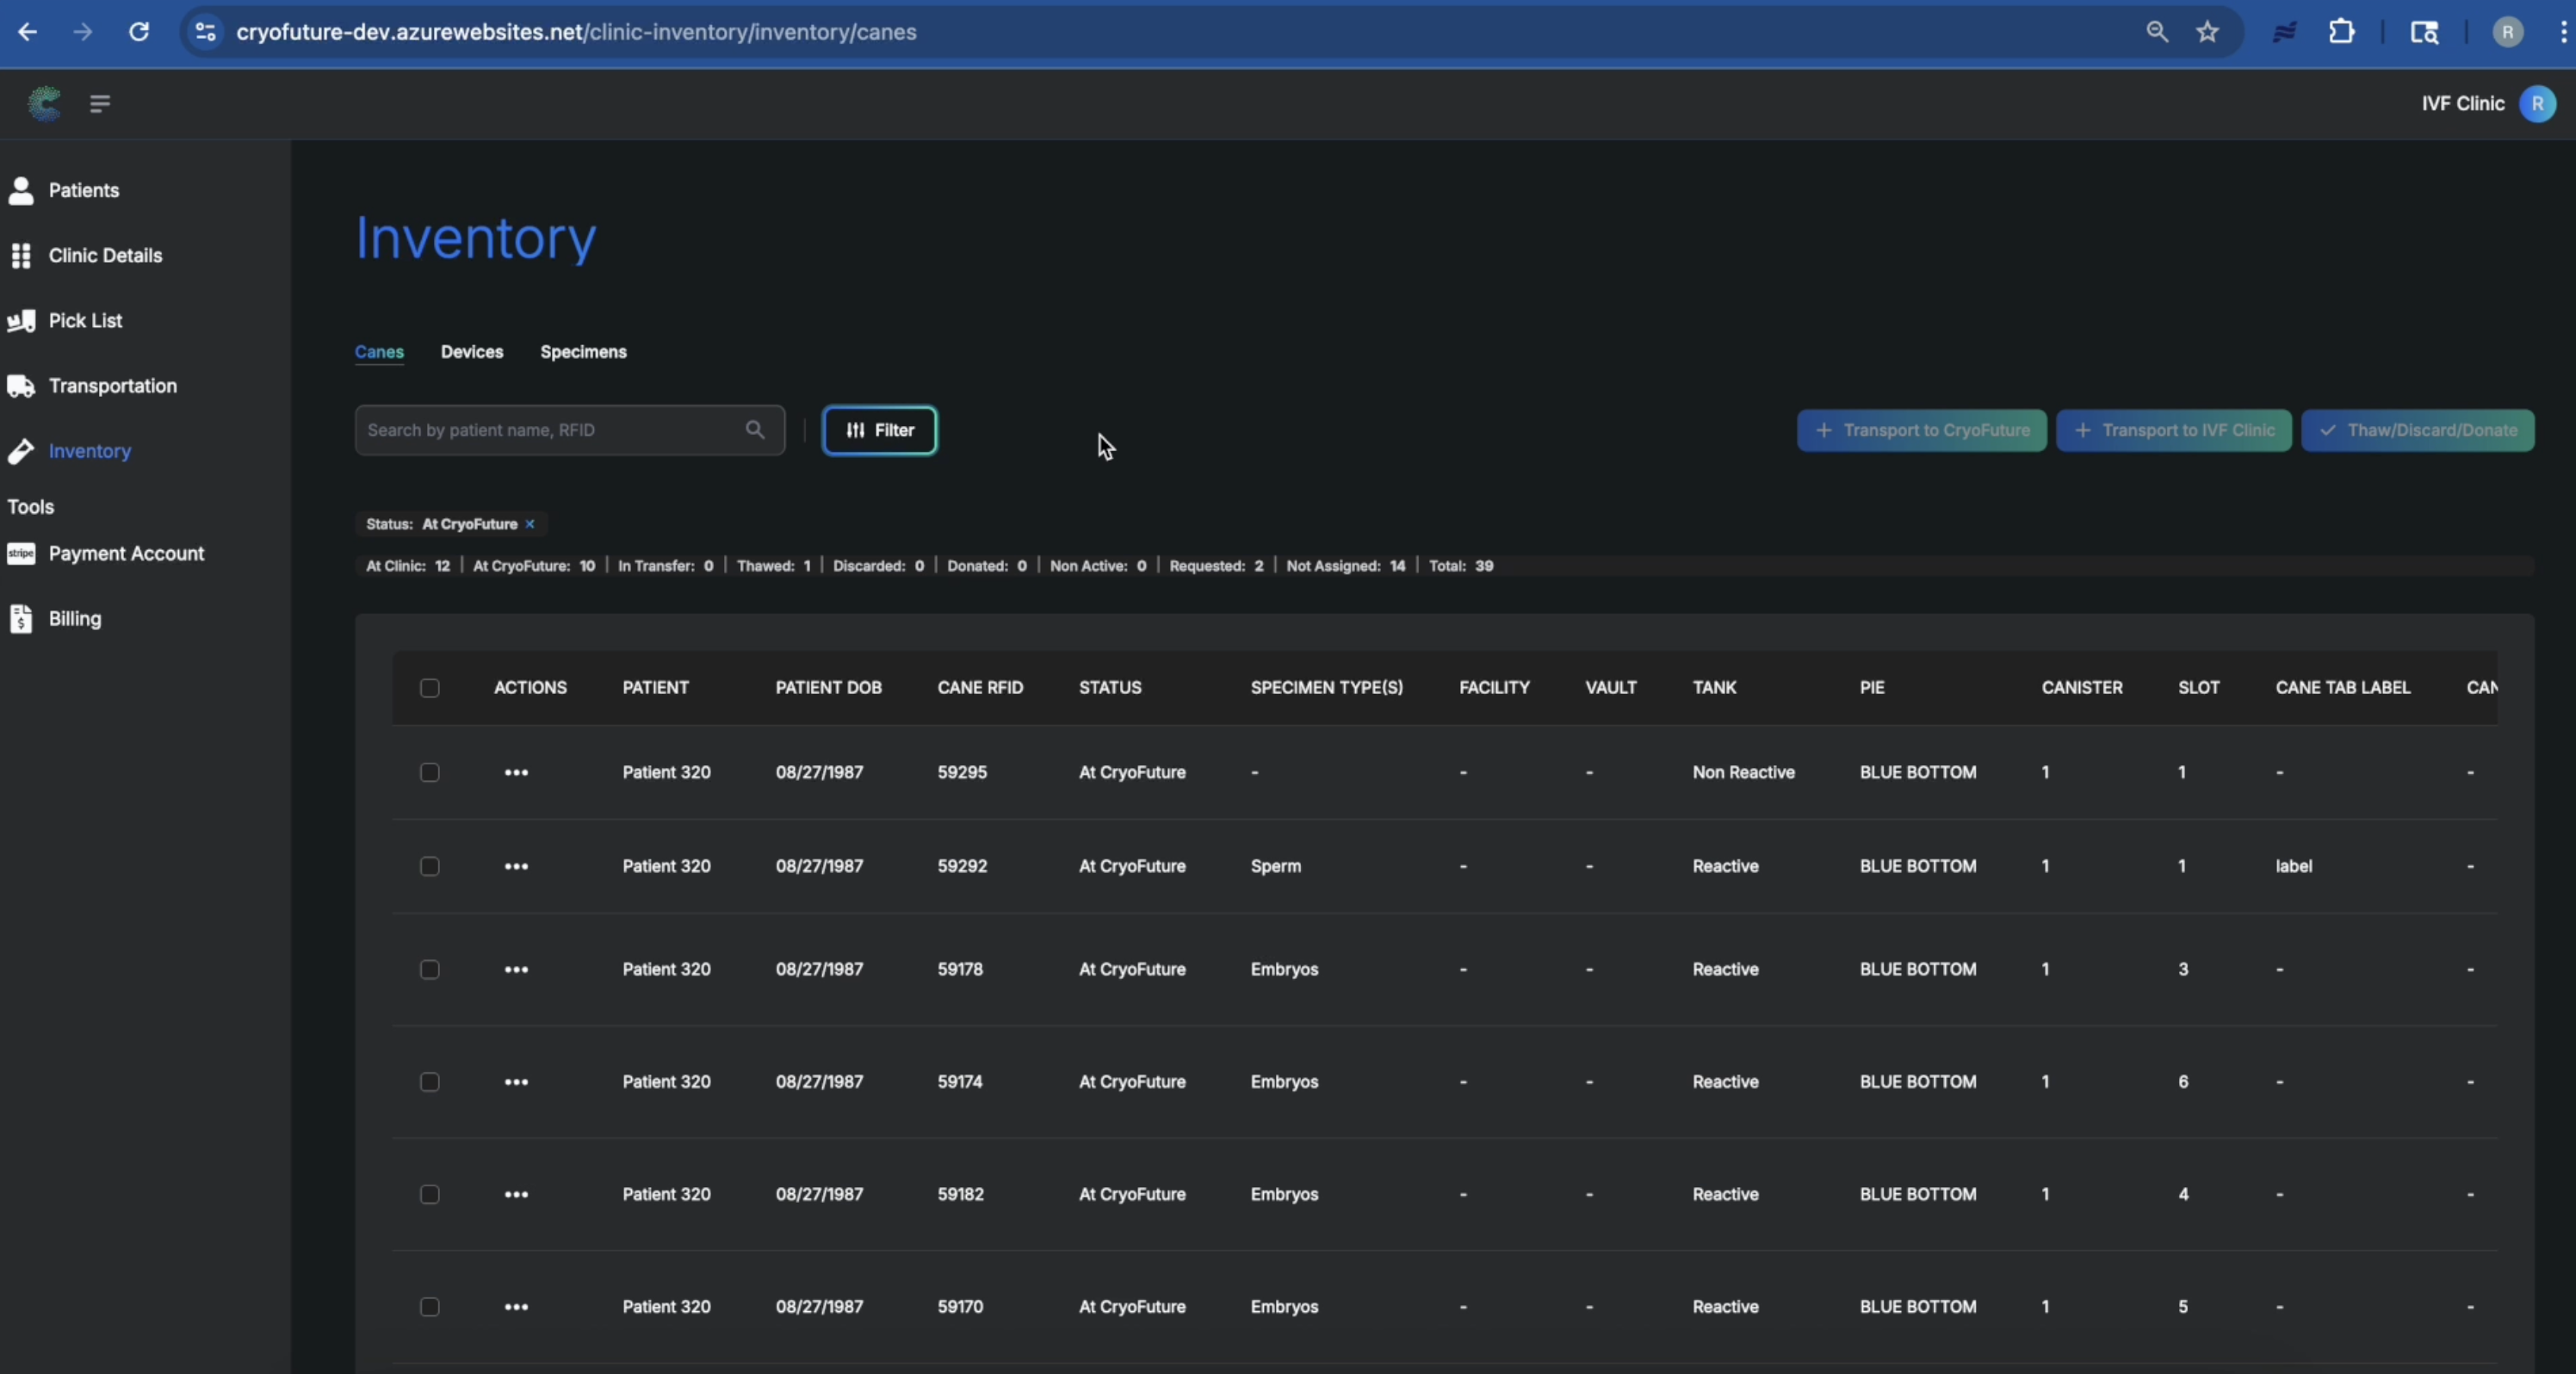
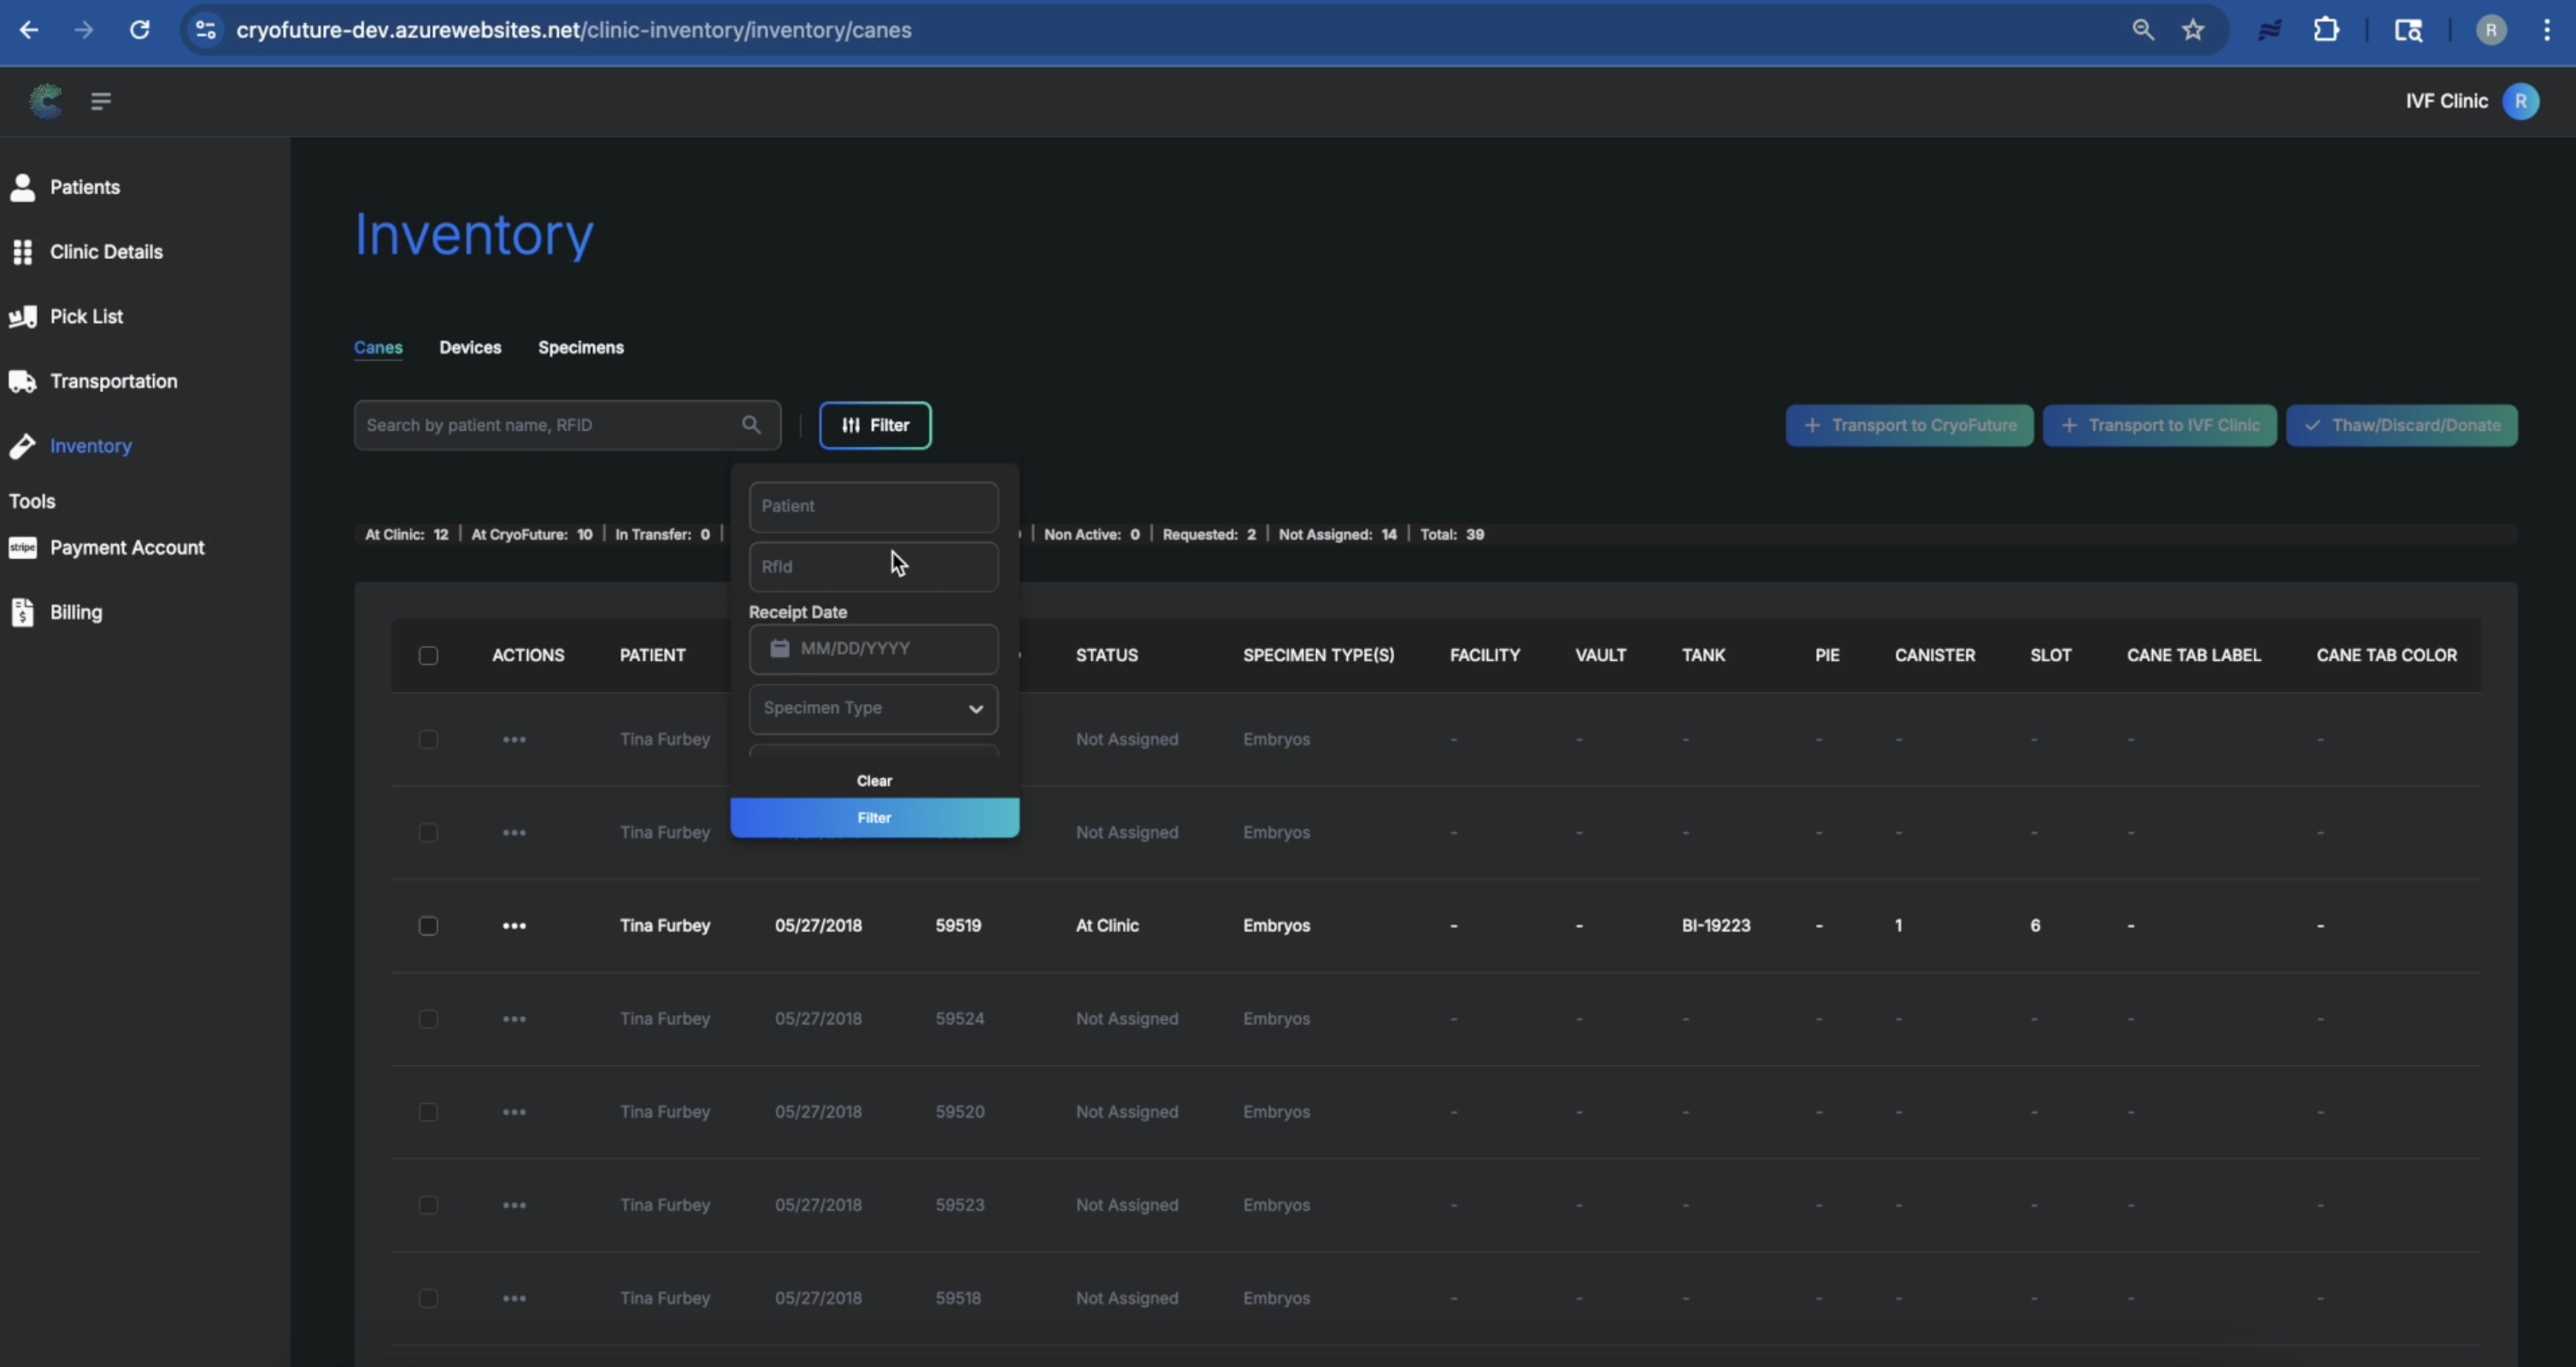
Use the filter options to search for specific canes based on patient, RFID, receipt date, storage location, or status. You can apply multiple filters to narrow down your search.
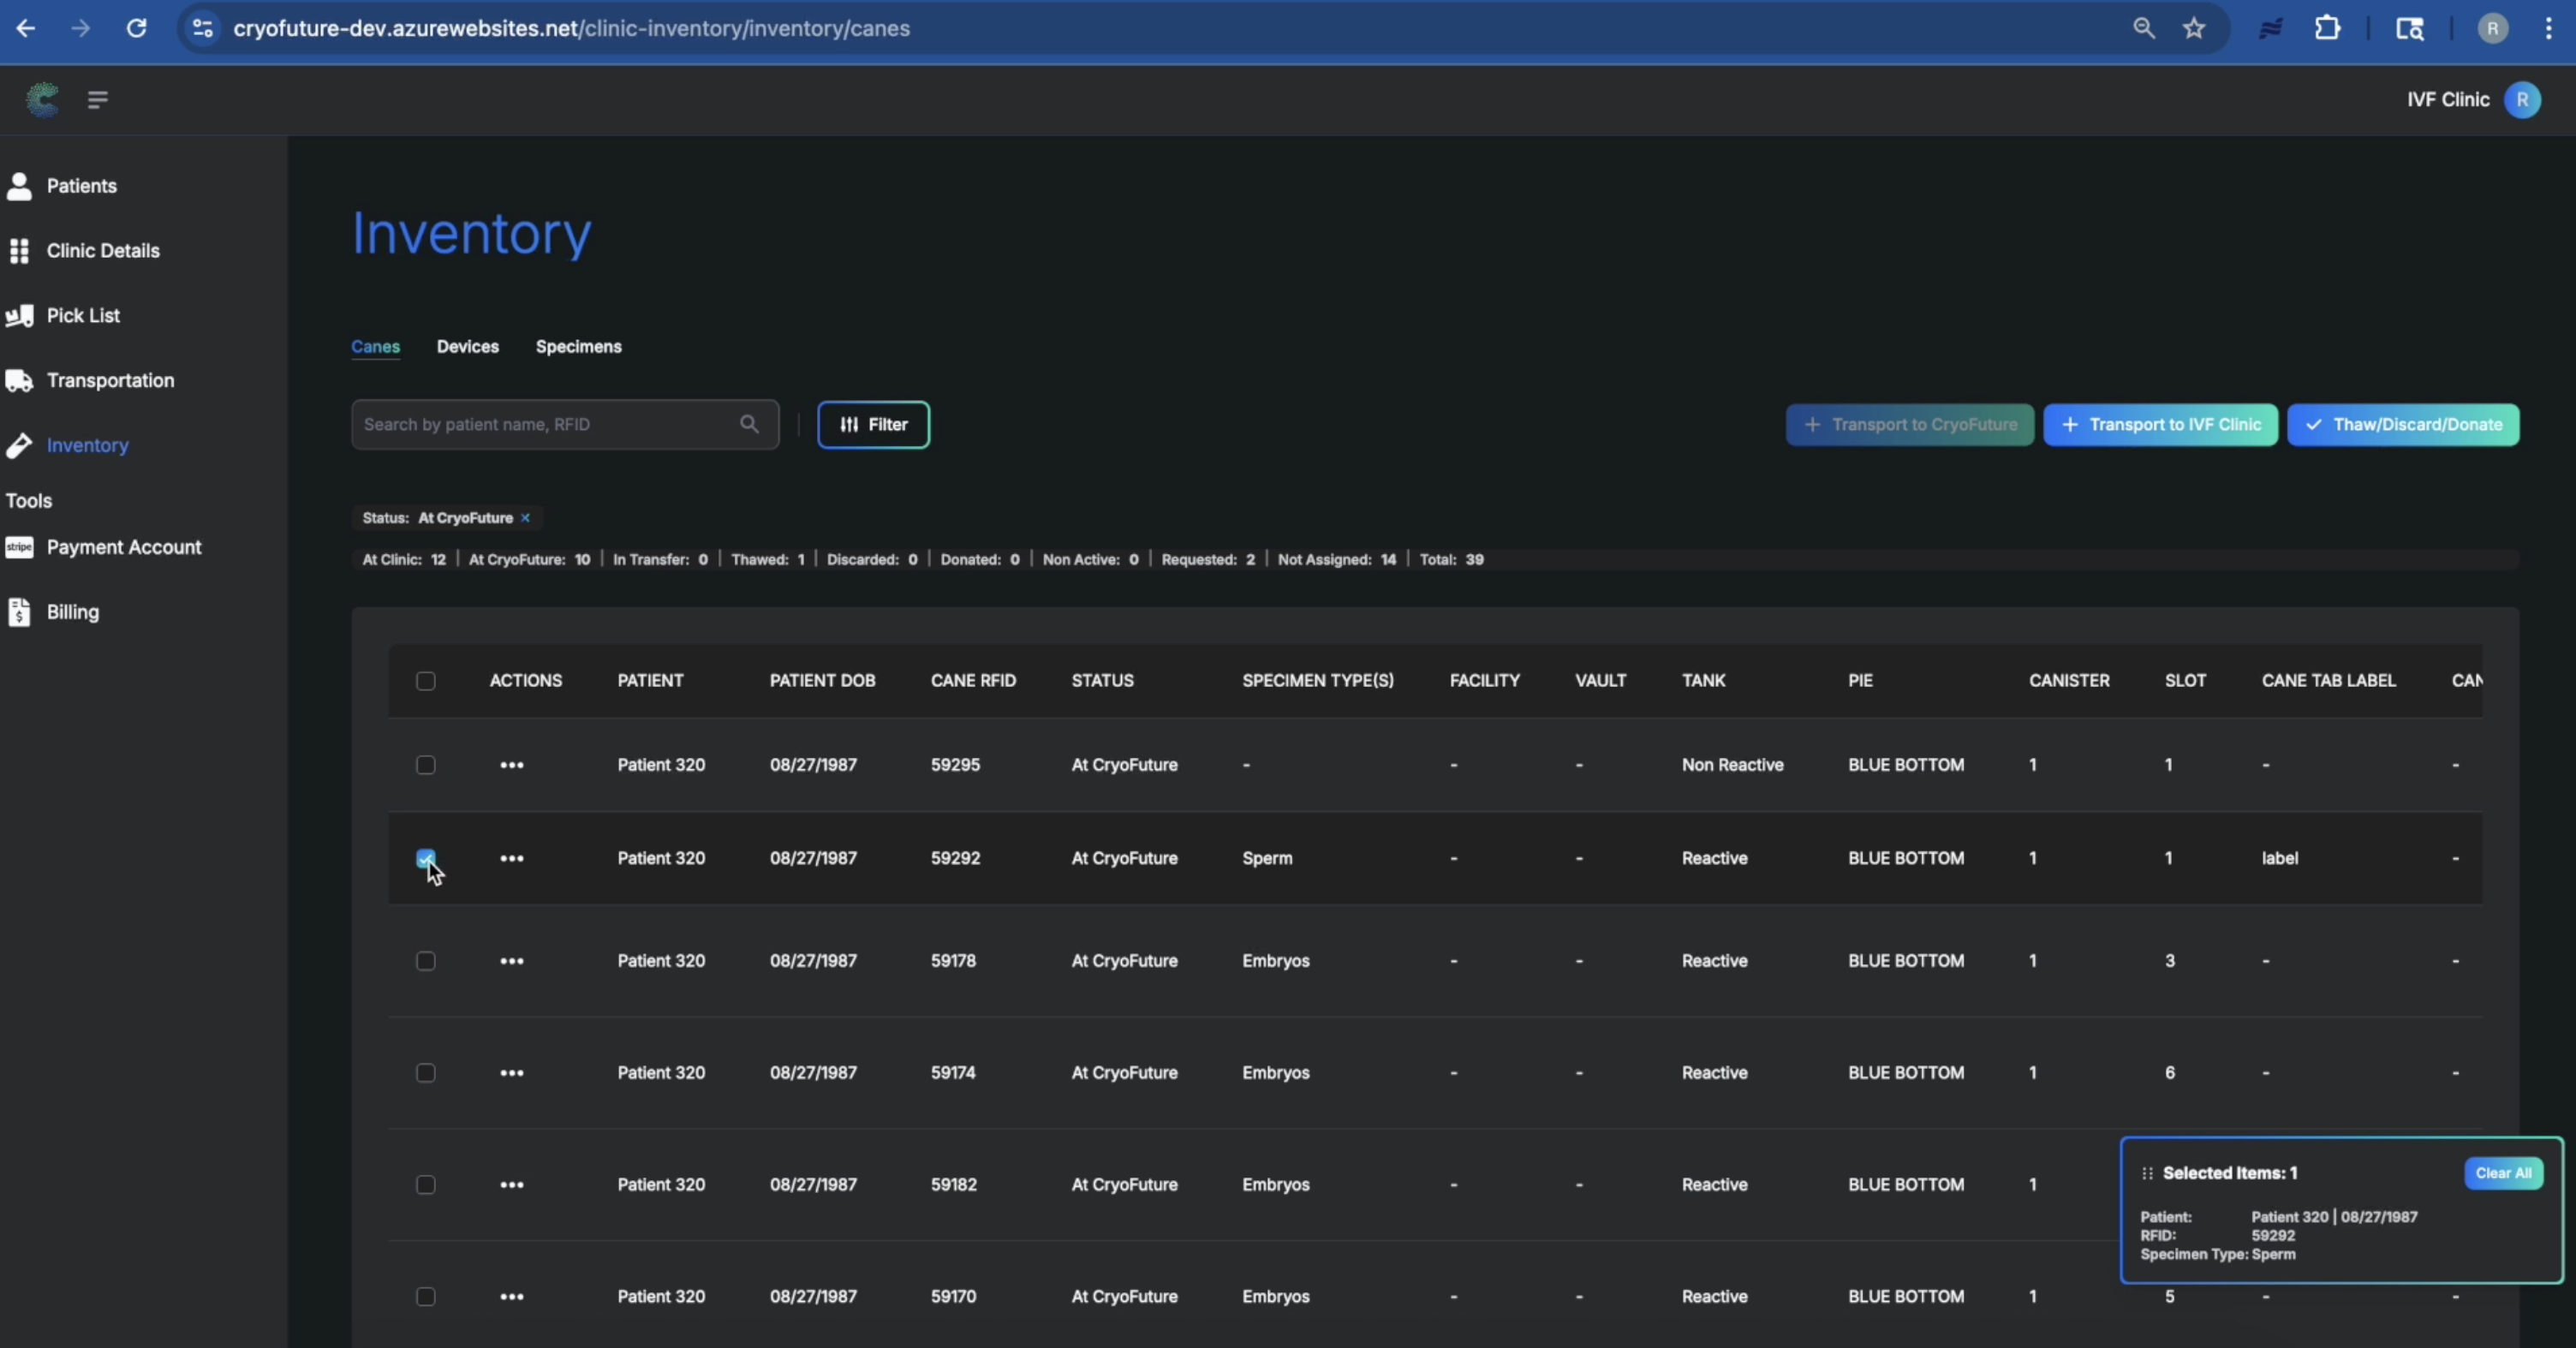
Select one or more canes by checking the box next to them. This will enable options to initiate actions such as transporting them back to your clinic, or starting the thaw or discard process.
Troubleshooting
Common Issues:
- Not seeing all canes: Ensure all filters are cleared, then refresh the page.
- Unable to perform actions: Verify you have the necessary permissions and that the cane's status allows for the action.
- Filter not working: Double-check your filter criteria for accuracy.
8. How to Transfer Specimens Back to Your Clinic
- Access to the CryoFuture system with Clinic Admin credentials
- Specimens stored at CryoFuture that need to be transferred back to your clinic
Overview
As a clinic admin, you can initiate a return transfer for specimens directly from the Inventory tab. This process allows you to send items back from CryoFuture storage to your clinic safely and efficiently.
Navigate to the Inventory tab from the sidebar. Use either single select by clicking the checkbox next to one specimen, or bulk select by using the checkbox in the table header to select multiple specimens at once.
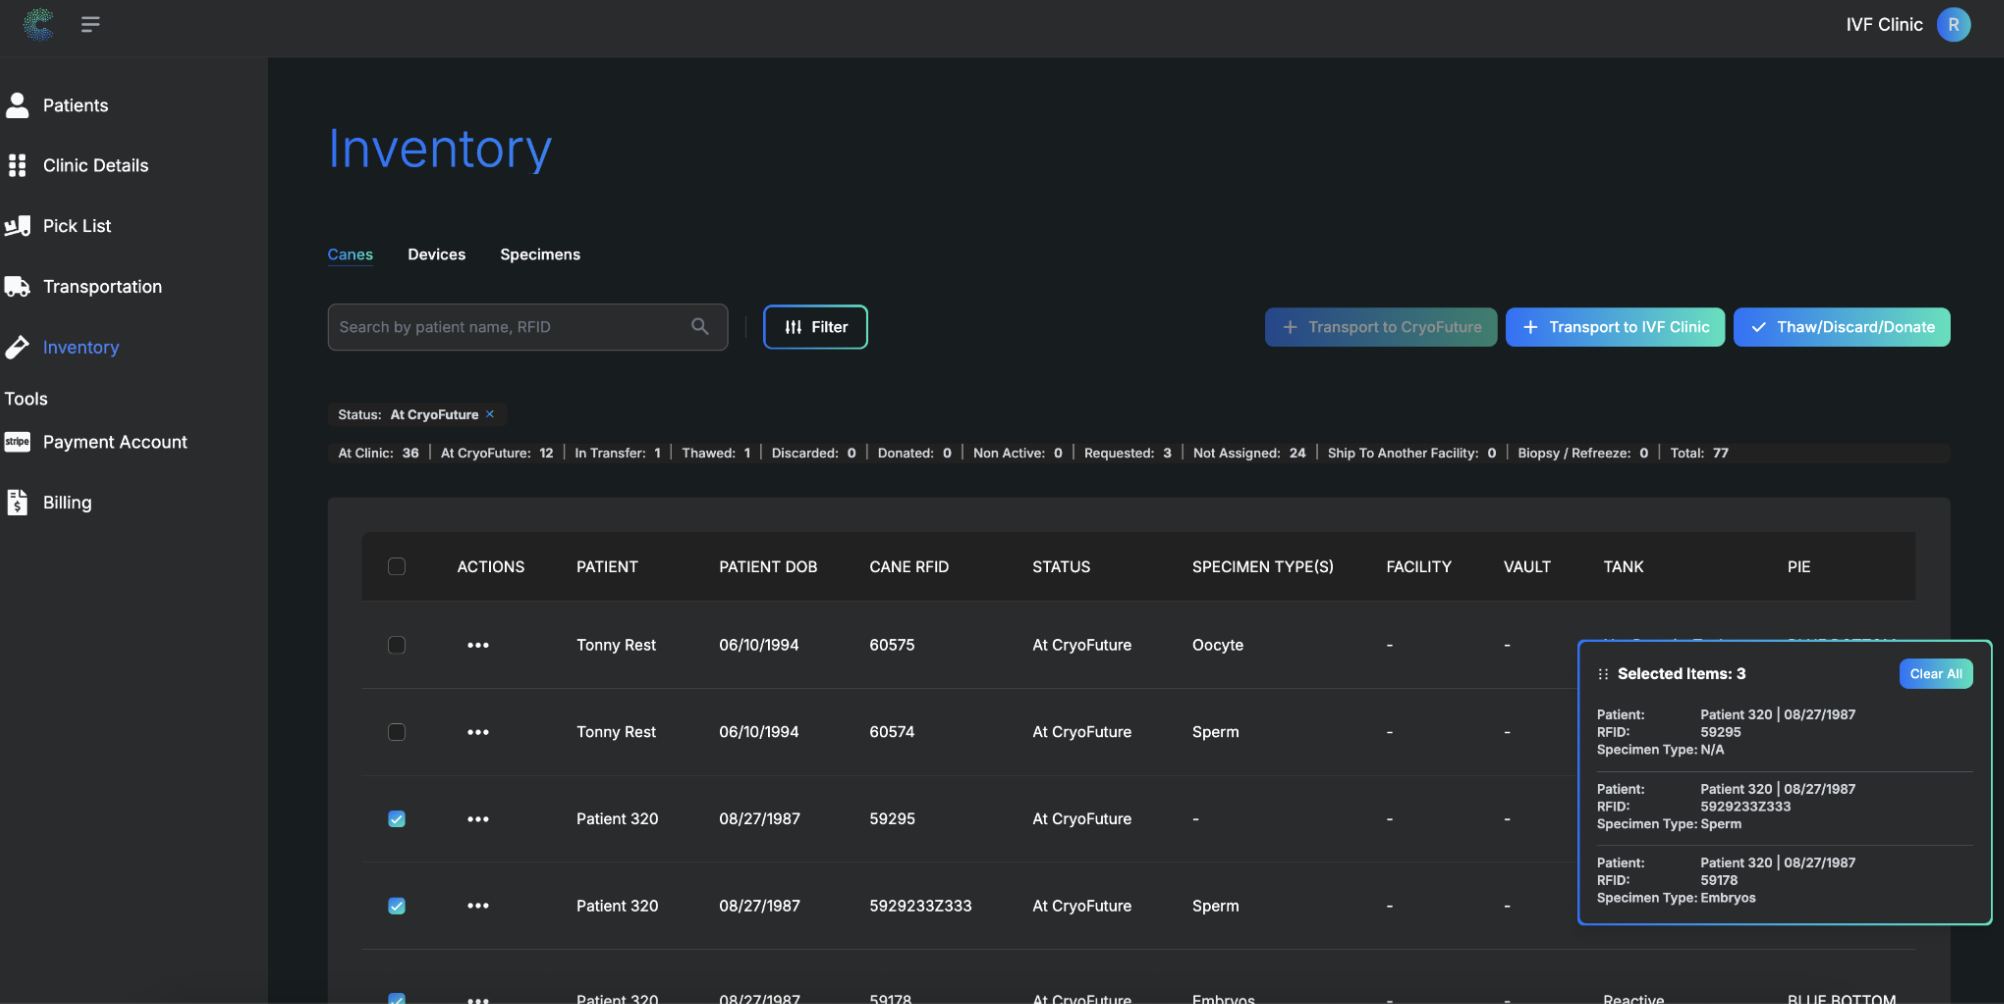
Once selected, click the "Transport to Clinic" button that appears. This action will generate a transport request in the Transportation tab.
After clicking the "Transport to Clinic" button, the system will automatically generate a transport request. This request will be visible in the Transportation tab under the "Return to Clinic" section.
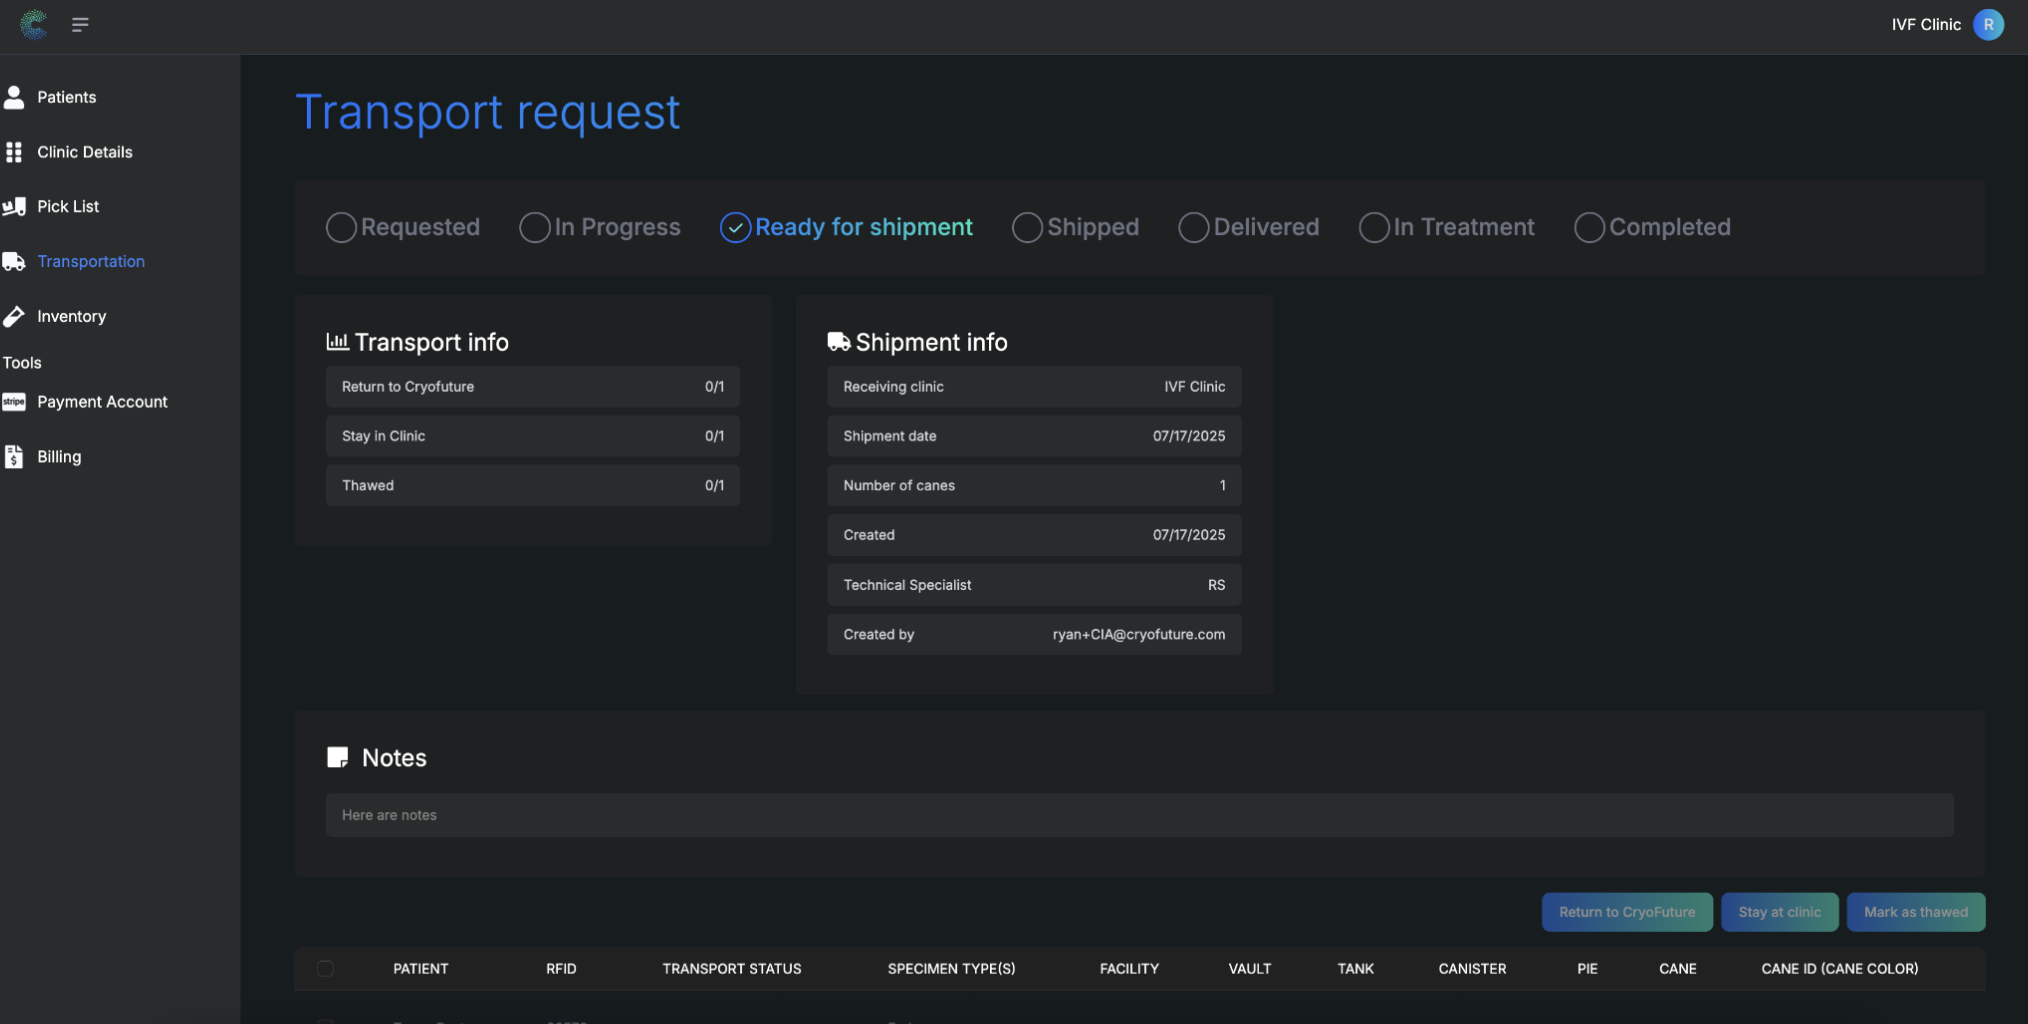
Go to the Transportation tab and click on the "Return to Clinic" section. Find your new request and click "View Details" to open the shipment overview.
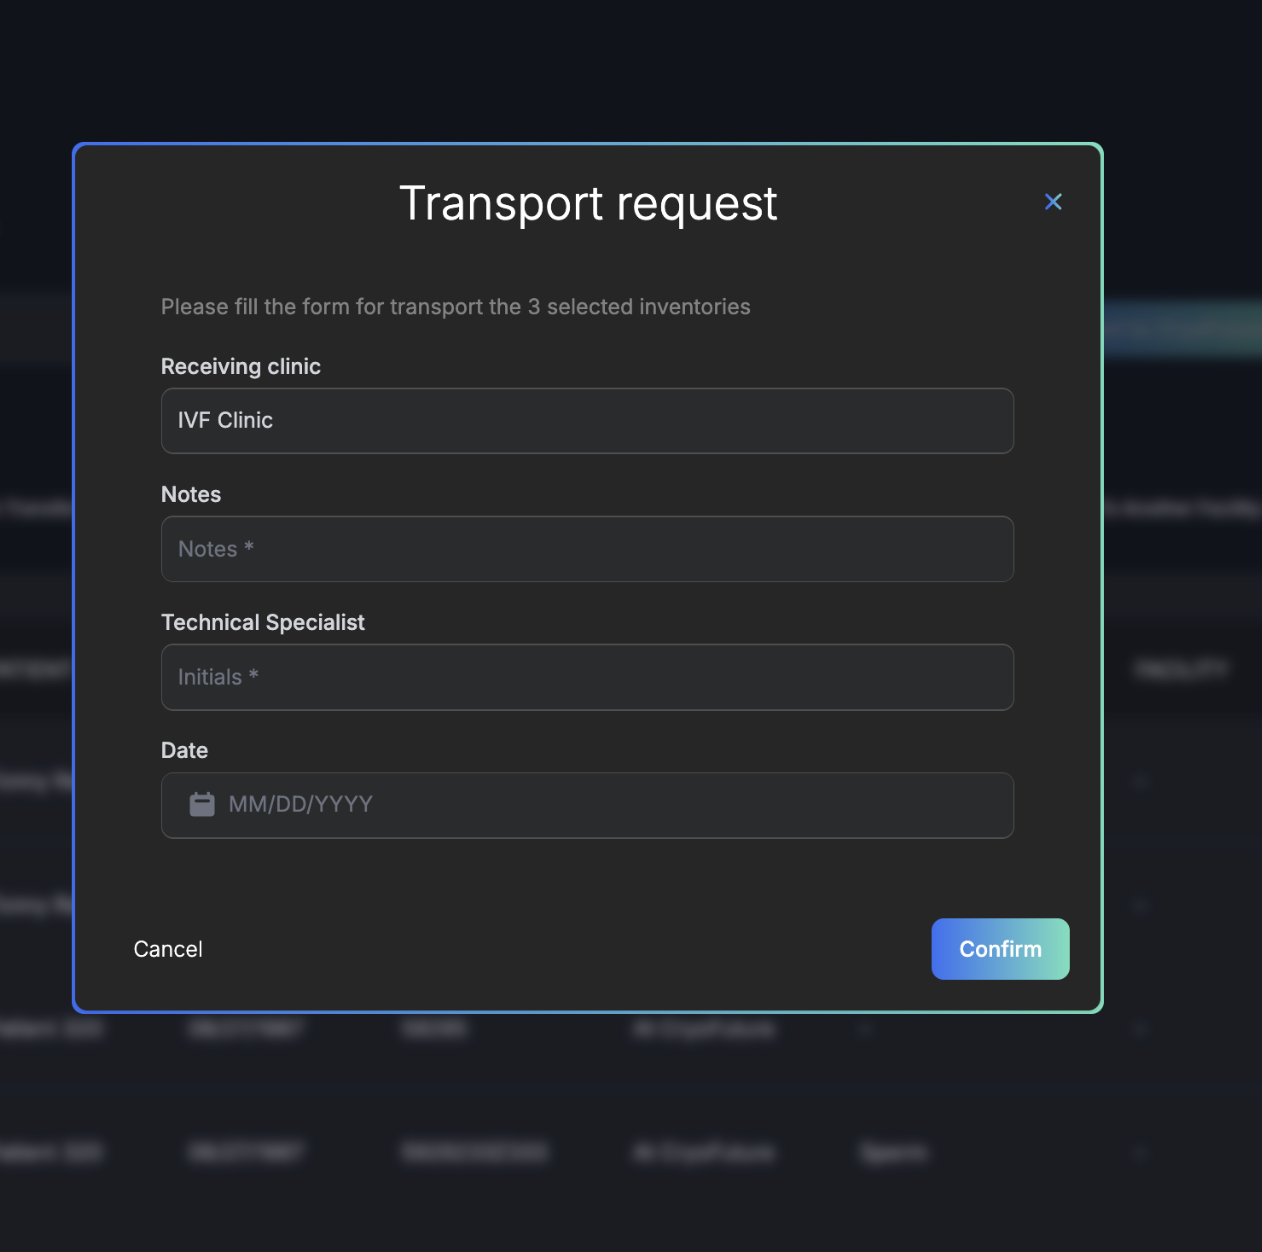
In the details view, you can review:
- Receiving clinic name
- Number of canes
- Shipment date
- Assigned technical specialist
- Current status (e.g., Ready for shipment, Shipped, Delivered)
The status will update automatically throughout the transfer process. You can check back at any time to see the current status of your transfer request.
Status updates include:
- Ready for shipment: Request has been processed and is prepared for pickup
- Shipped: Specimens are in transit to your clinic
- Delivered: Specimens have arrived at your clinic
Troubleshooting
Common Issues:
- Transport button not visible: Ensure you have selected at least one specimen and have appropriate permissions.
- Unable to select specimens: Verify that the specimens are eligible for transfer and not already in transit.
- Transport request not appearing: Check the Transportation tab under "Return to Clinic" section, or refresh the page.
- Status not updating: Allow some time for status updates, or contact support if the status remains unchanged for an extended period.
9. Setting Up Patient Inventory
- Access to the CryoFuture system
- Logged in as a Clinic Administrator
- An existing patient profile to associate the inventory with
Overview
This process involves creating new inventory items (canes, straws/vials, and specimens) and associating them with a specific patient profile within the CryoFuture system.
From the main interface, navigate to the "Patients" tab, click on the specific patient's name, and select the "Inventory" tab within their profile.
Click the "Add cane" button, typically located on the right side of the screen, and enter the basic details about the cane as required.
.png)
After adding cane details, enter information for the straws and/or vials that will be placed in this cane, then click "Next".

Input all required details about the specimen and click "Finish" to finalize the inventory creation process.
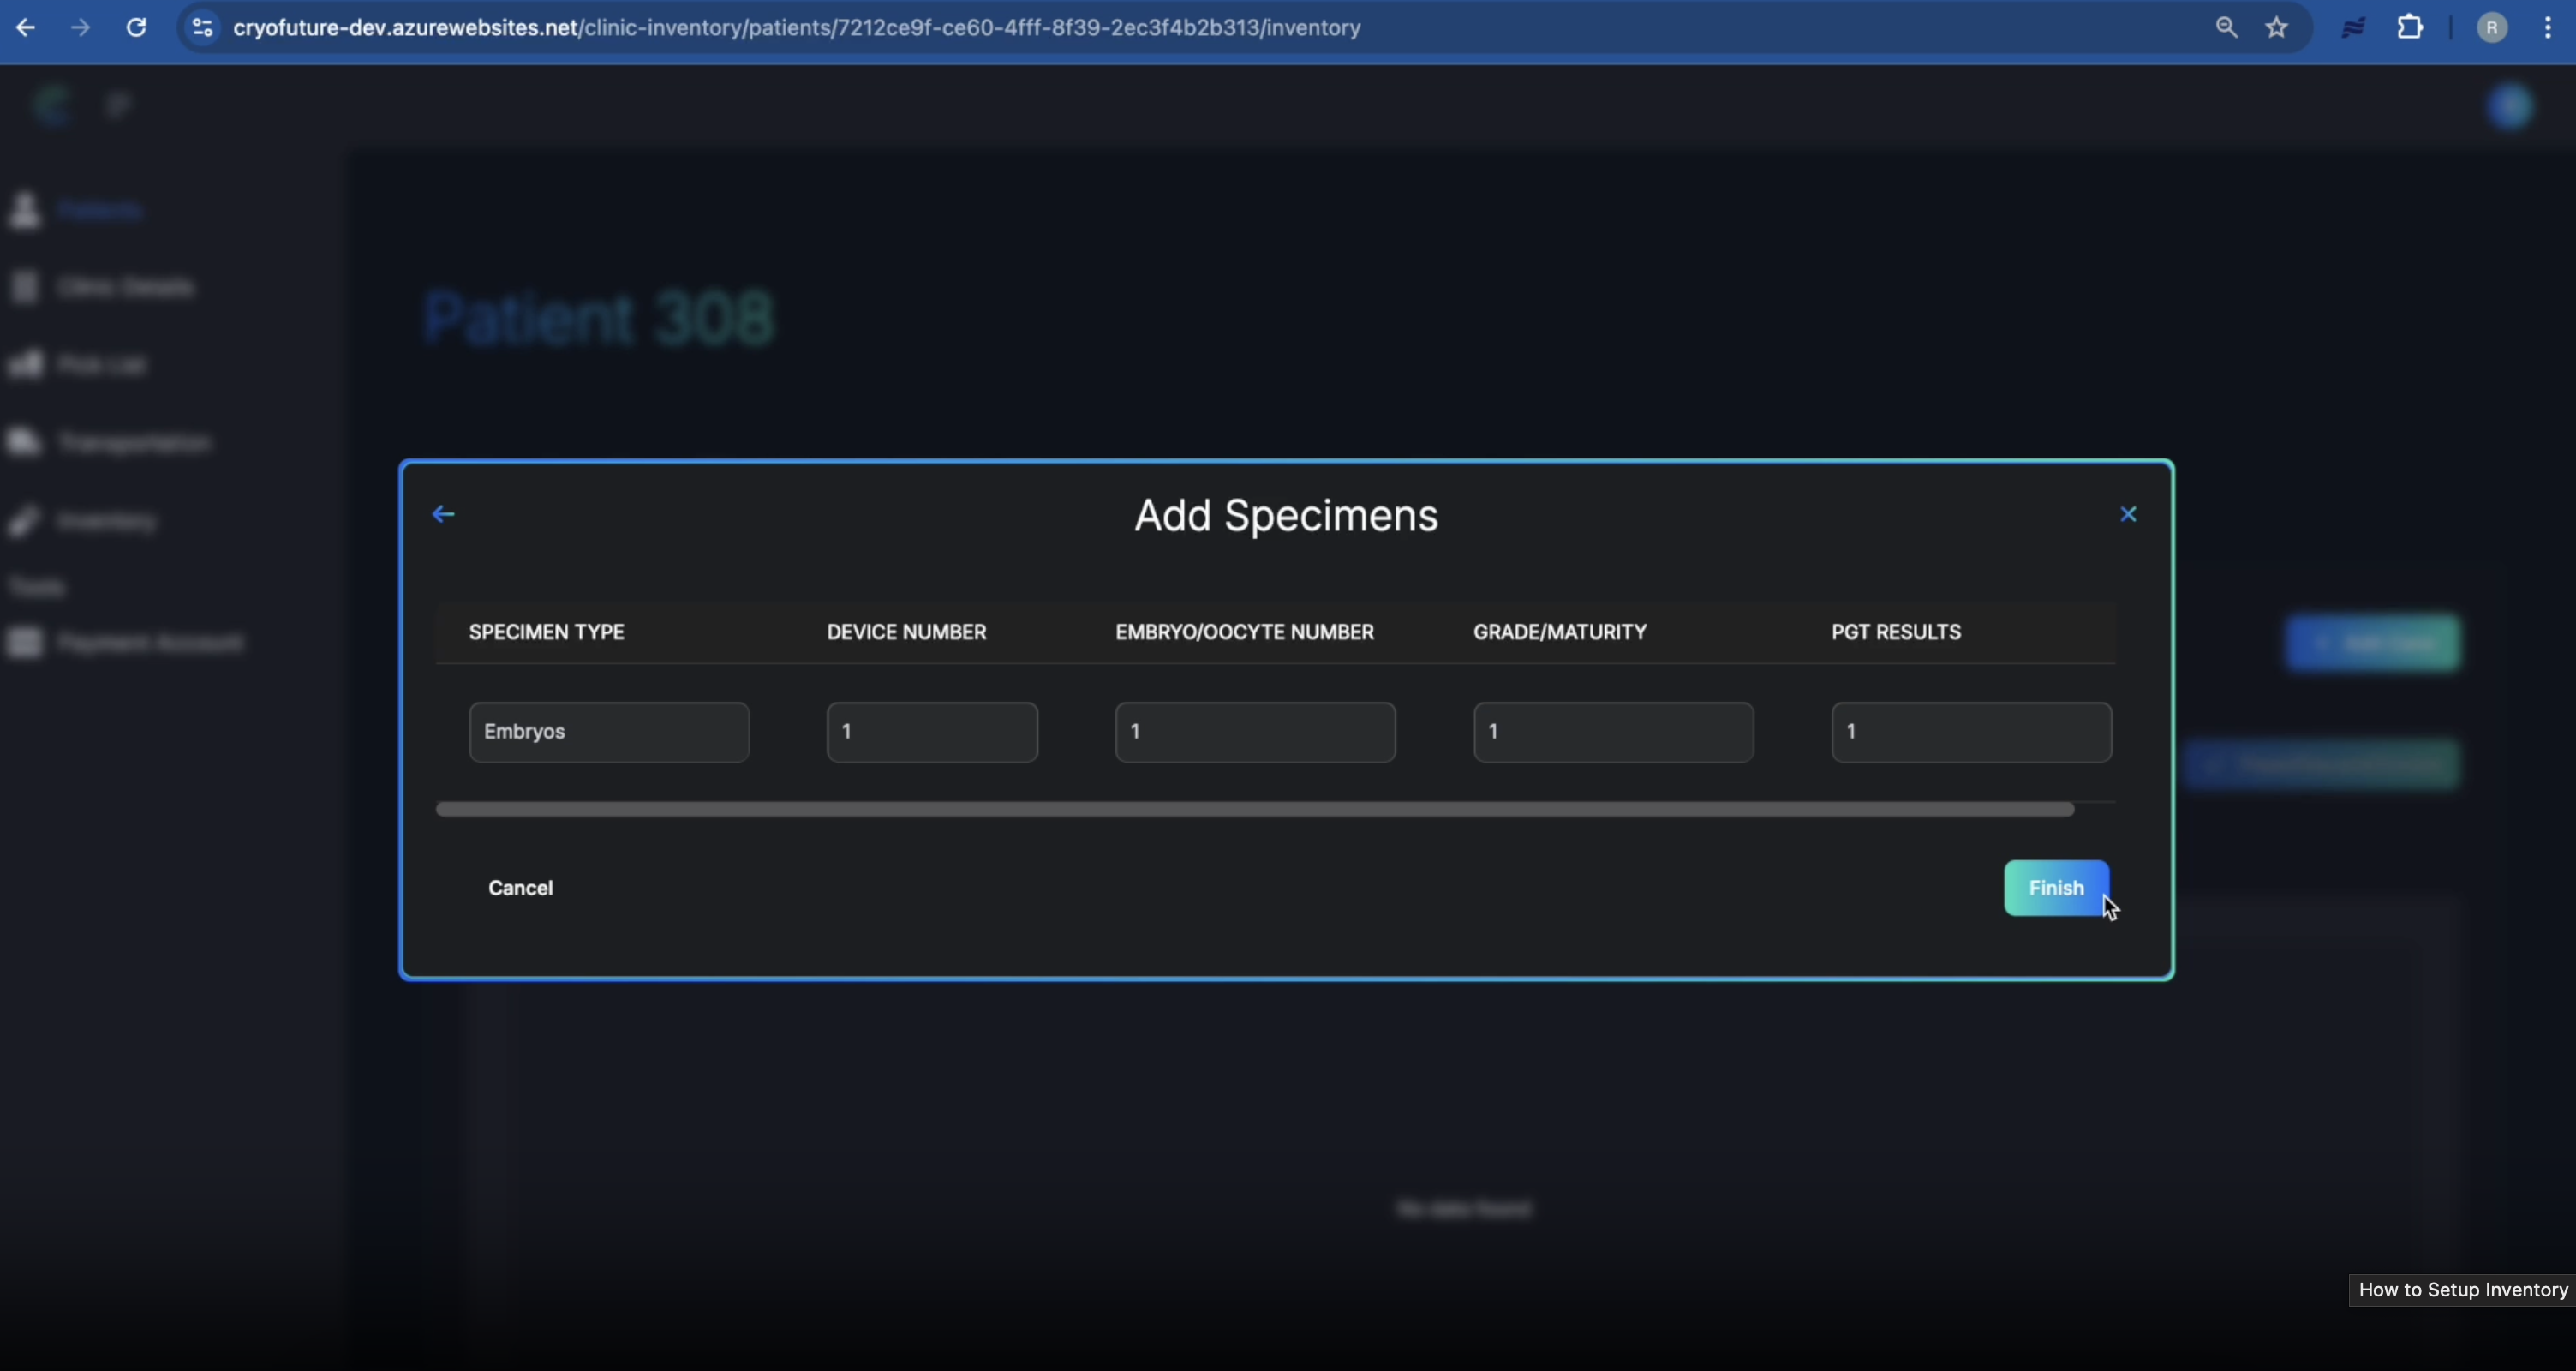
You may need to adjust filters to display all inventory items. Remove or adjust any "default at clinic filter" to confirm that your new inventory is visible in the patient's inventory list.
.png)
The creation of new inventory automatically generates a ticket in the picklist for a team member to assign a specific storage location to the newly created inventory item.
To see this inventory item awaiting assignment in the general inventory system, navigate to the main "Inventory" tab and remove any default filters.
.png)
Troubleshooting
Common Issues:
- Ticket not found on the Pick List: Verify the inventory item was created and check for active filters that might be hiding tickets.
- Unable to assign the ticket to yourself: Confirm you have Clinic Admin permissions or check if the ticket is already assigned.
- No tanks in dropdown: Ensure tanks have been set up for your clinic (see Section 2).
- Confirm button disabled: Make sure all required fields (Tank, Canister, Slot) are filled correctly.
10. Assigning Inventory Locations
- You must be logged into CryoFuture with Clinic Admin credentials
- An inventory item must have been previously created, resulting in a ticket on the pick list
- Storage tanks must be set up and configured for your clinic within the CryoFuture system
Overview
This process involves assigning a specific physical storage location to inventory items that have been created in the system. This is crucial for maintaining accurate records of where each specimen is stored in your facility.
Ensure you are logged into CryoFuture as a Clinic Admin and navigate to the "Pick List" tab. This is your starting point for managing outstanding inventory tasks.
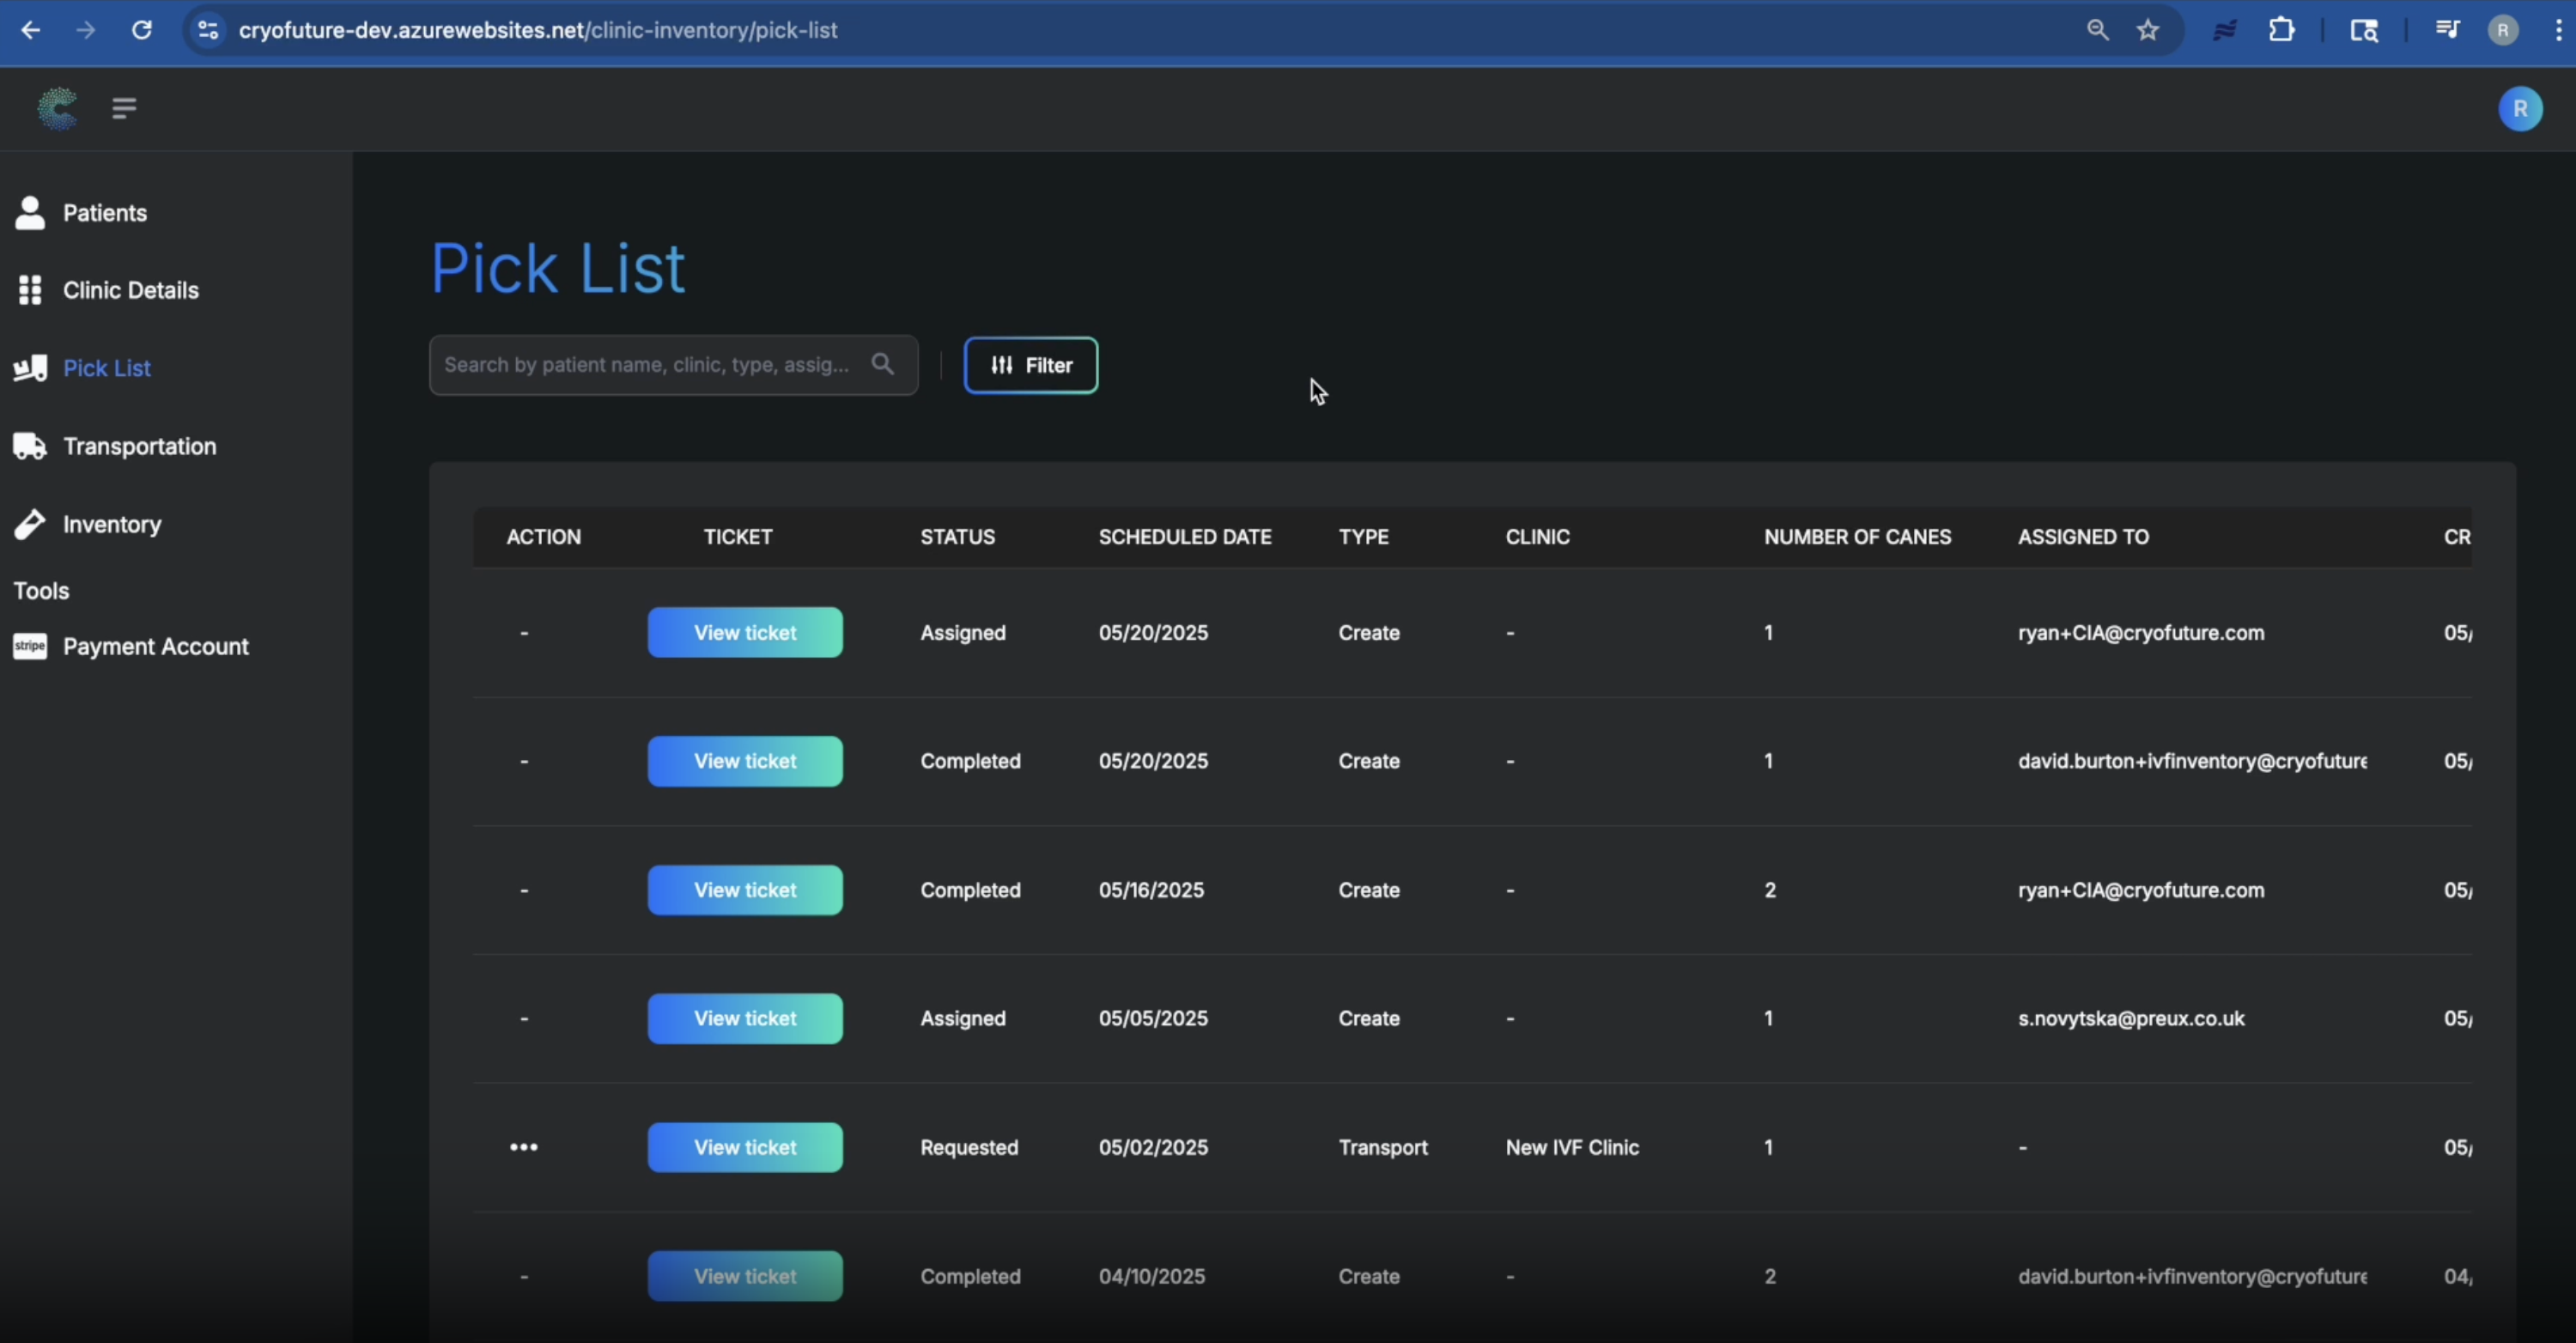
On the pick list, identify the ticket associated with the inventory item you wish to locate. This ticket would have been created when the inventory was initially registered. Click the "View Ticket" button for that specific inventory item.
Once the ticket details are displayed, locate the option to assign the ticket. Assign the ticket to yourself by selecting your user profile. This indicates you are responsible for completing the location assignment.
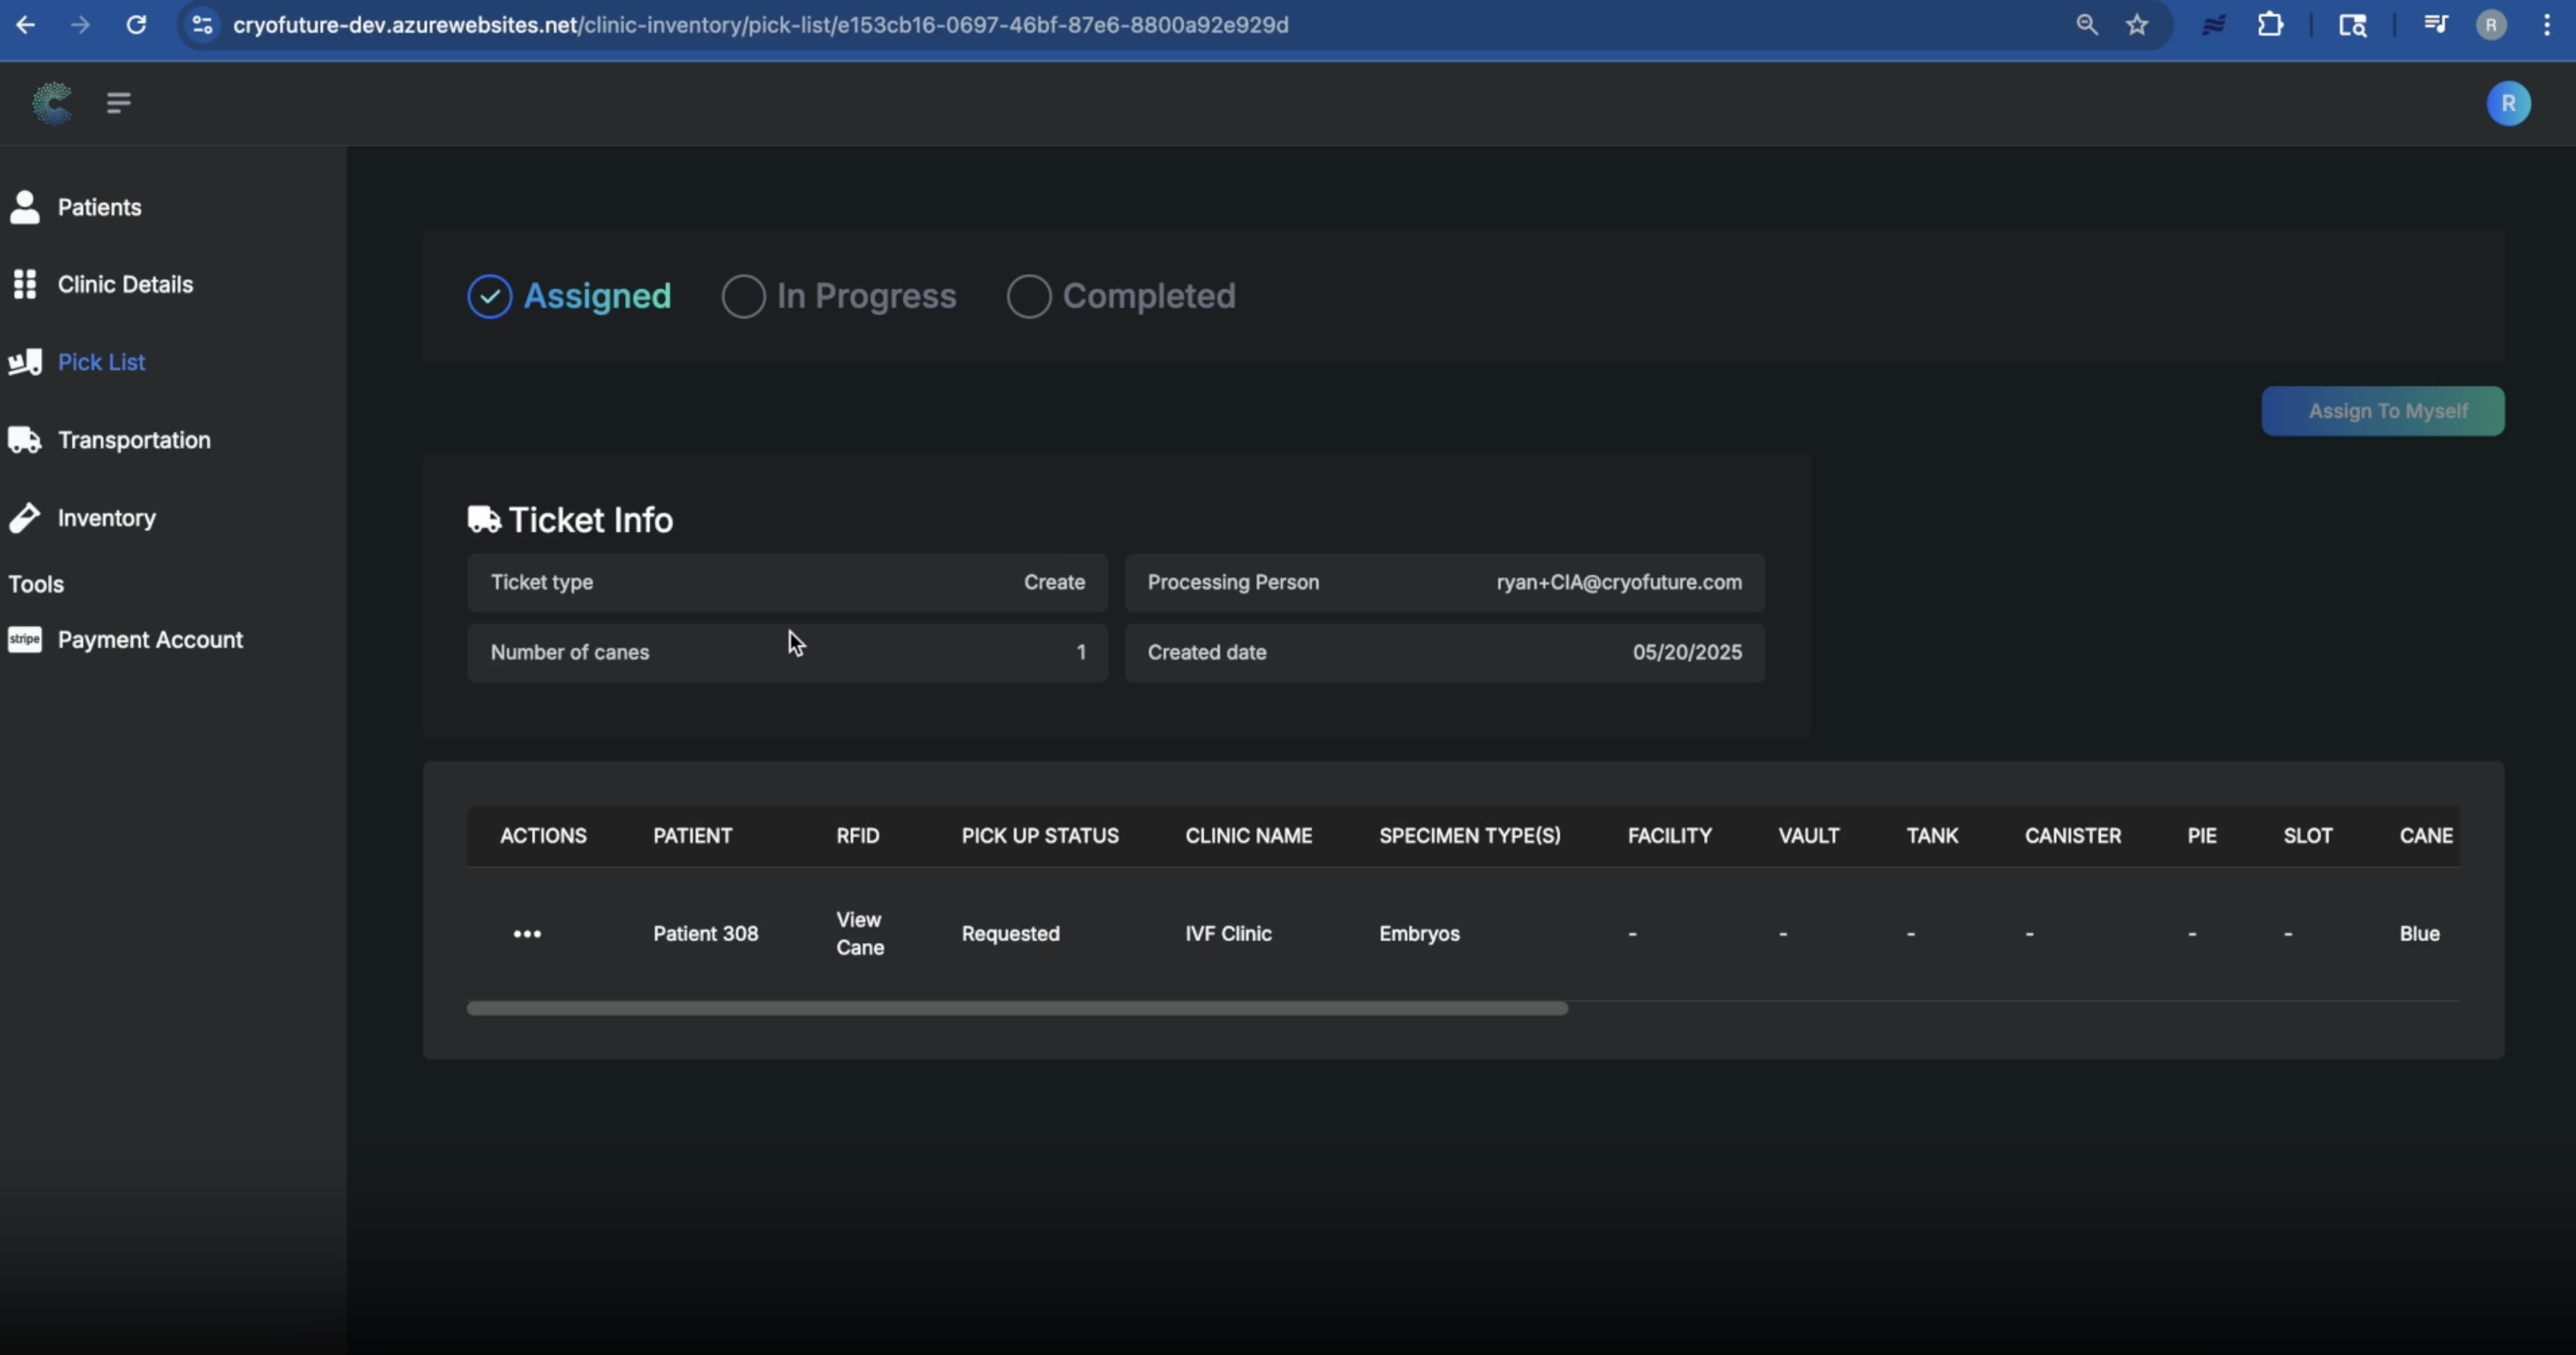
Tip: If the ticket is already assigned to you, you can skip this step.
In the ticket details view, find the "Actions" column or a similar section for managing the inventory. Click on the "Add a location" option.
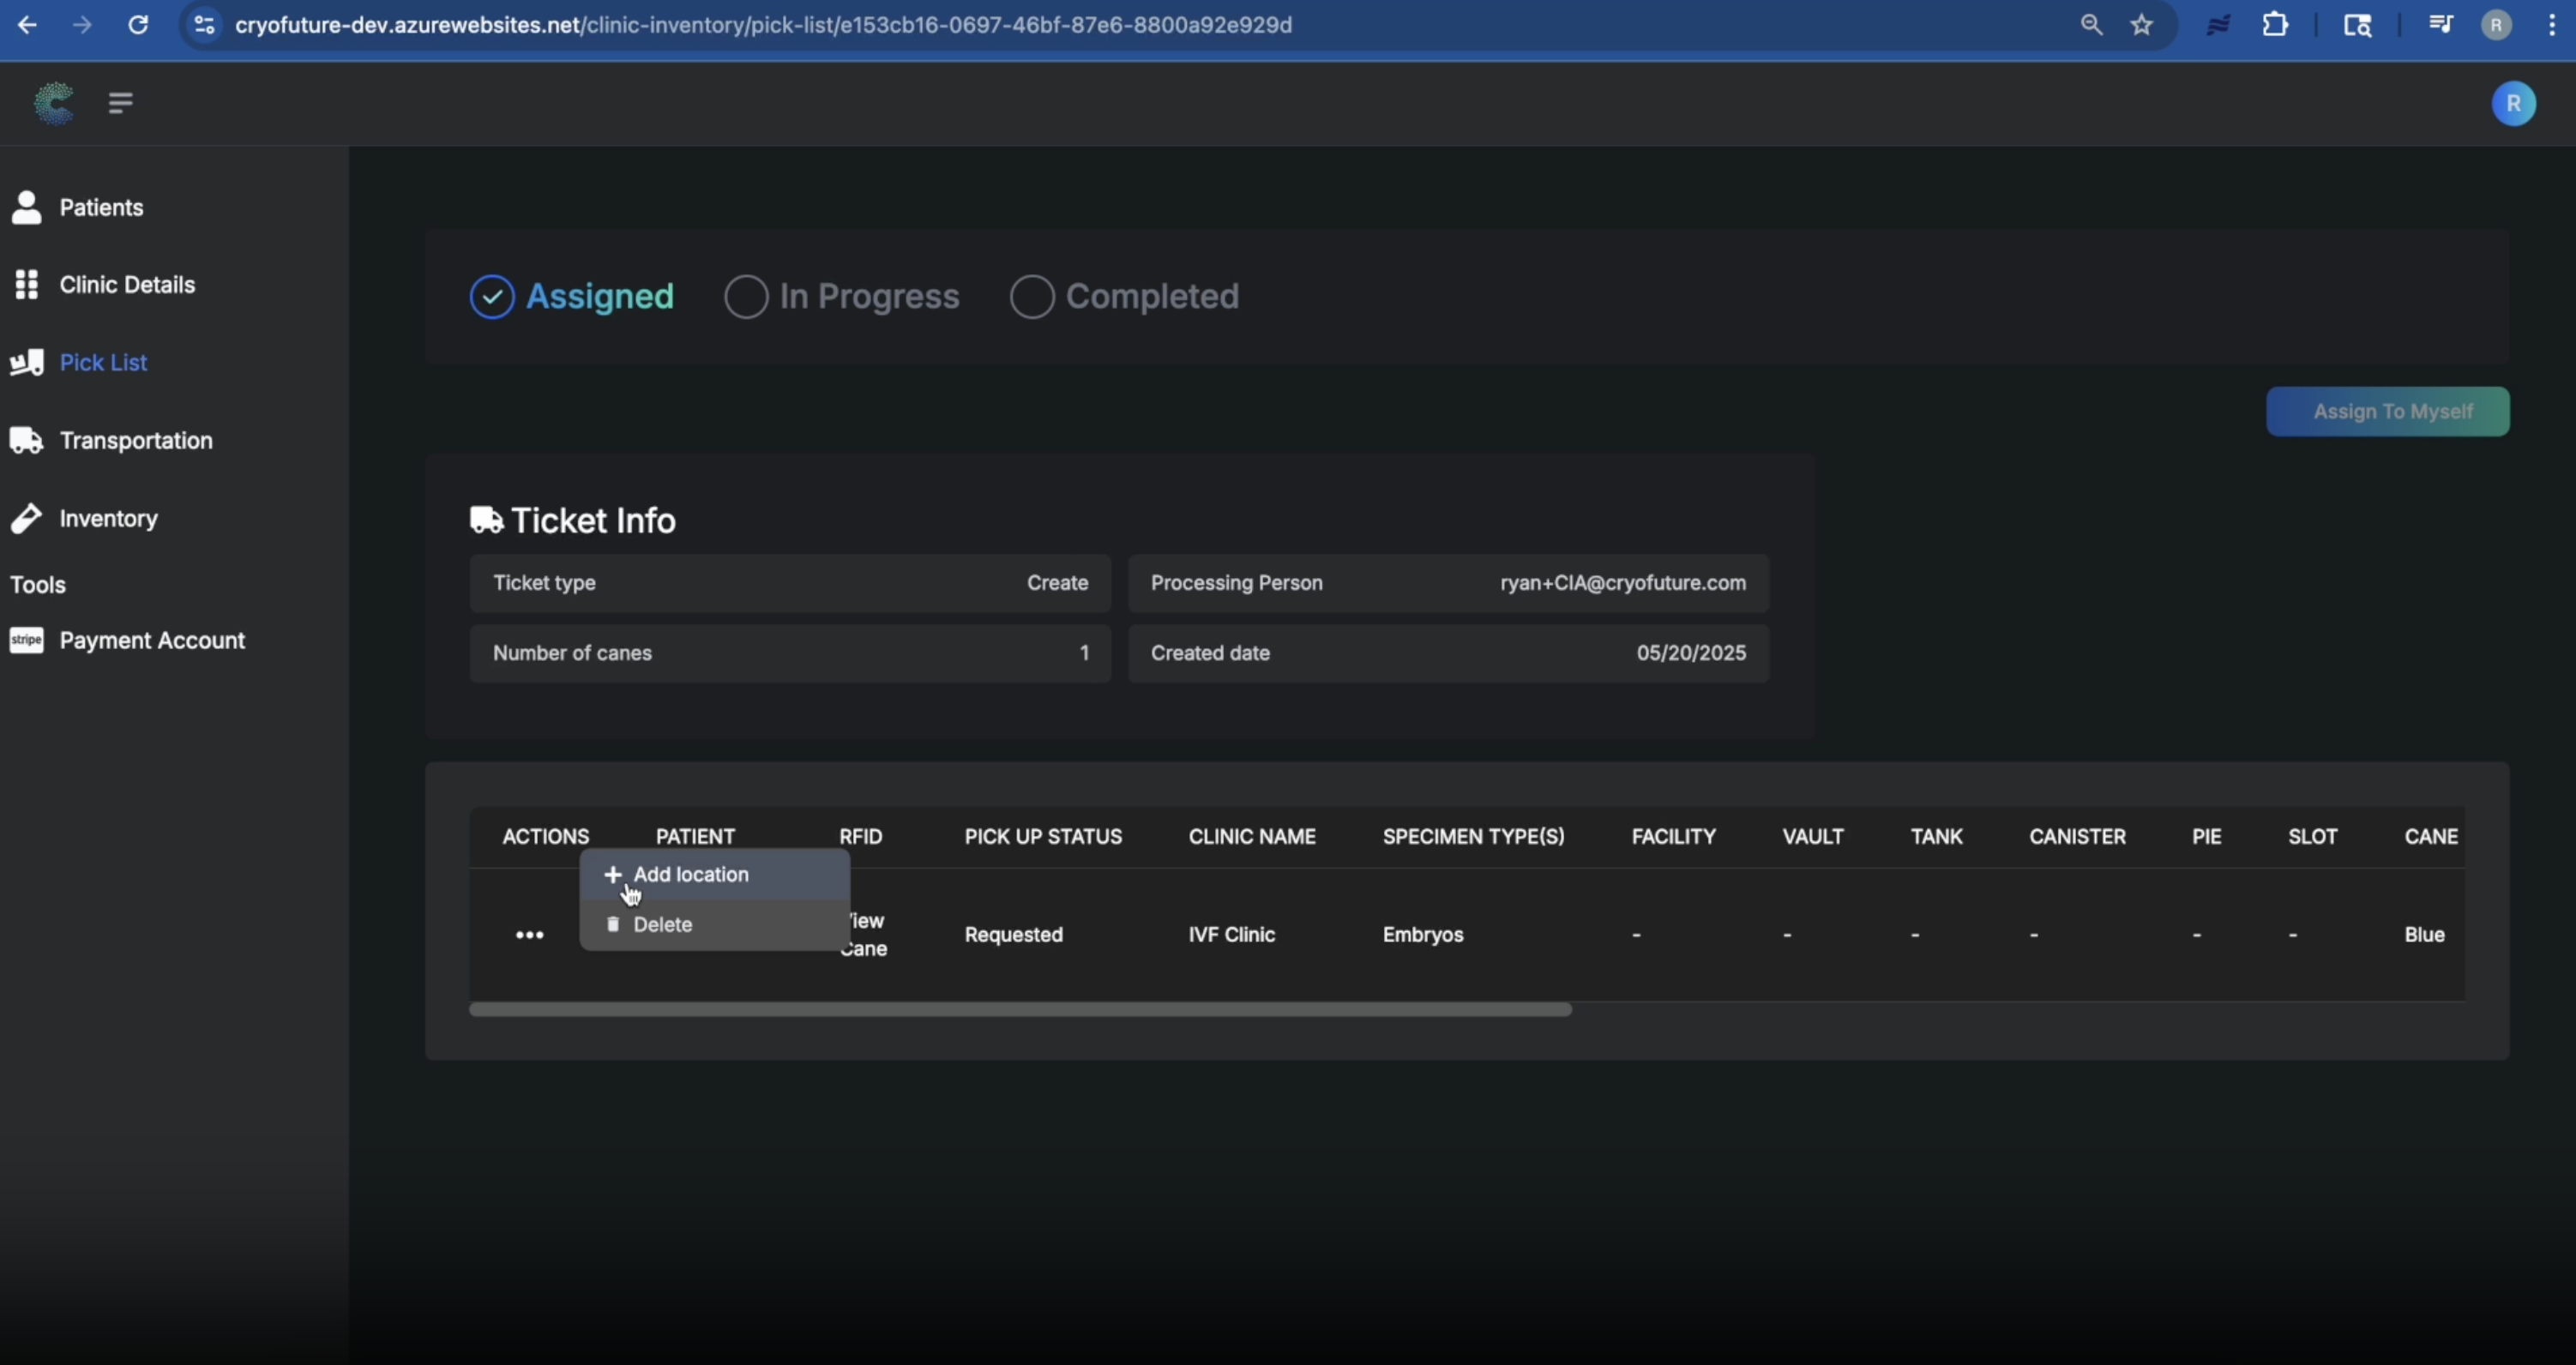
A dialog or new section will appear, allowing you to specify the location. From the dropdown menu, choose the tank where the inventory item (e.g., a cane) is being placed.
.png)
Enter the specific canister number within the selected tank and the specific slot number within the canister.
.png)
Warning: Ensure the tank, canister, and slot information is accurate to maintain precise inventory tracking.
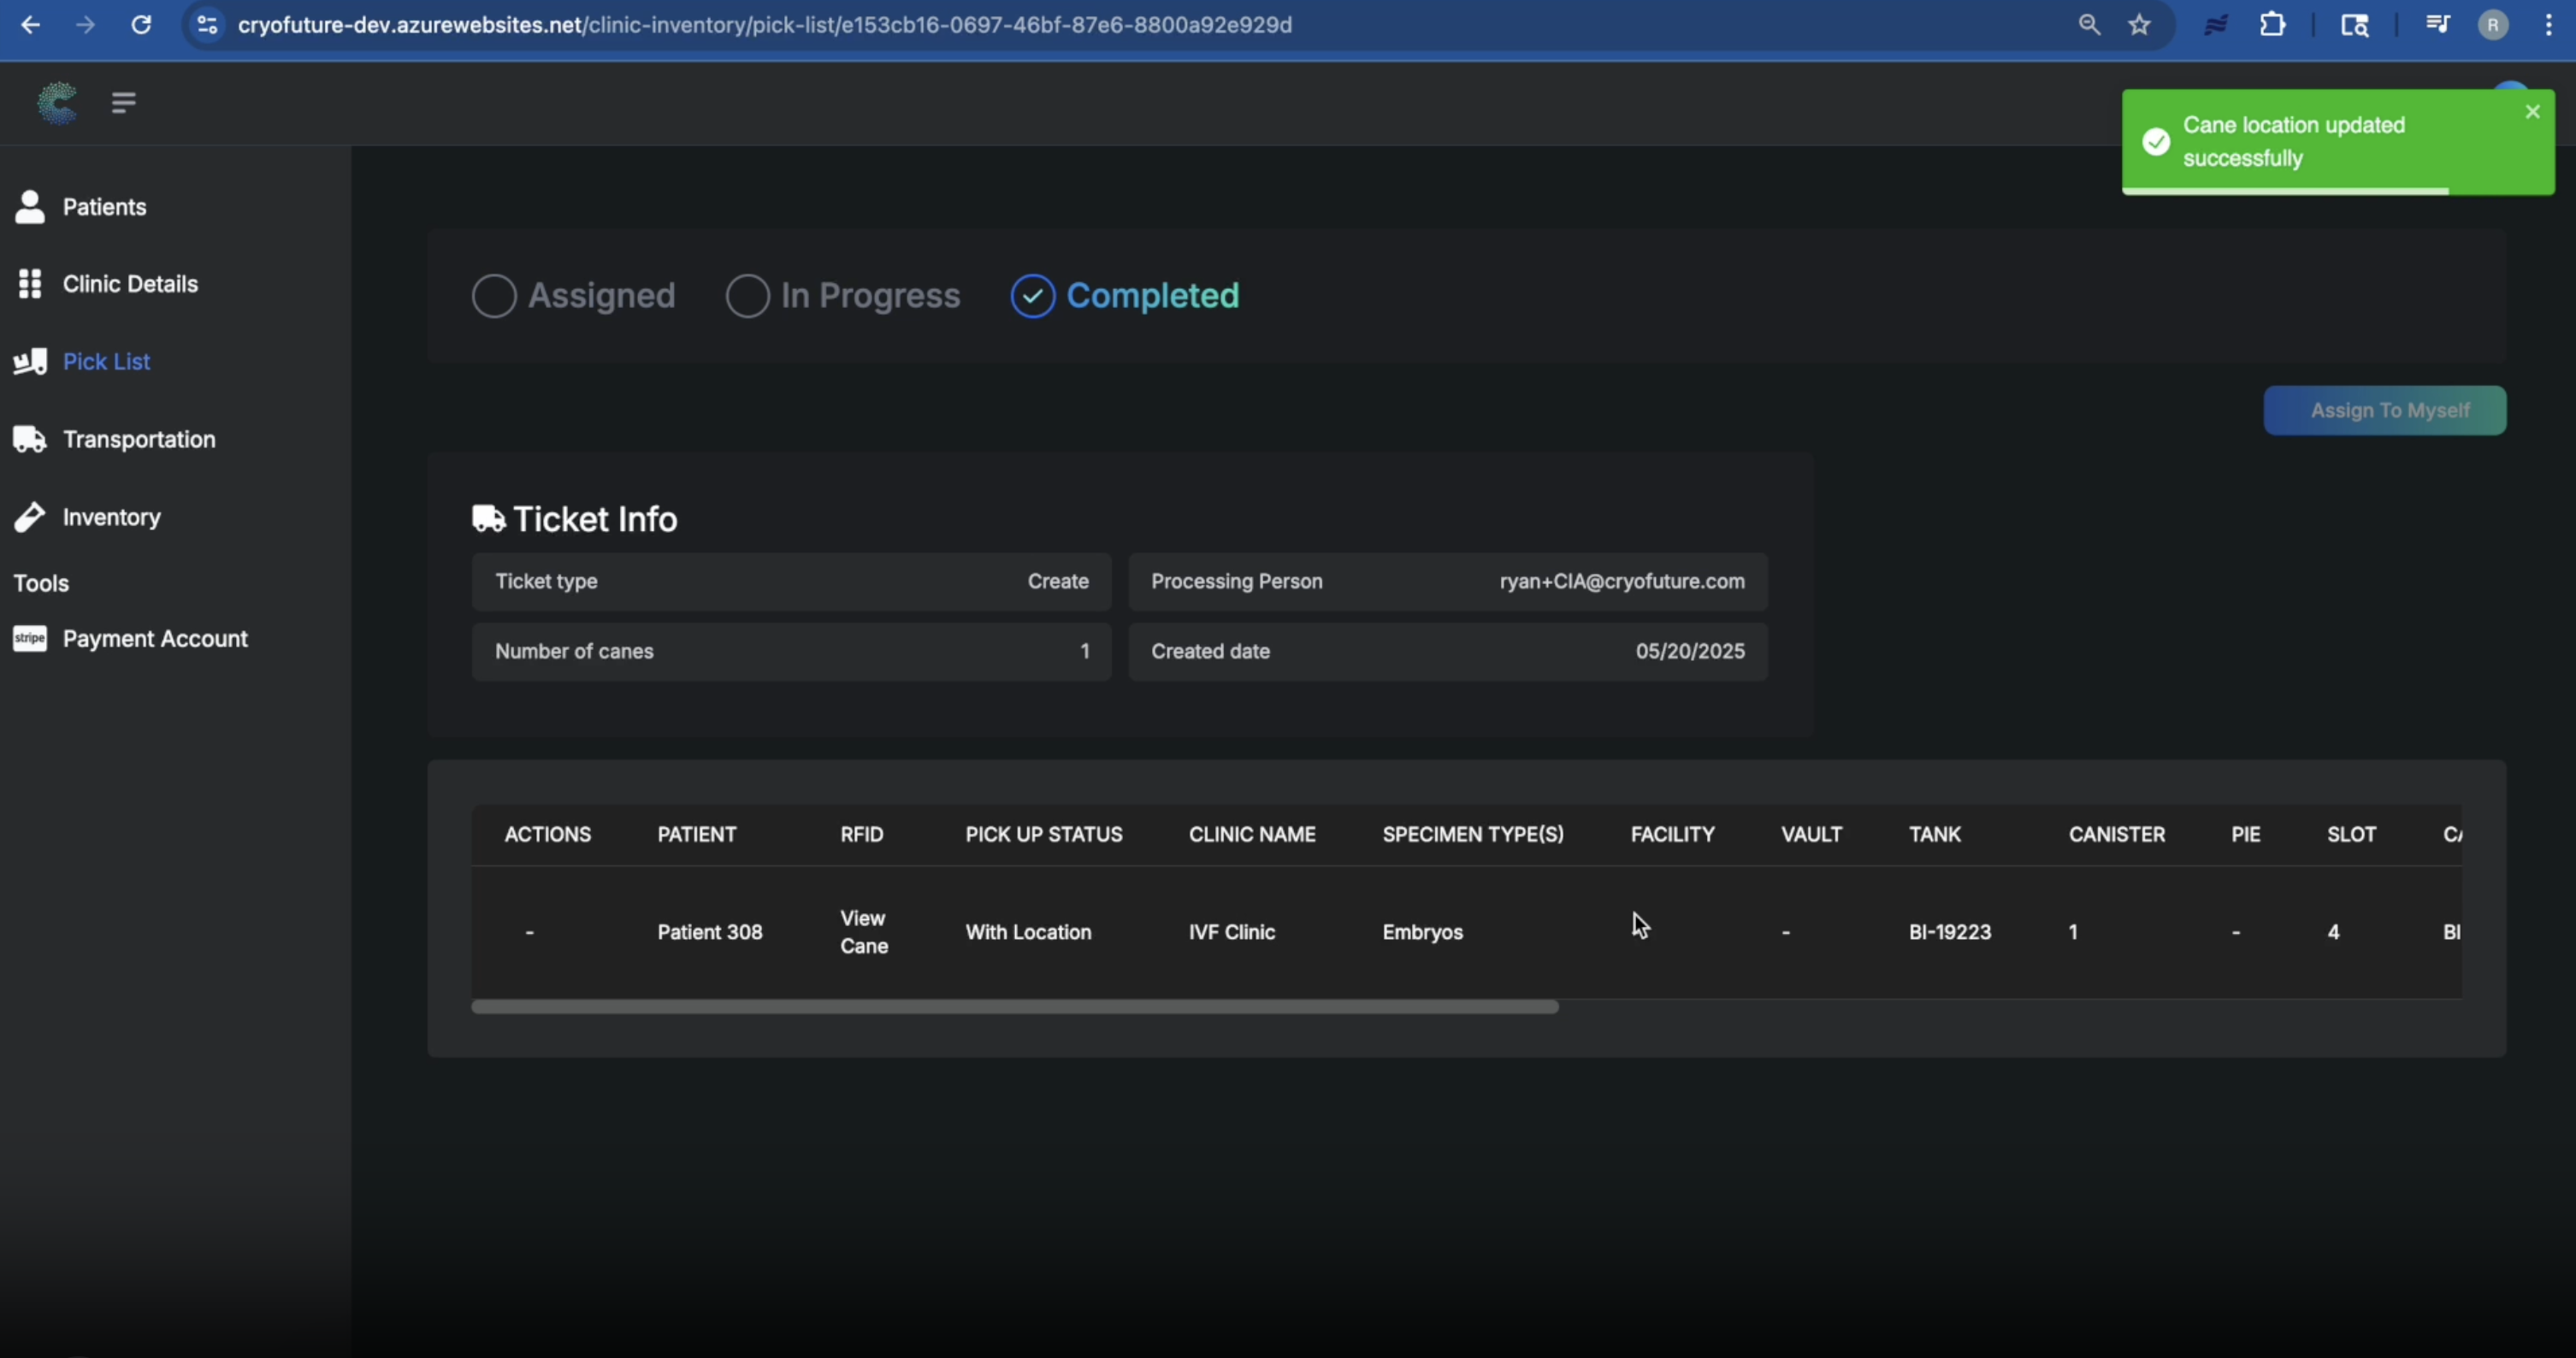
After entering all location details (tank, canister, slot), click the "Confirm" button.
The system will process the update. You should see a confirmation that the ticket has been completed.
To verify the update, navigate back to the main "Inventory" tab. Locate the inventory item you just updated. You should now see it listed with its newly associated location details (tank, canister, slot).
Troubleshooting
Common Issues:
- Ticket not found on the Pick List: Verify the inventory item was created and check for active filters that might be hiding tickets.
- Unable to assign the ticket to yourself: Confirm you have Clinic Admin permissions or check if the ticket is already assigned.
- No tanks in dropdown: Ensure tanks have been set up for your clinic (see Section 2).
- Confirm button disabled: Make sure all required fields (Tank, Canister, Slot) are filled correctly.
11. Creating a New Tank
- Access to the CryoFuture platform
- Logged in with clinic admin privileges
Overview
This section covers how to add a new tank to your clinic's CryoFuture system for inventory management.
Log in to CryoFuture as a clinic admin and navigate to the "Clinic Details" tab.
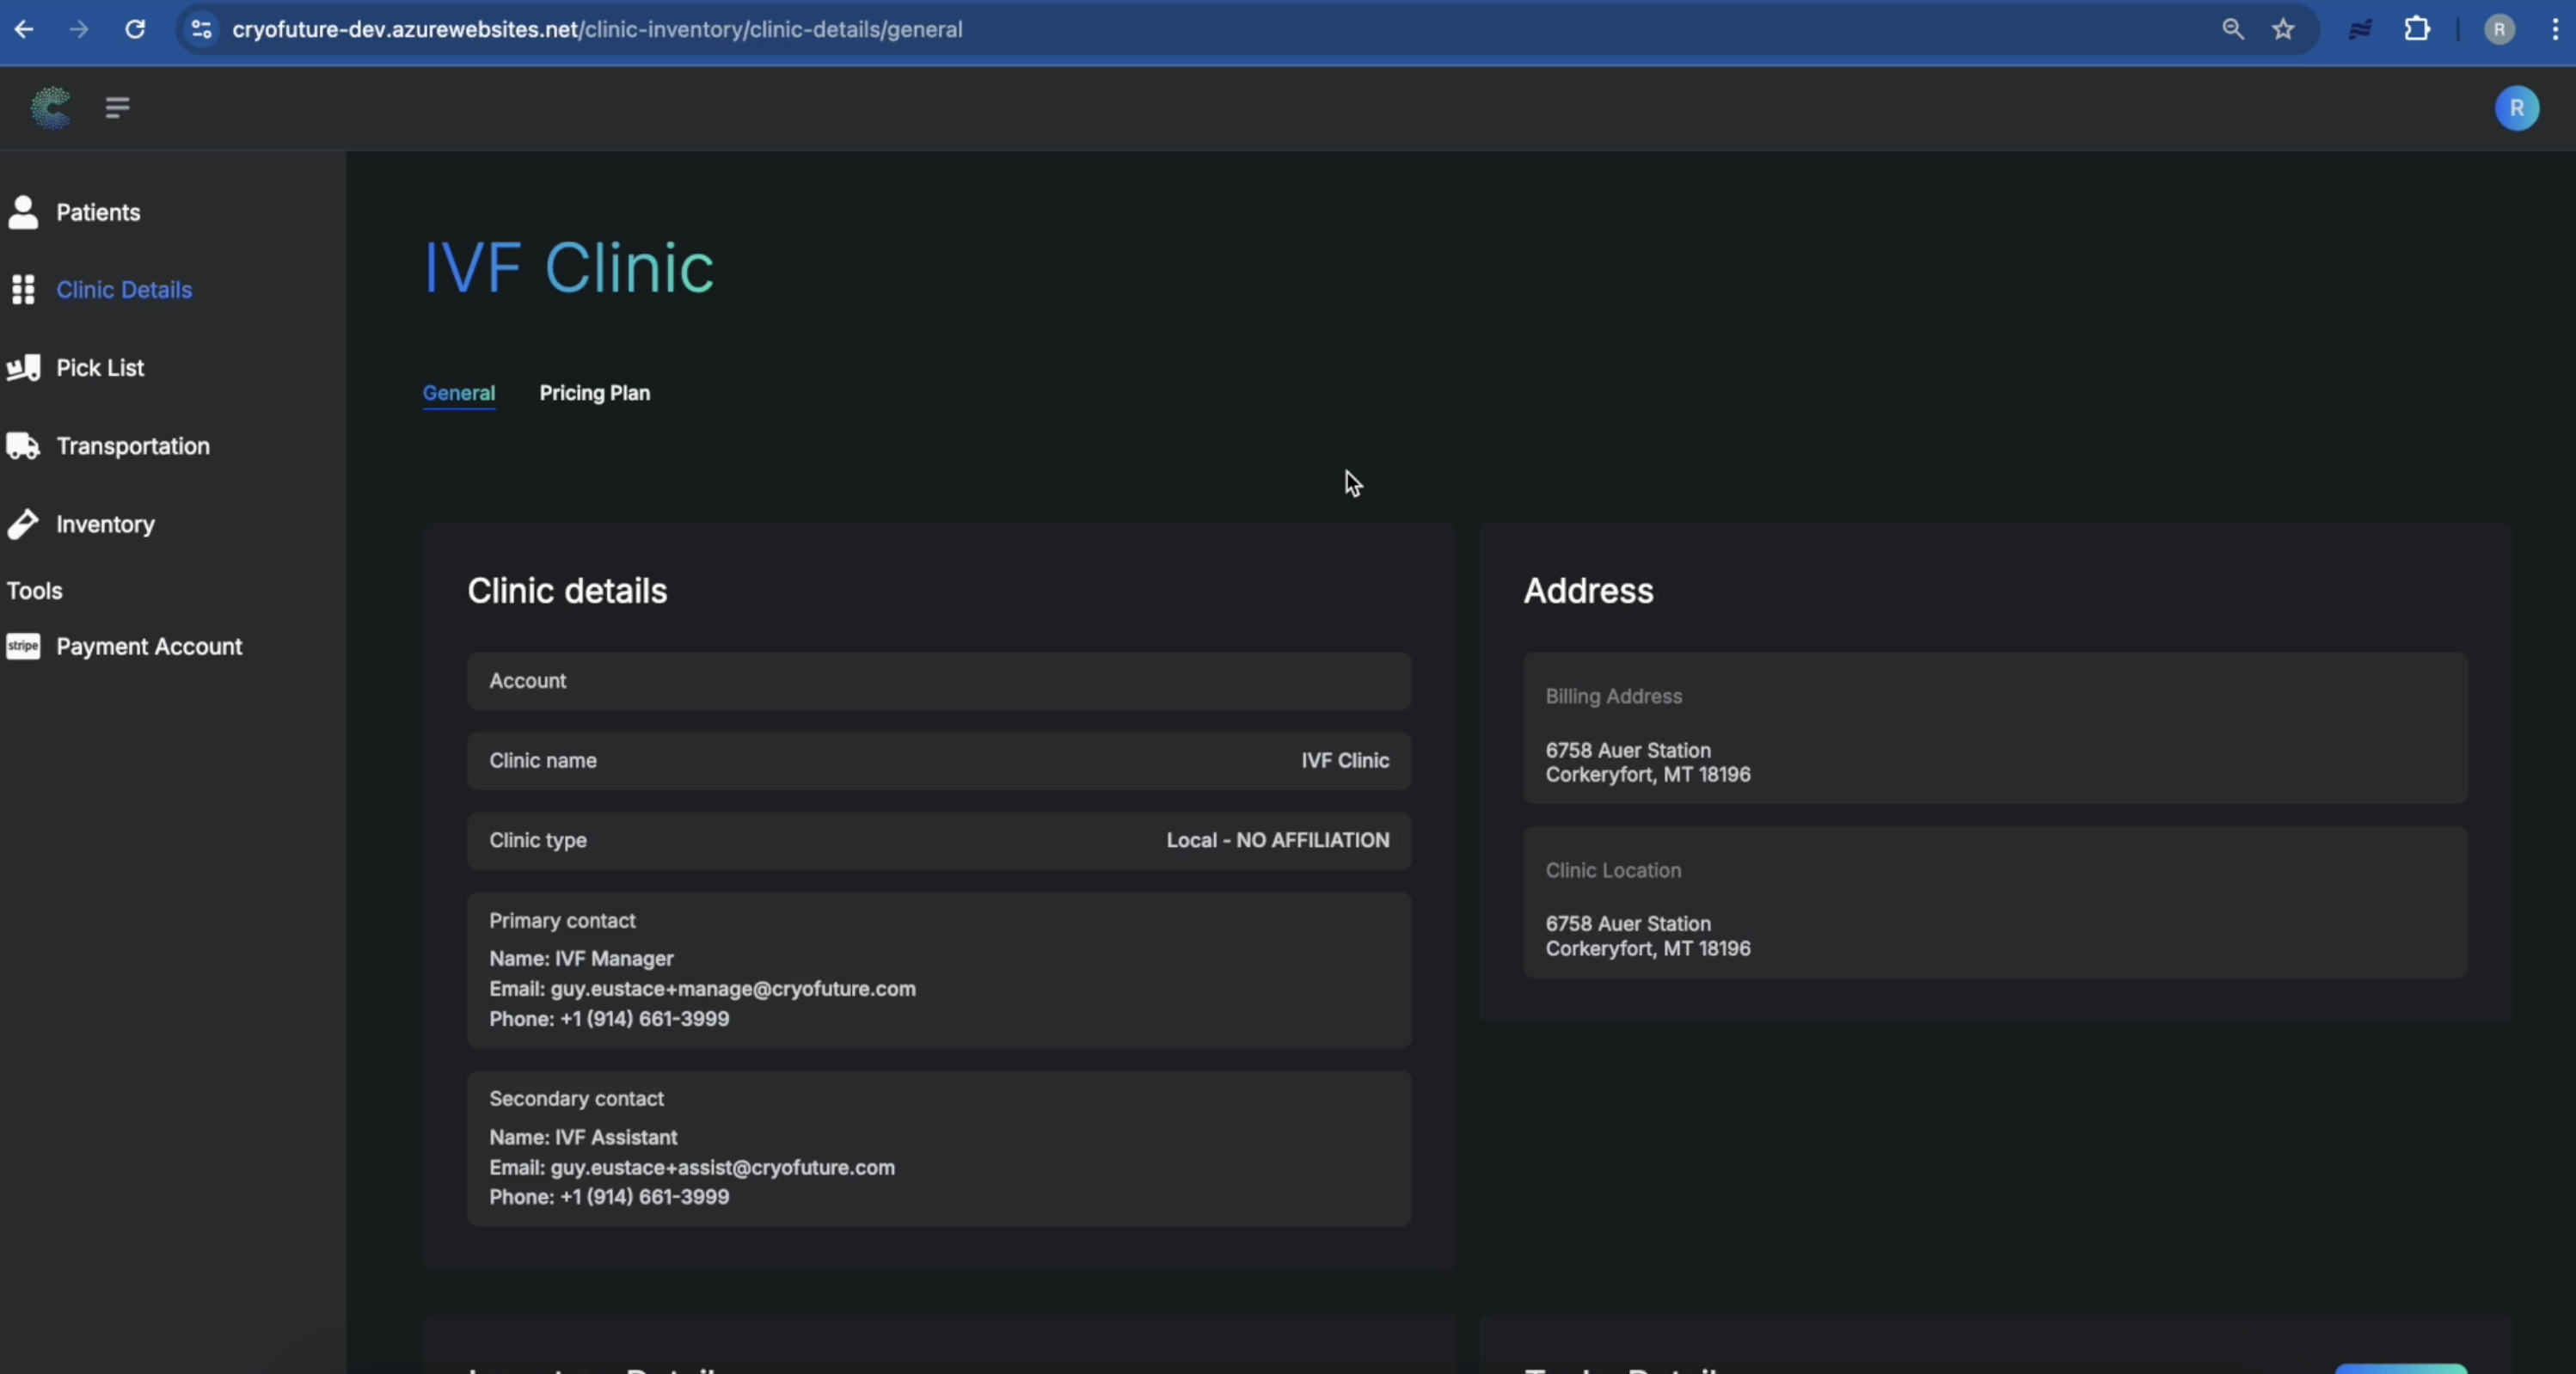
Scroll down the "Clinic Details" page until you find the "Tank Details" section.
.png)
Click the "Add Tank" button in the "Tank Details" section.
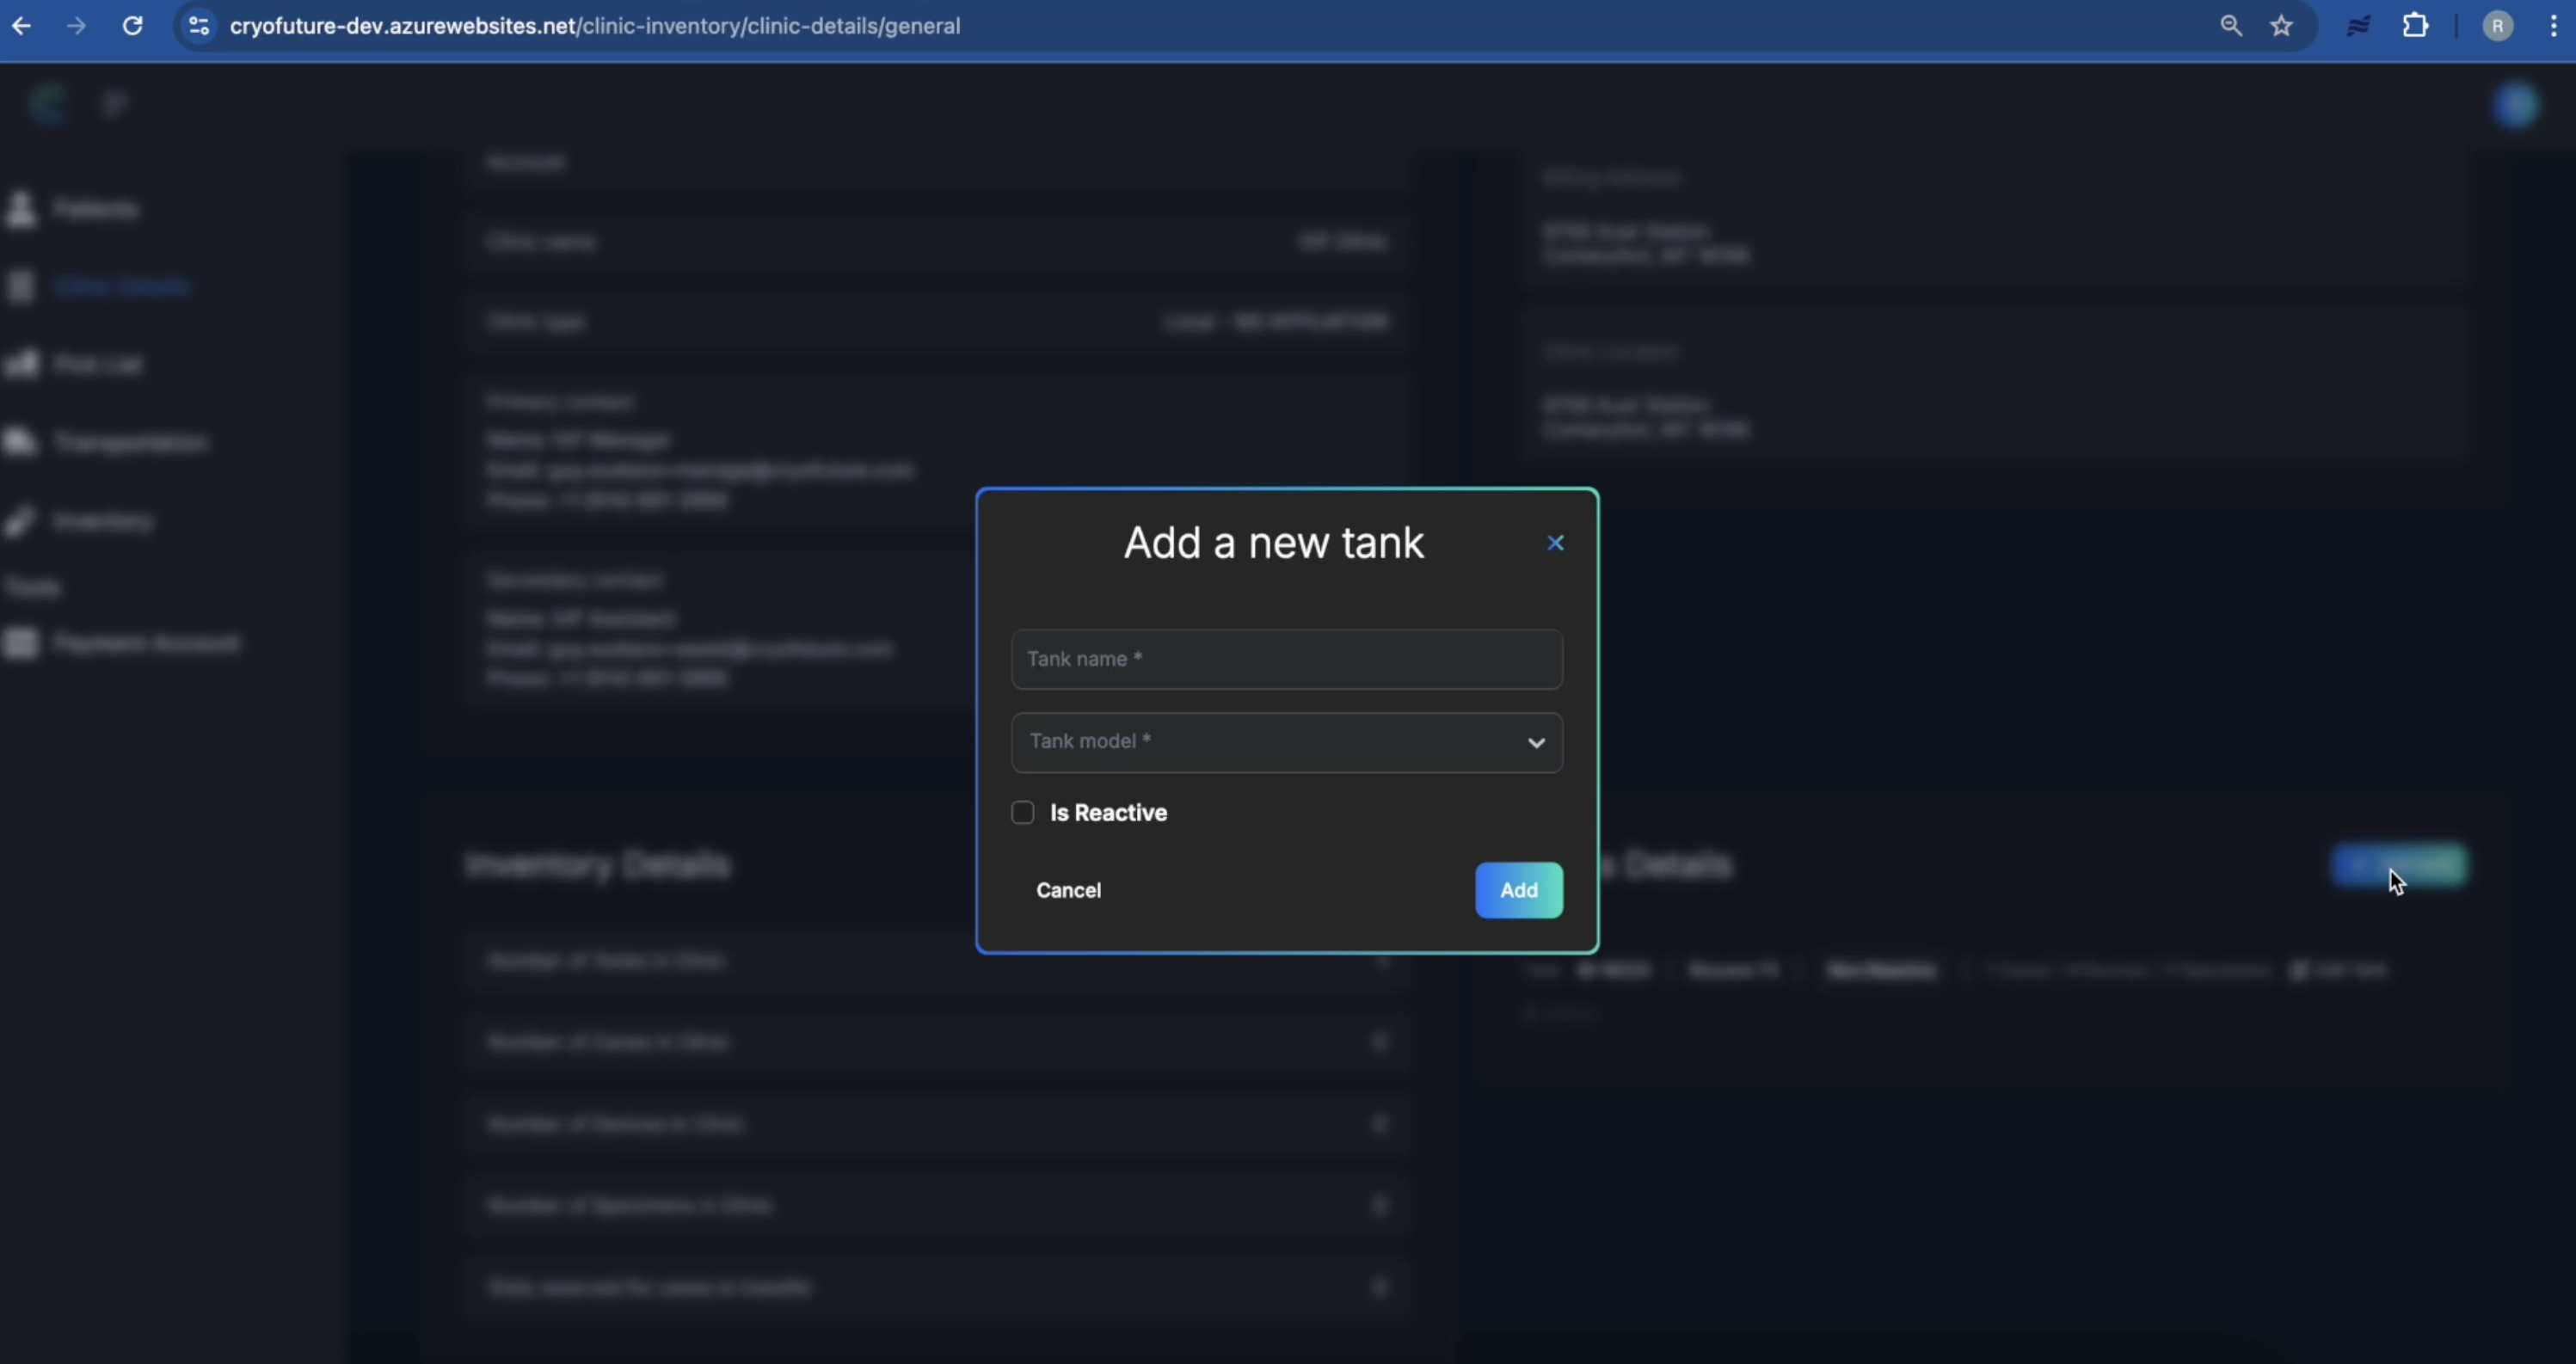
In the dialog box that appears, enter the following information:
- Tank Name: A unique identifier for your tank
- Model: The model of the tank
- Reactive (Yes/No): Specify if the tank is reactive
.png)
Once all the required information is entered, click the "Add" button to save the new tank.
After clicking "Add," you should see your new tank listed in the "Tank Details" section, confirming it has been successfully created. The system will indicate that the tank is ready for inventory in the platform.
.png)
Troubleshooting
Common Issues:
- "Add Tank" button missing or greyed out: Verify your user role and permissions or ensure you're on the correct page.
- Error message when adding tank: Check that all required fields are filled correctly or try a different tank name if it already exists.
- New tank not appearing: Try refreshing your browser or check for any active filters on the tank list.
12. Setting Up Billing Reports
- Access to the CryoFuture system
- Logged in as a user with "Clinic Admin" privileges
Overview
This section covers how to generate and export billing reports within the CryoFuture platform for financial tracking, auditing, and administrative purposes.
Log in to CryoFuture with your Clinic Admin credentials and navigate to the "Billing" tab in the main navigation area of the platform.
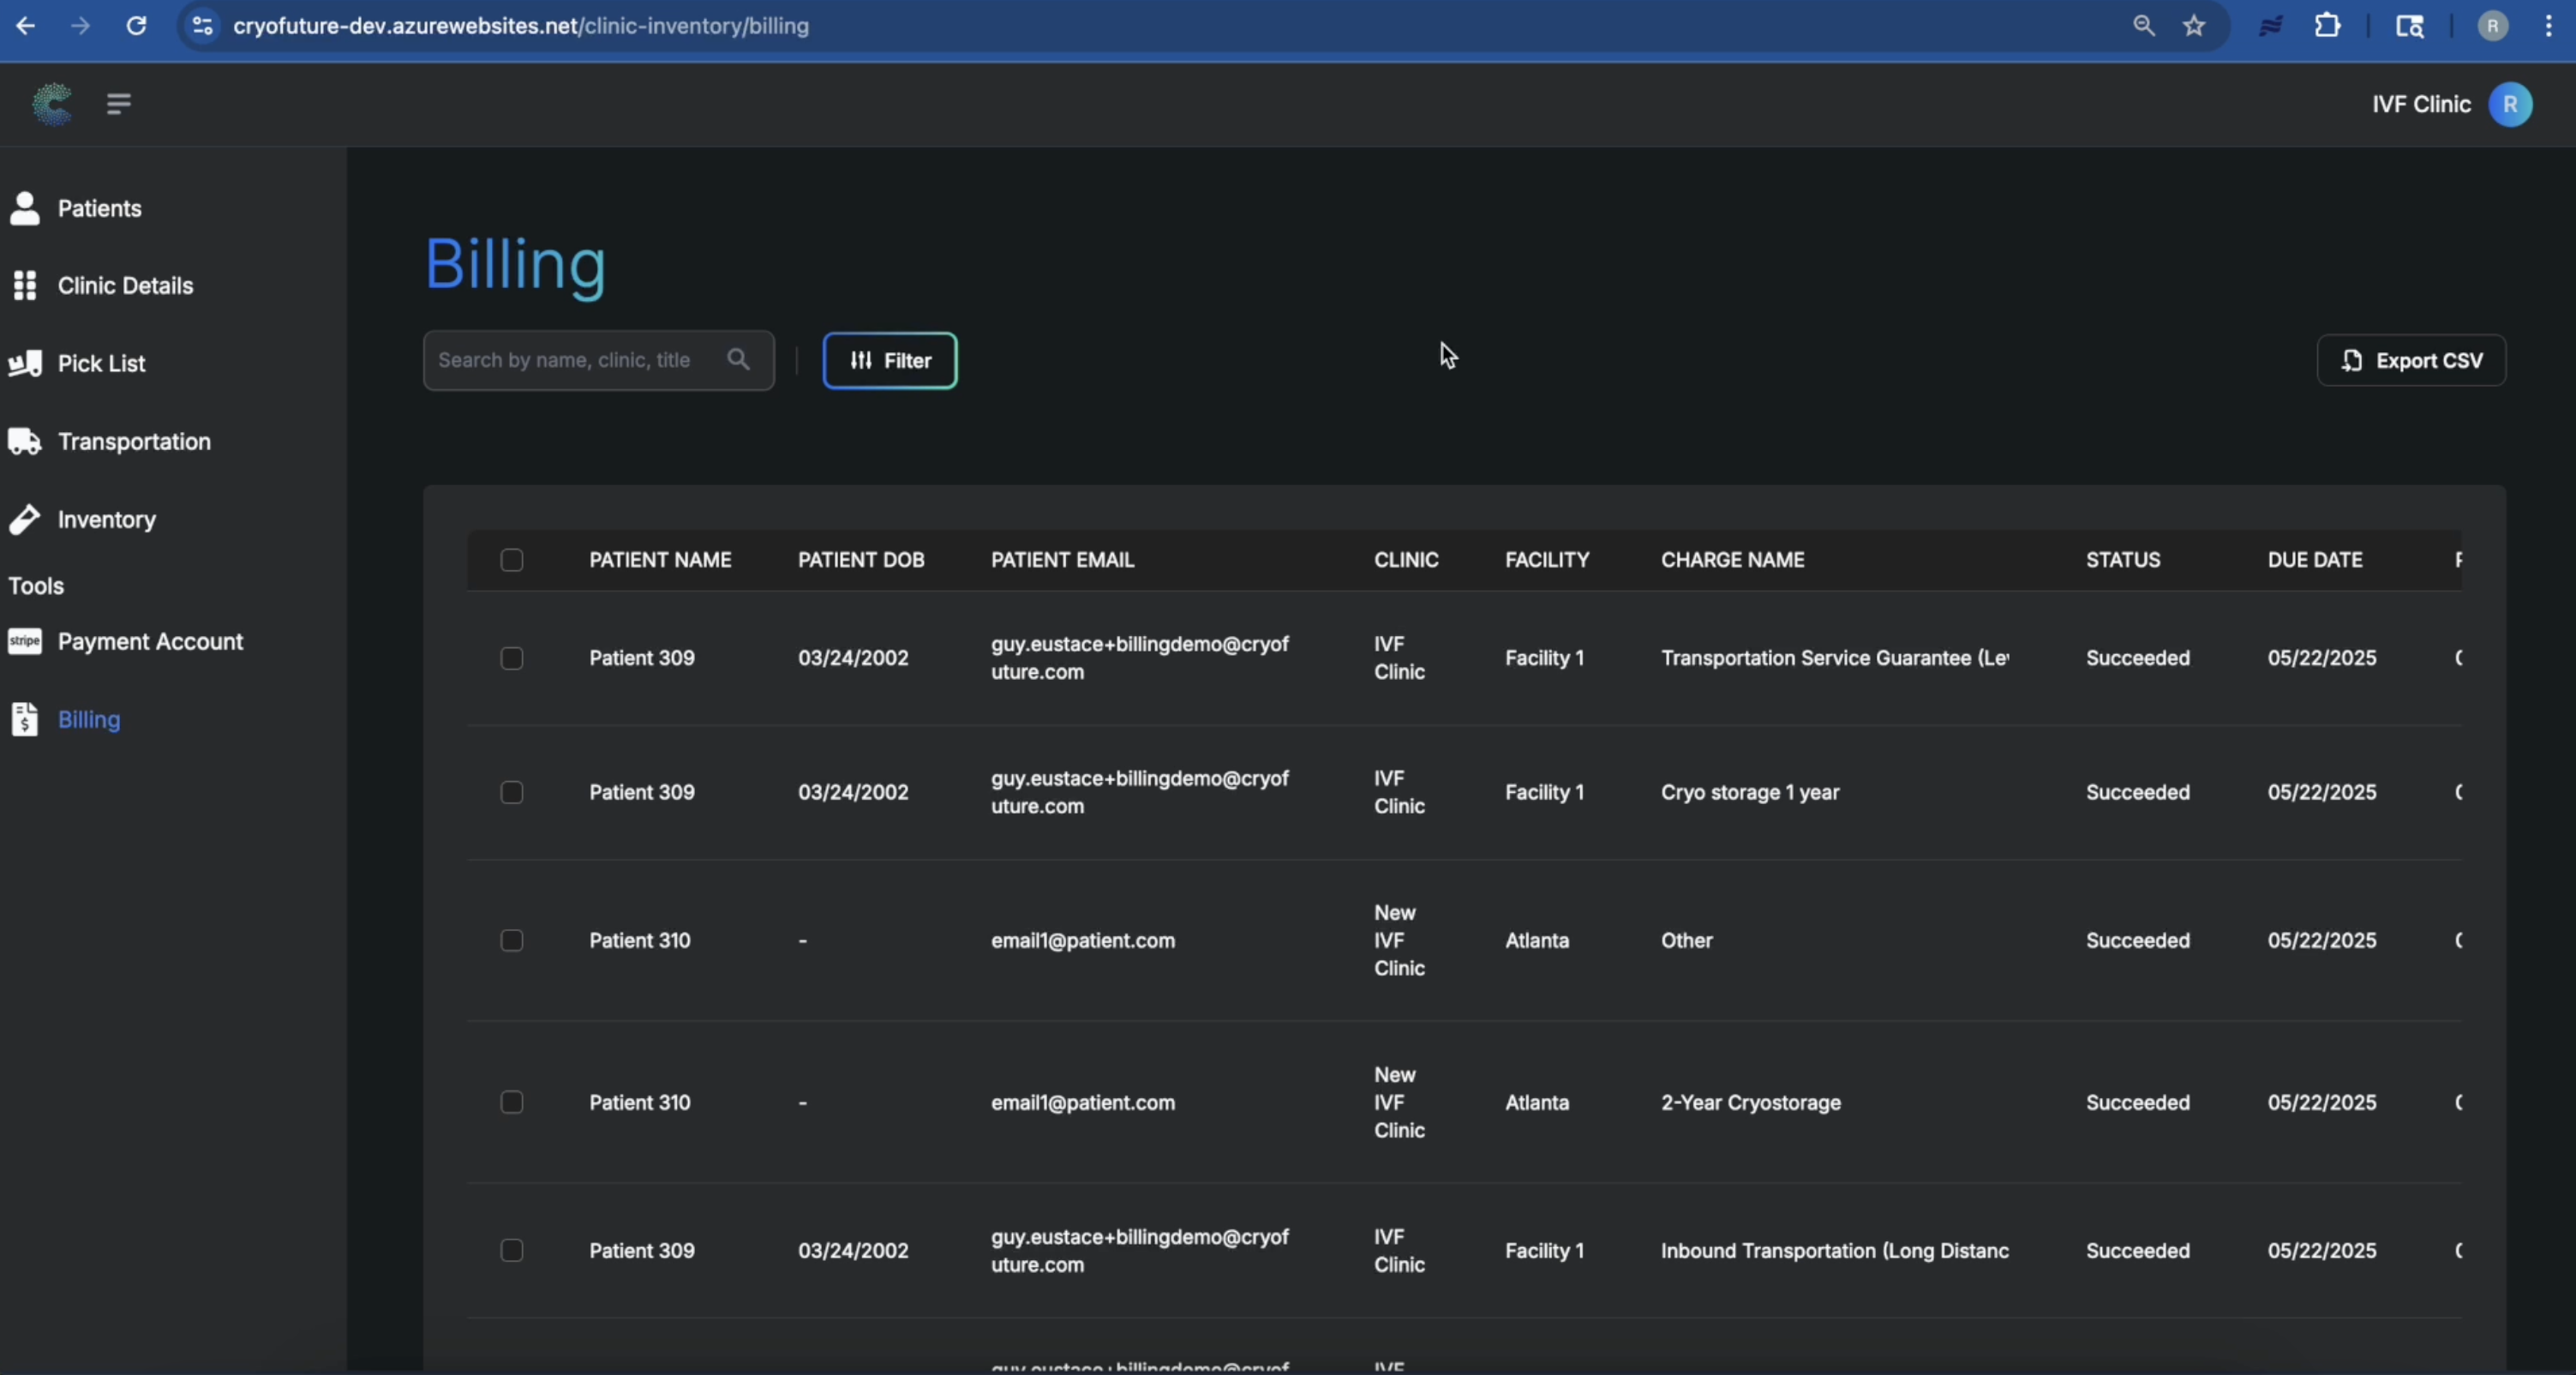
The Billing tab contains all patient billing information and the tools to manage and report on it. You can also click on any patient to view their specific billing details and payment history.
On the Billing tab, look for and click the "Export" button to open the export options.
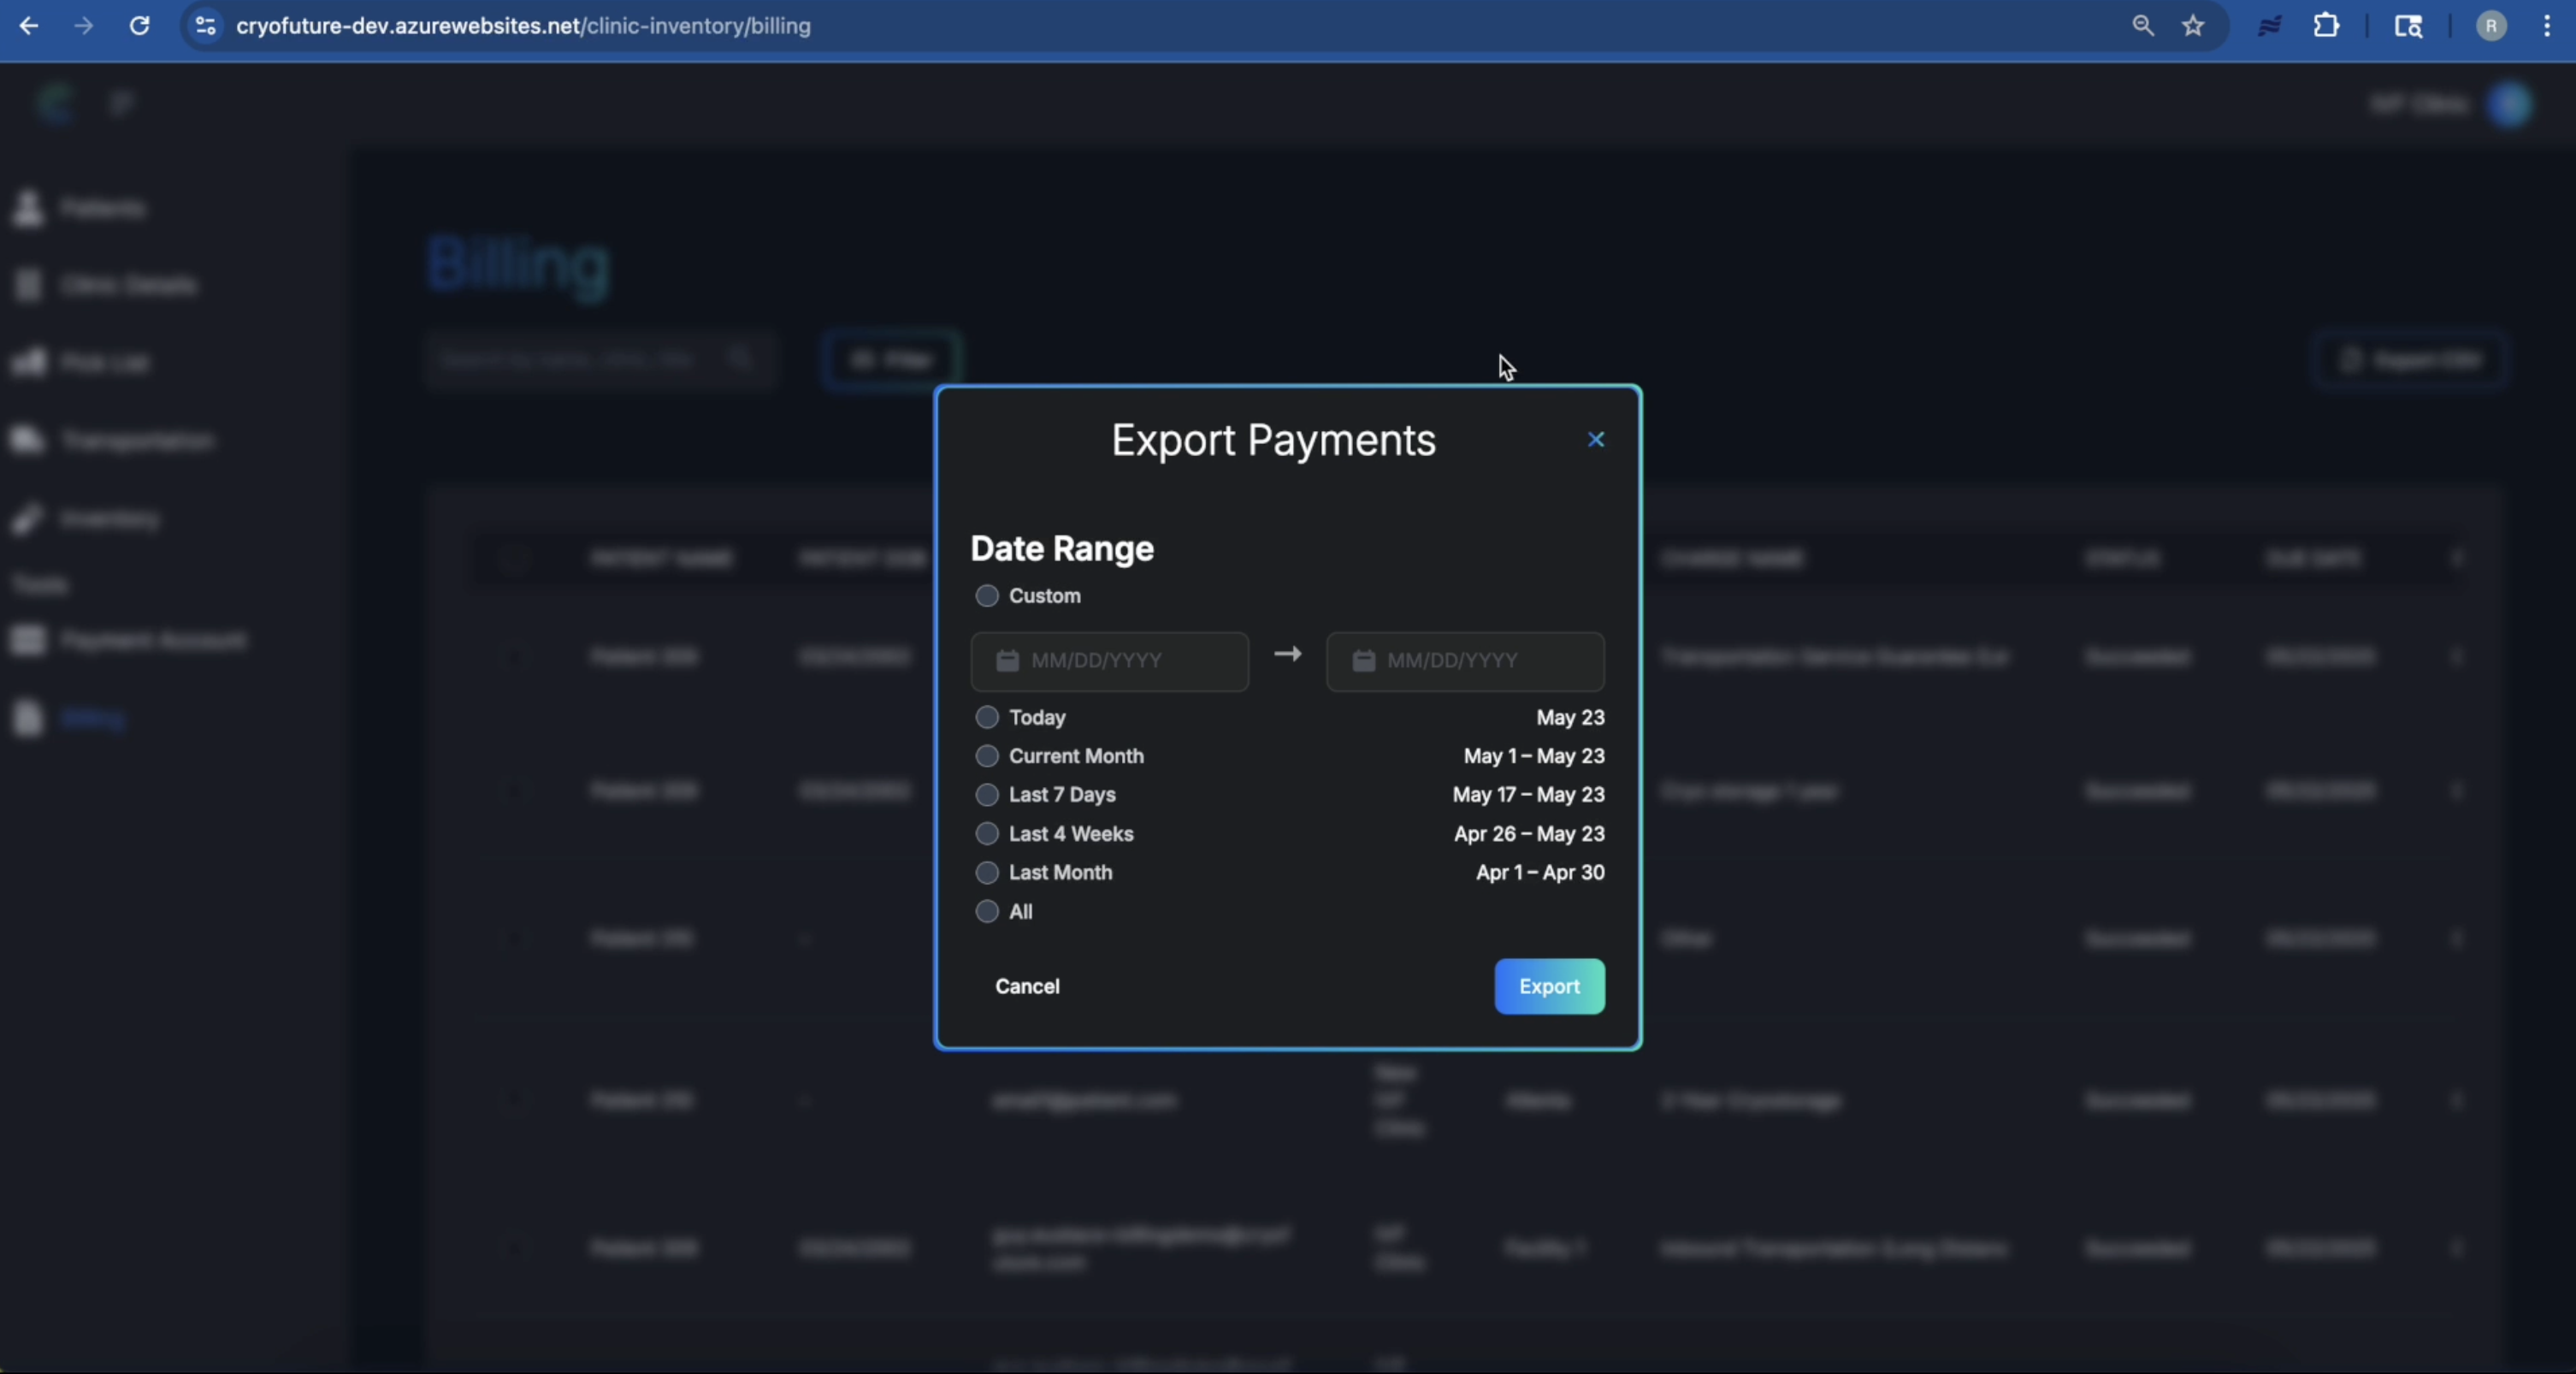
After clicking "Export," a dialog will appear prompting you to specify the date range for the payments you want to include in your report. Choose the start and end dates for your report, ensuring you select the correct period for the data you need.
Tip: Double-check the selected dates to ensure accuracy before proceeding.
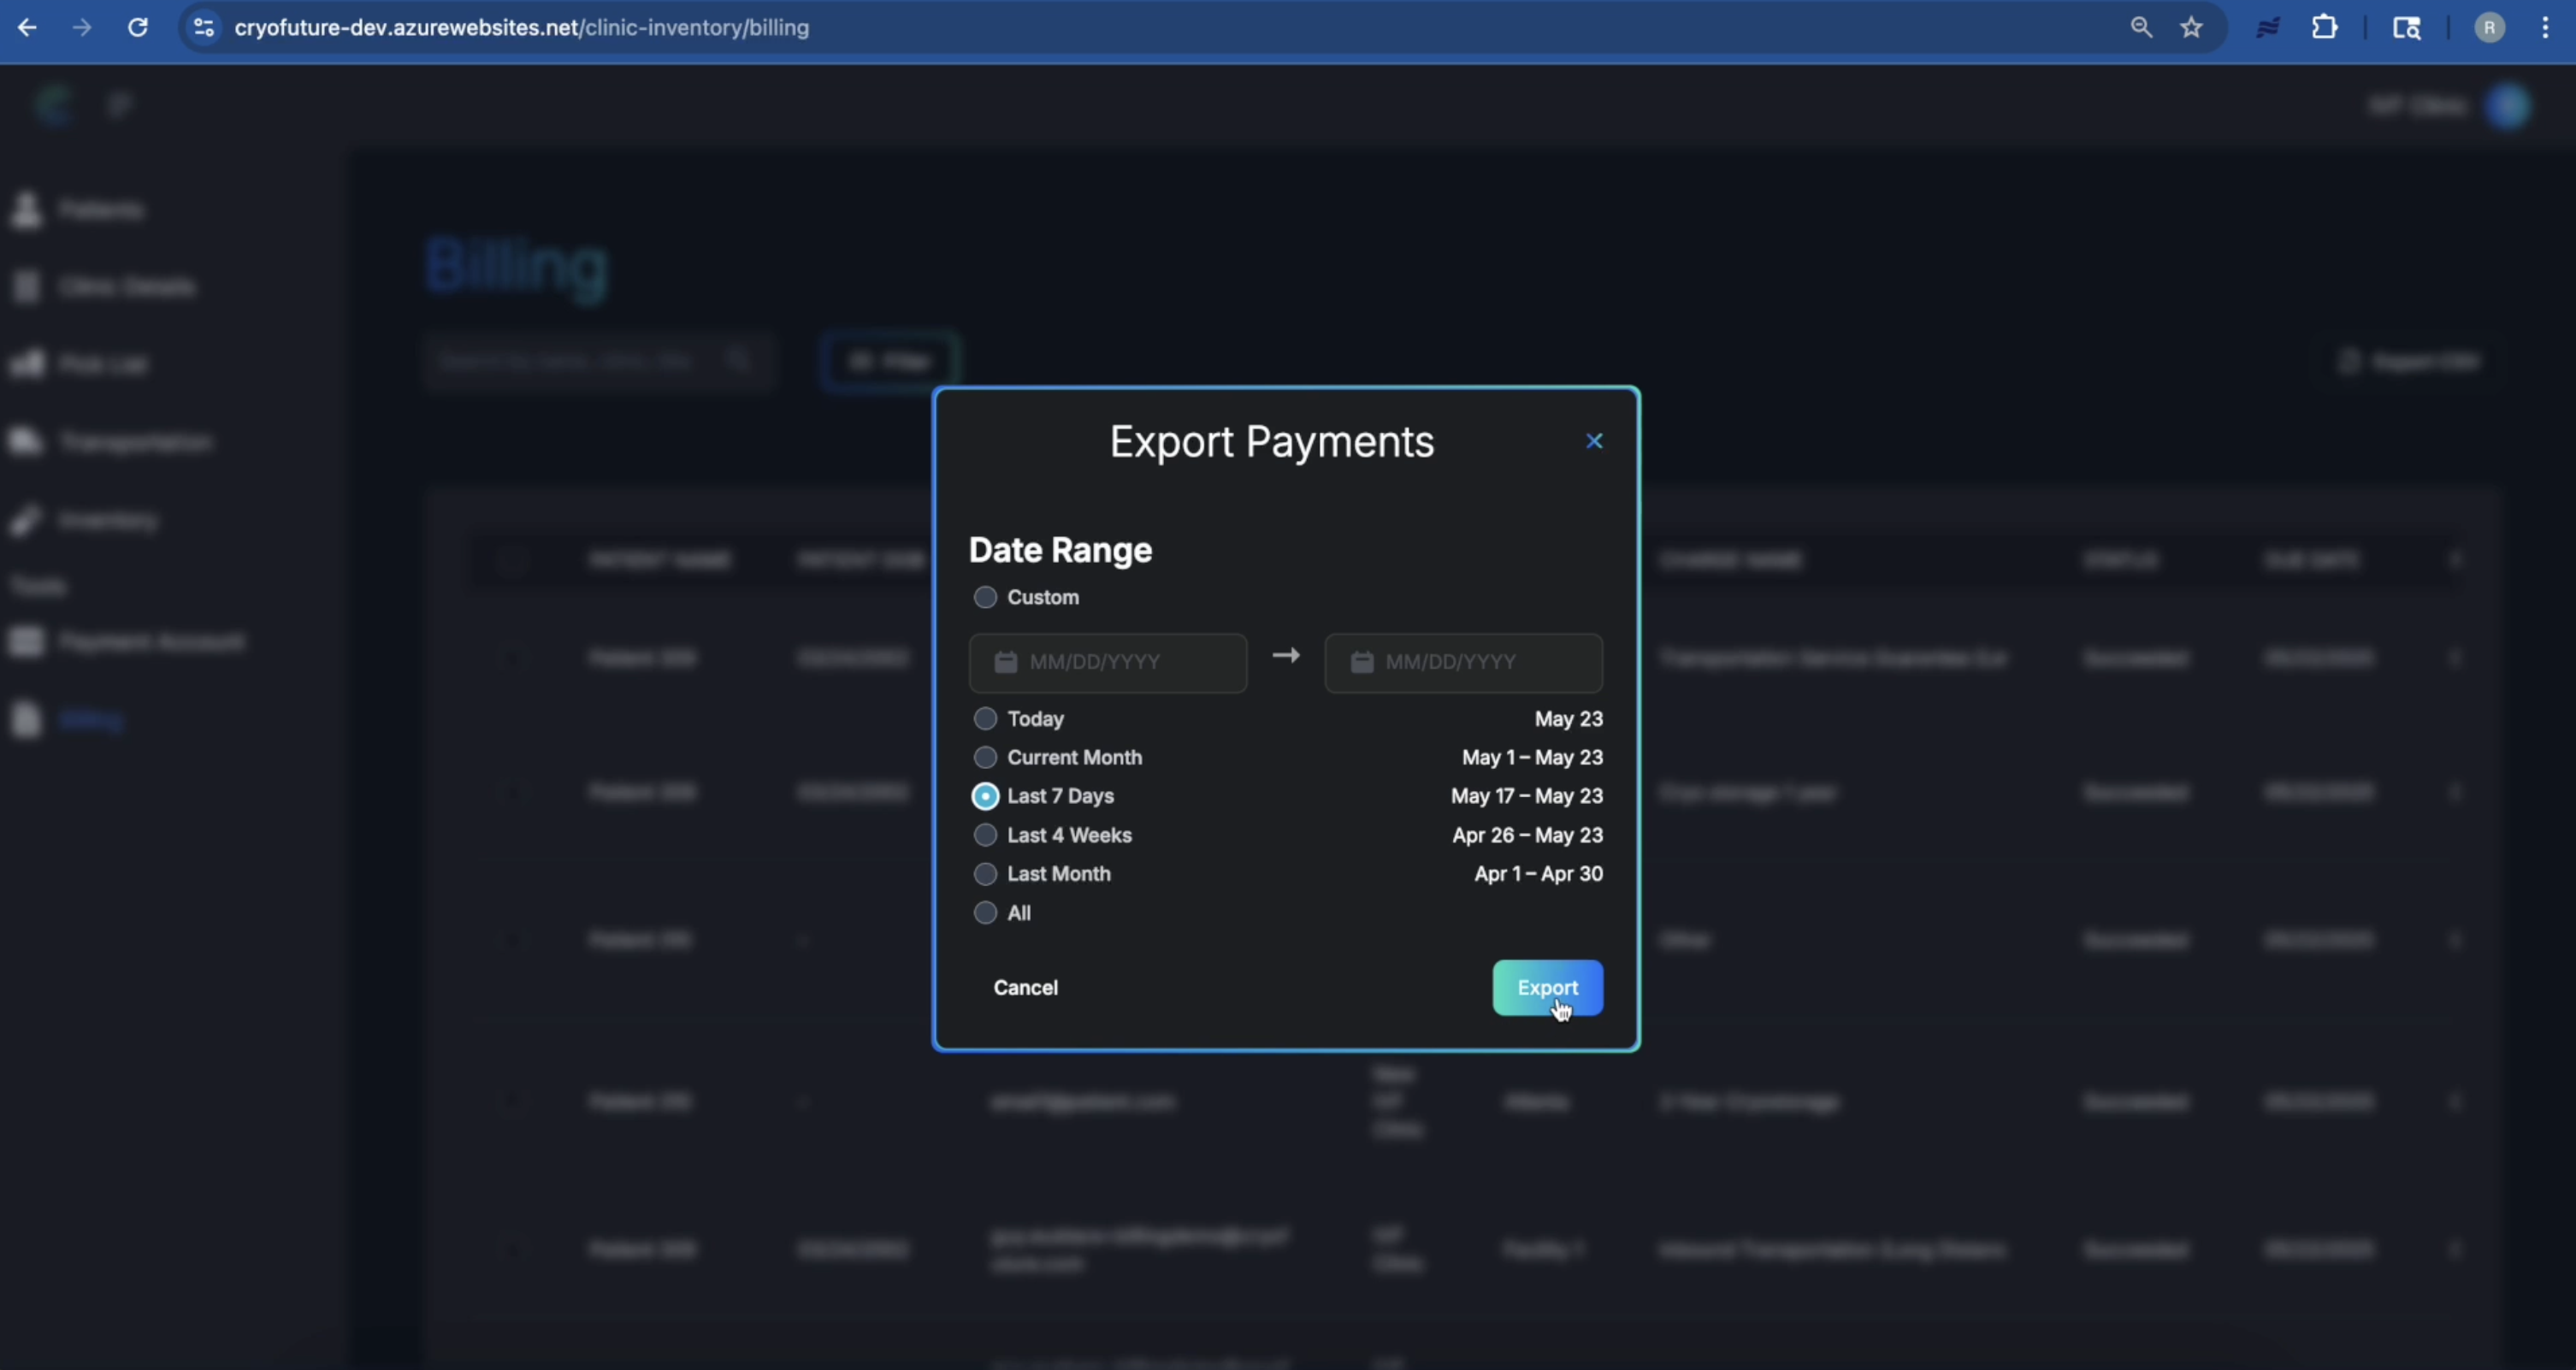
Once you have specified the desired date range, click the "Export" button within the date range selection interface. The system will compile the payment data for the selected period and prepare it for download.
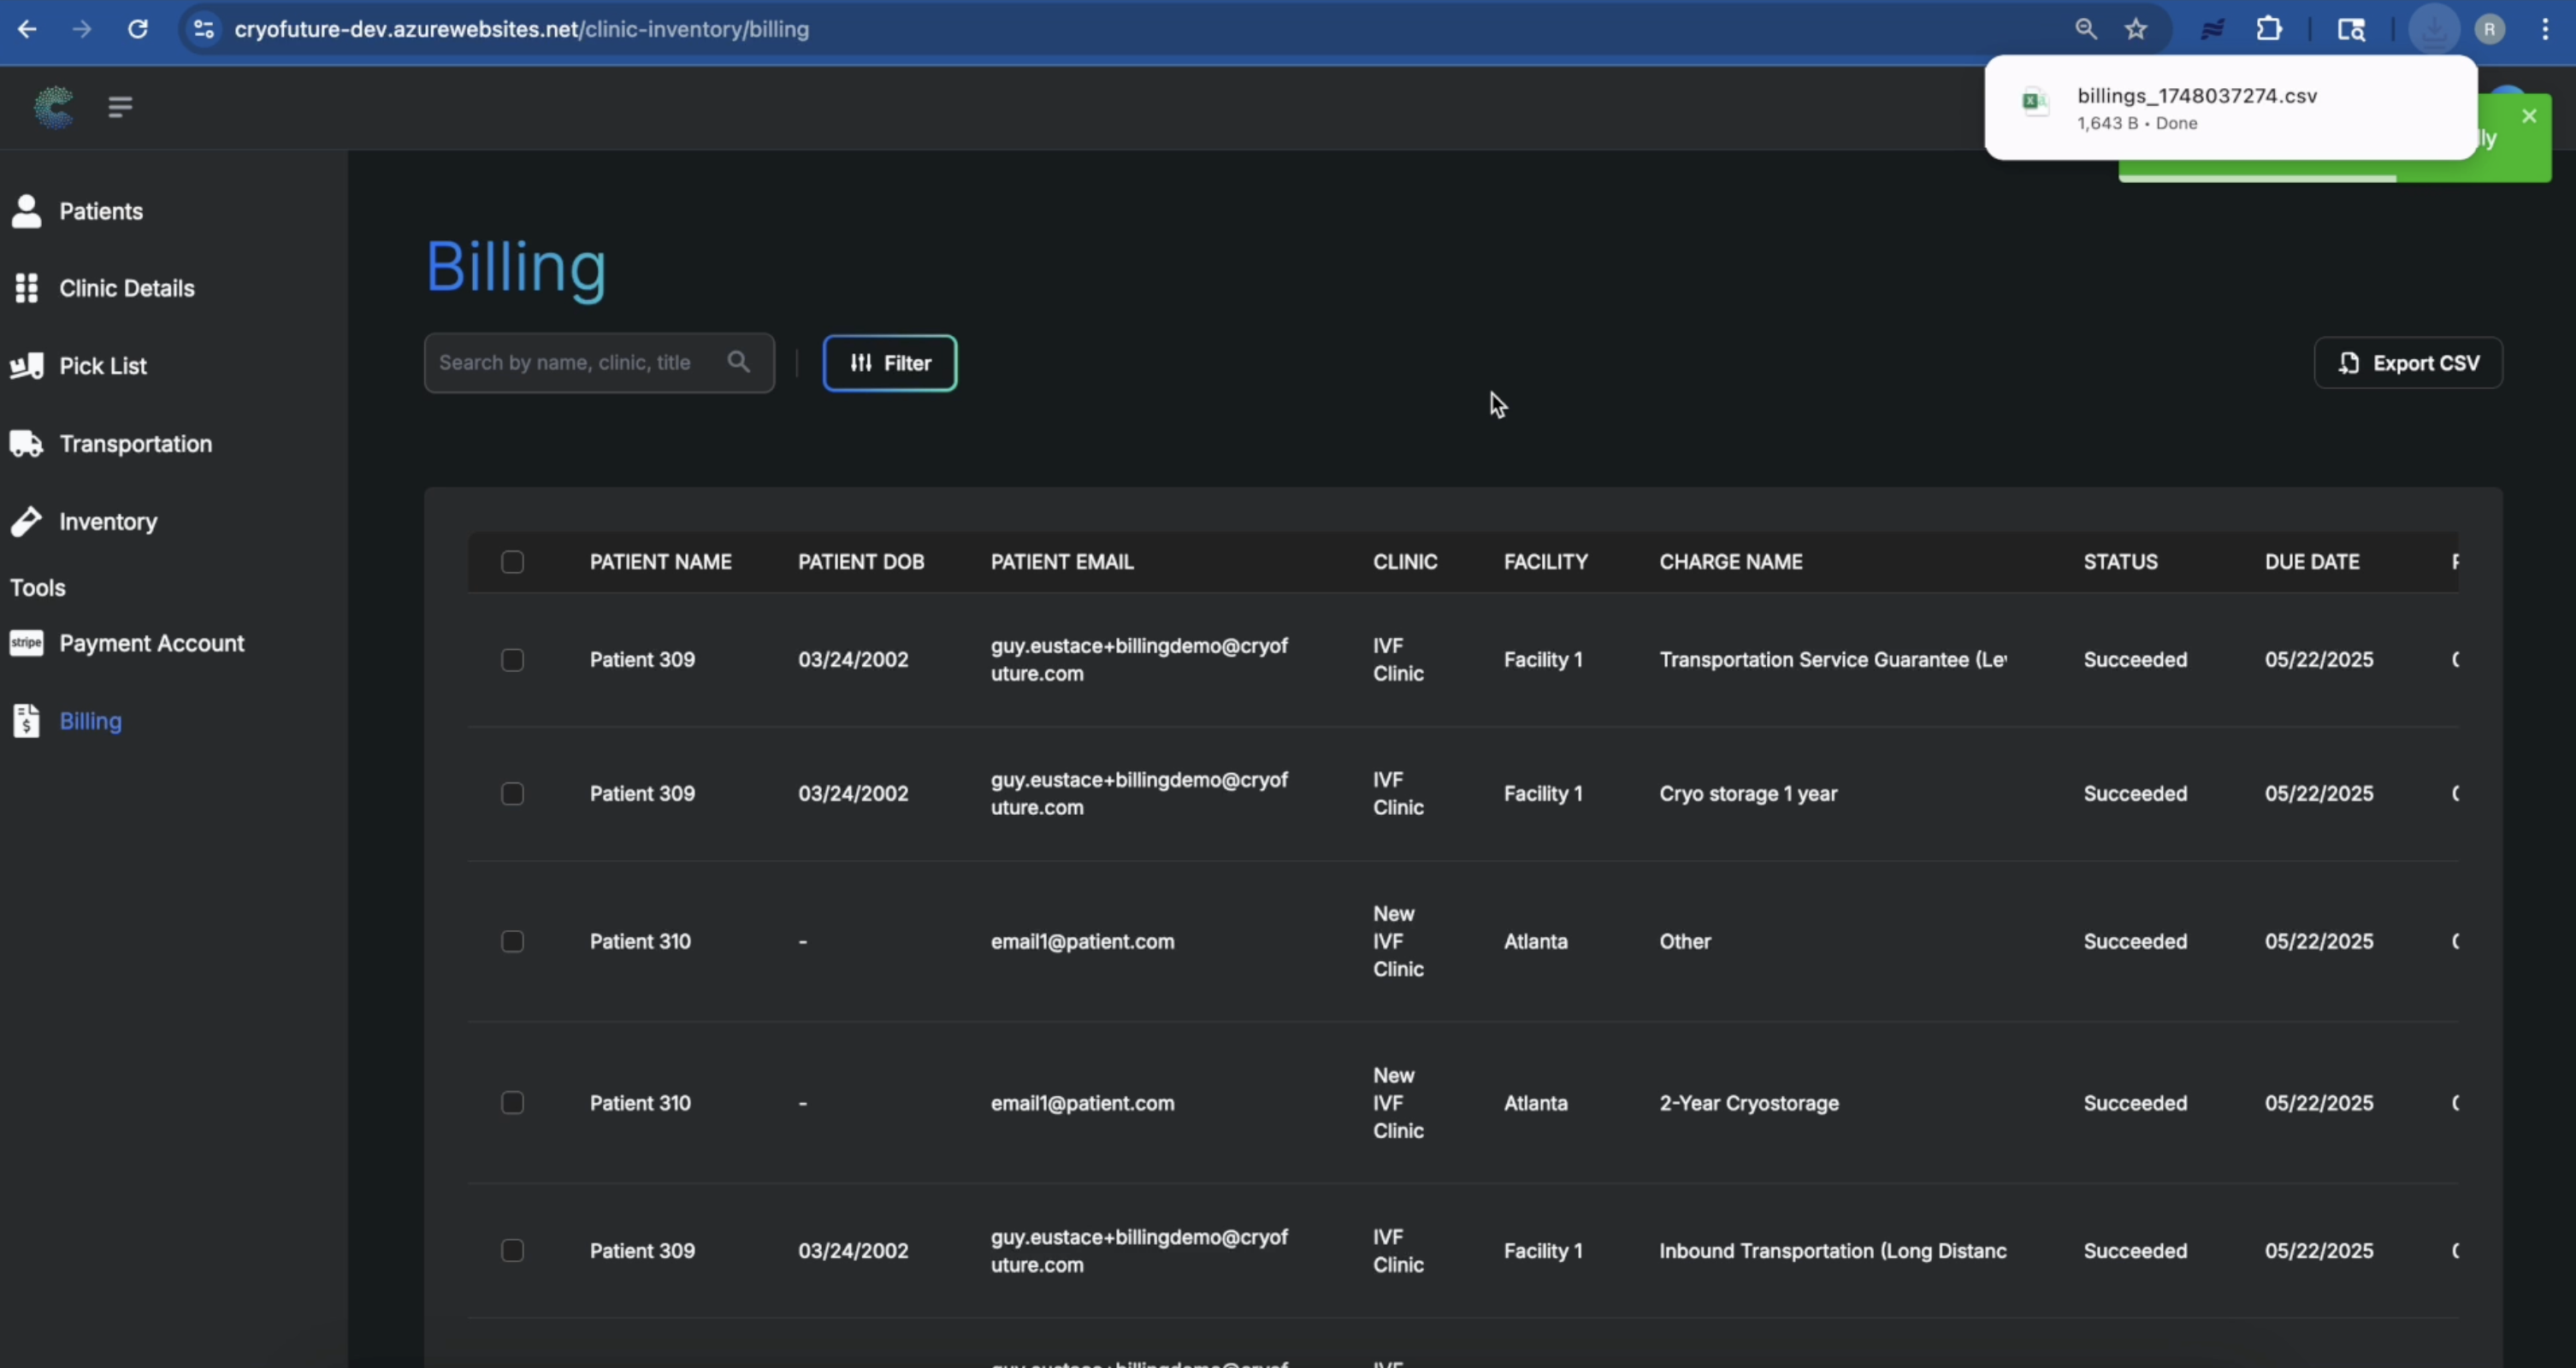
A file (typically CSV, Excel, or PDF) will be automatically downloaded to your computer, or a link to download it will be provided.
Troubleshooting
Common Issues:
- "Export" button not visible: Ensure you have Clinic Admin privileges.
- No data in report: Verify that payments were processed within the selected date range.
- Incorrect data in report: Double-check your specified date range.
- Date selection not working: Update your browser or clear cache.